SCIM with Entra
SCIM (the system for cross-domain identity management) allows your application to synchronize its users data based on recurring communication with your customers’ identity providers (IDPs).
Your app will periodically listen for updates from your customer regarding the users that should have access to your application. You can use this information to provision or deprovision users — or simply update data about a user (e.g., a first name).
SSOReady helps you use SCIM without integrating your product directly with Entra. You will instead integrate with SSOReady, which will communicate with Entra on your behalf.
Connecting SSOReady to your customer’s Entra implementation requires that you share two pieces of information with Entra. You will find both of these in SSOReady:
- A base url that Entra will perform operations on (e.g. via HTTP PATCH)
- A bearer token that Okta will include with its requests
When Entra has both of those pieces of information, the connection between SSOReady and Entra is complete. No additional configuration within SSOReady will be necessary. With that said, configuration within Entra can be somewhat involved.
This guide therefore starts by focusing briefly on SSOReady and subsequently focuses on Entra configuration.
Configuring SSOReady
To create a SCIM Directory within SSOReady, you’ll first need to create an Environment and an Organization. SCIM Directories belong to Organizations. You can create a SCIM Directory for an Organization by navigating to the Organization in SSOReady and selecting Create SCIM directory.
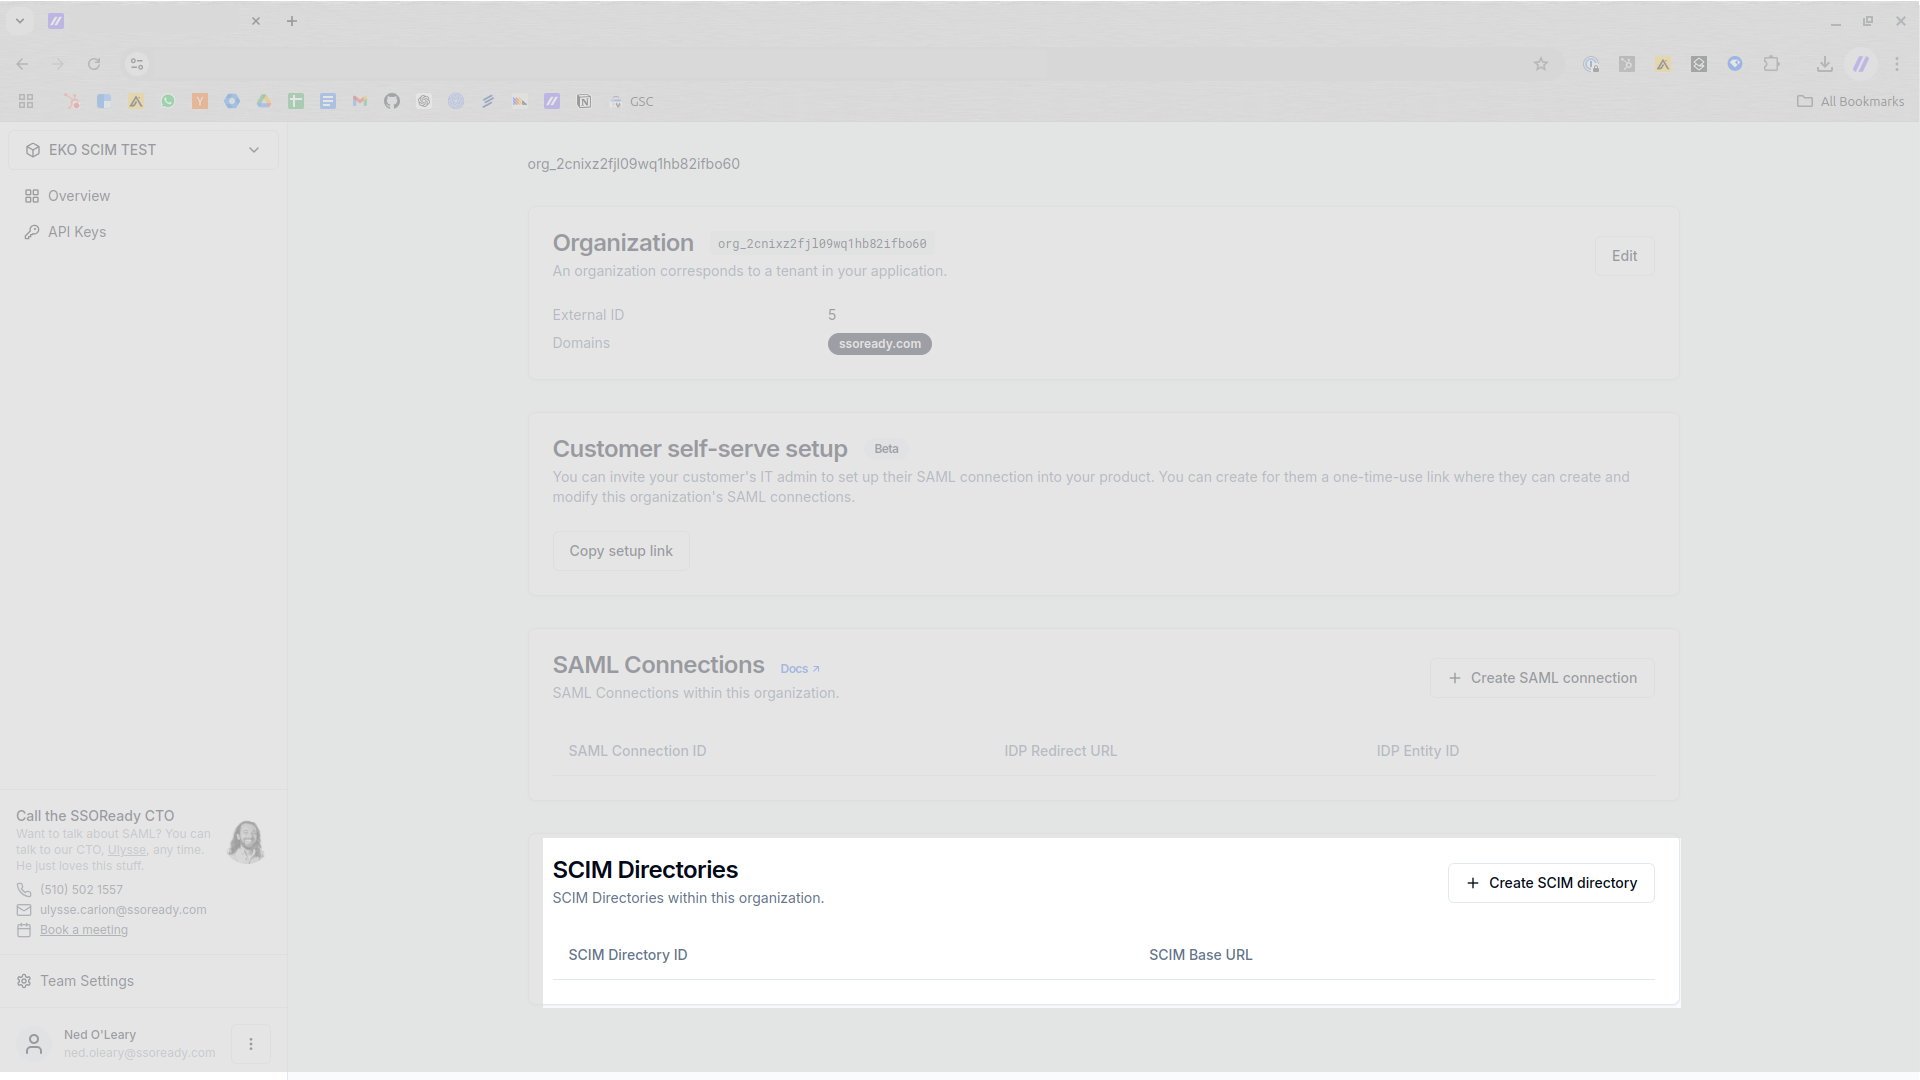
From there, you can find the base URL and generate the bearer token that your customer needs.
SSOReady does not store bearer tokens. You will not be able to access the bearer token in SSOReady again. You may at any time, however, replace the existing bearer token with a new one. When you create a new bearer token, you simultaneously invalidate the previous bearer token.
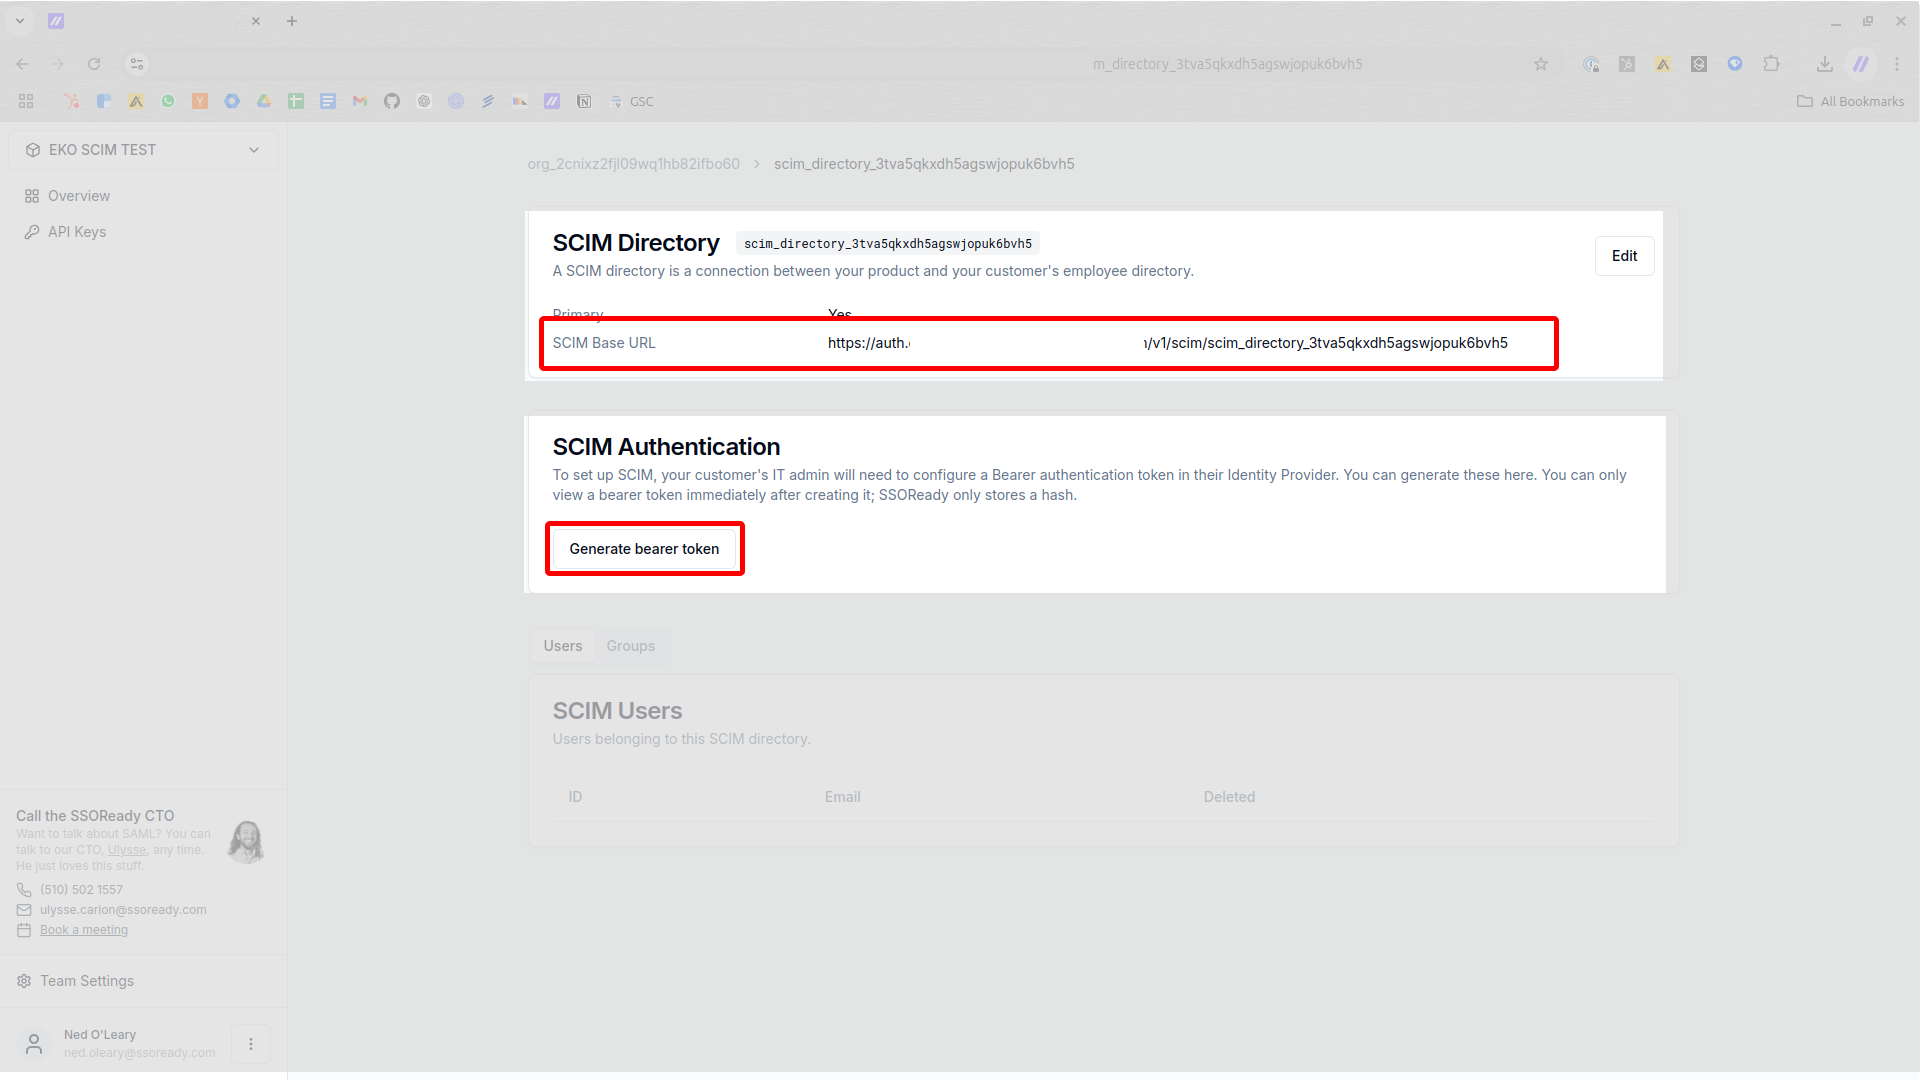
Once you have created a SCIM Directory in SSOReady and taken note of both the base URL and the bearer token, you have finished with SSOReady configuration.
Configuring Entra
Once there’s a SCIM Directory in SSOReady, you can connect that SCIM Directory to your customer’s Entra instance.
The following steps will be most relevant to IT administrators. However, SSOReady customers may find this section helpful either as a resource to share with their own customers or for development purposes.
Start at the Entra home page. Navigate to enterprise applications in the navigation bar.
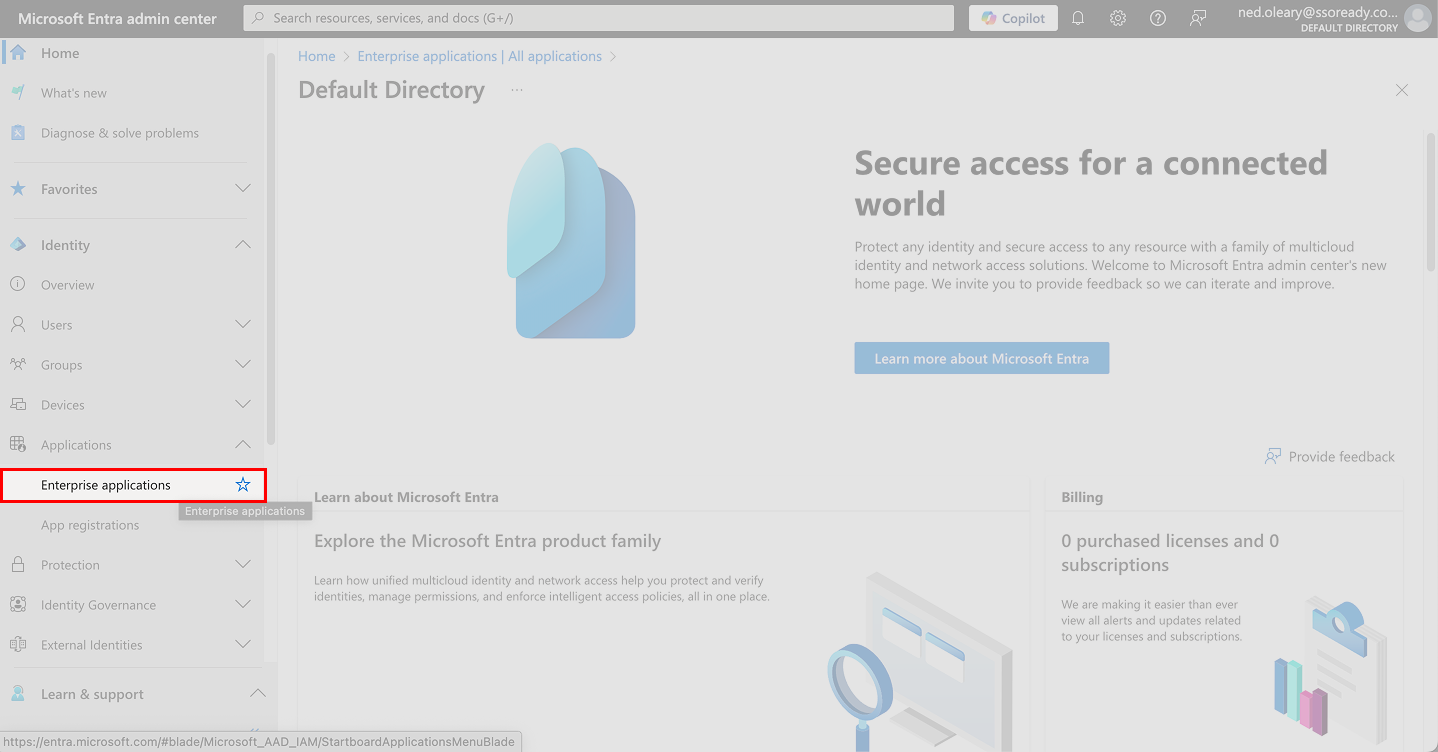
Visiting enterprise applications in Entra
You’ll now see a list of applications. In this case, we have just one: test_application. Click the blue text to see more details about the application.
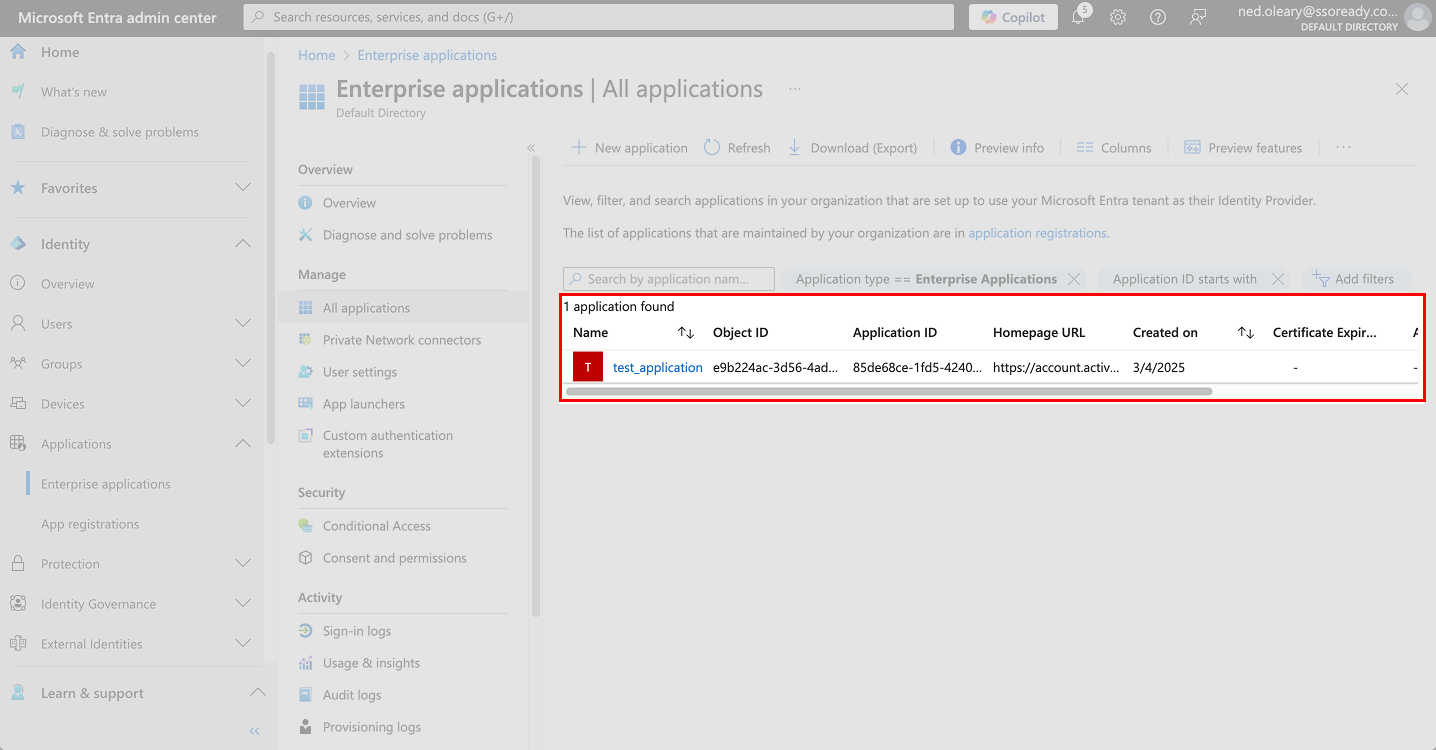
Visiting enterprise applications in Entra
You’ll see an Overview page. Click on the menu item labeled Provisioning on the left.
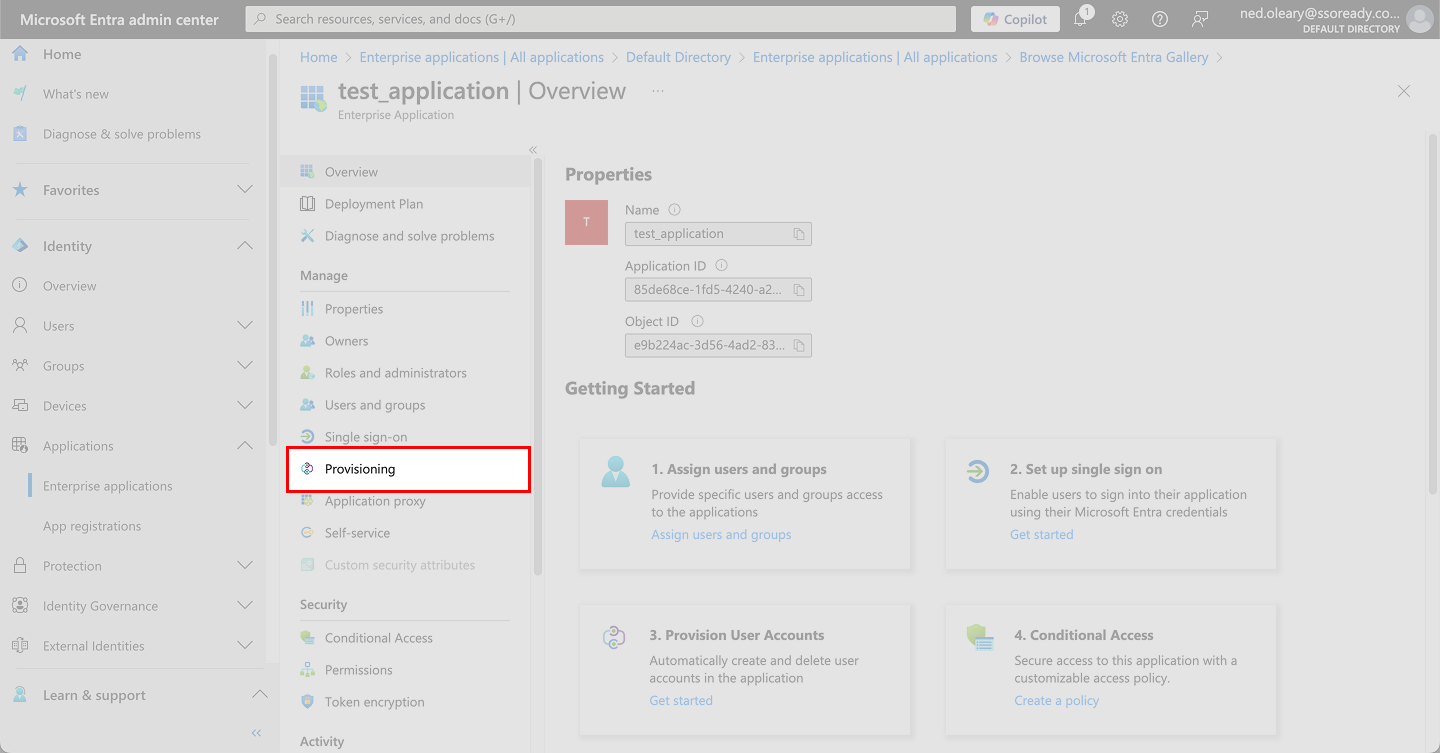
Navigating to Provisioning in Entra
This will take you to a new manu. Look toward the top/center of the page for a button with a plus icon labeled New configuration. Click this.
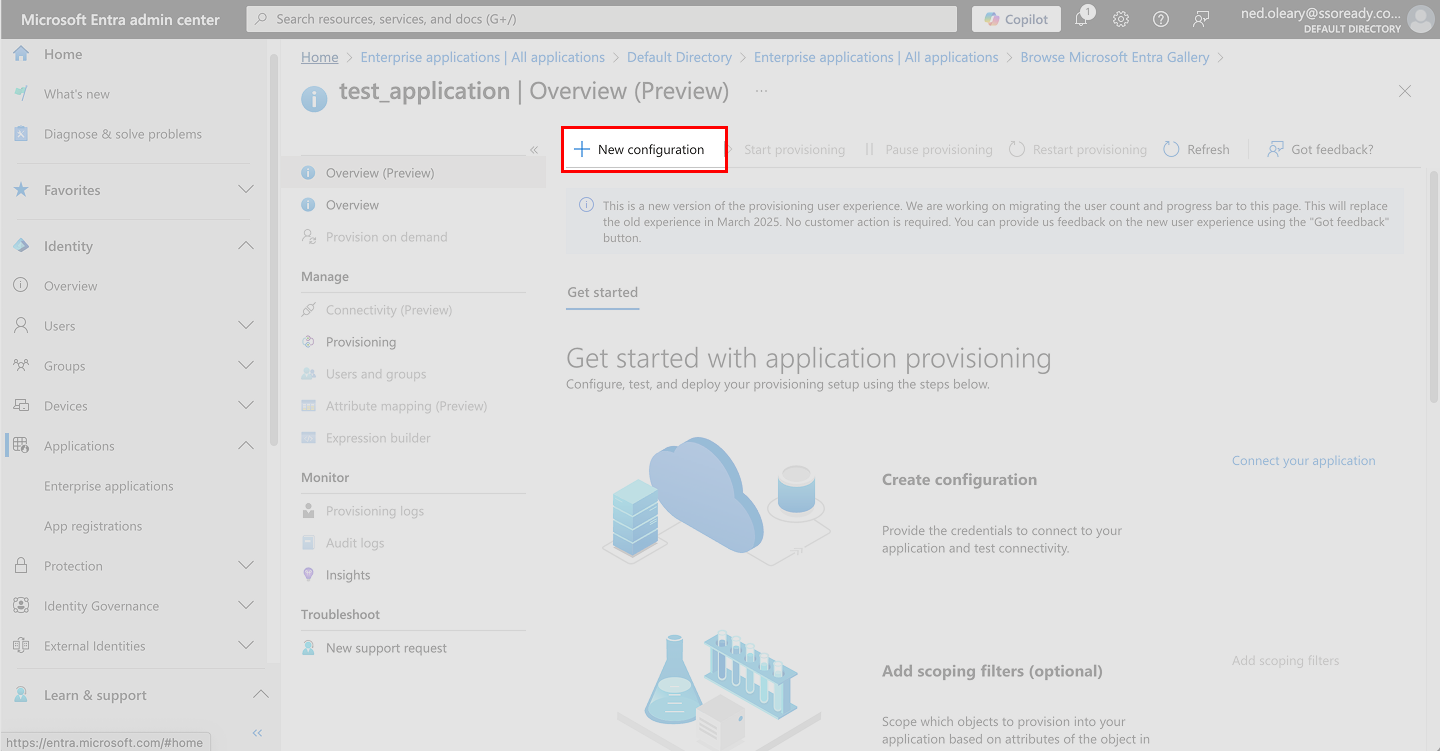
Selecting New configuration in Entra
You’ll land on a page with a few data input options. Start with the field labeled Tenant URL. This is what SSOReady calls a Base URL. It’s just the location where Entra will send its SCIM communications. Copy this value from SSOReady and paste it here.
It should look something like the below:
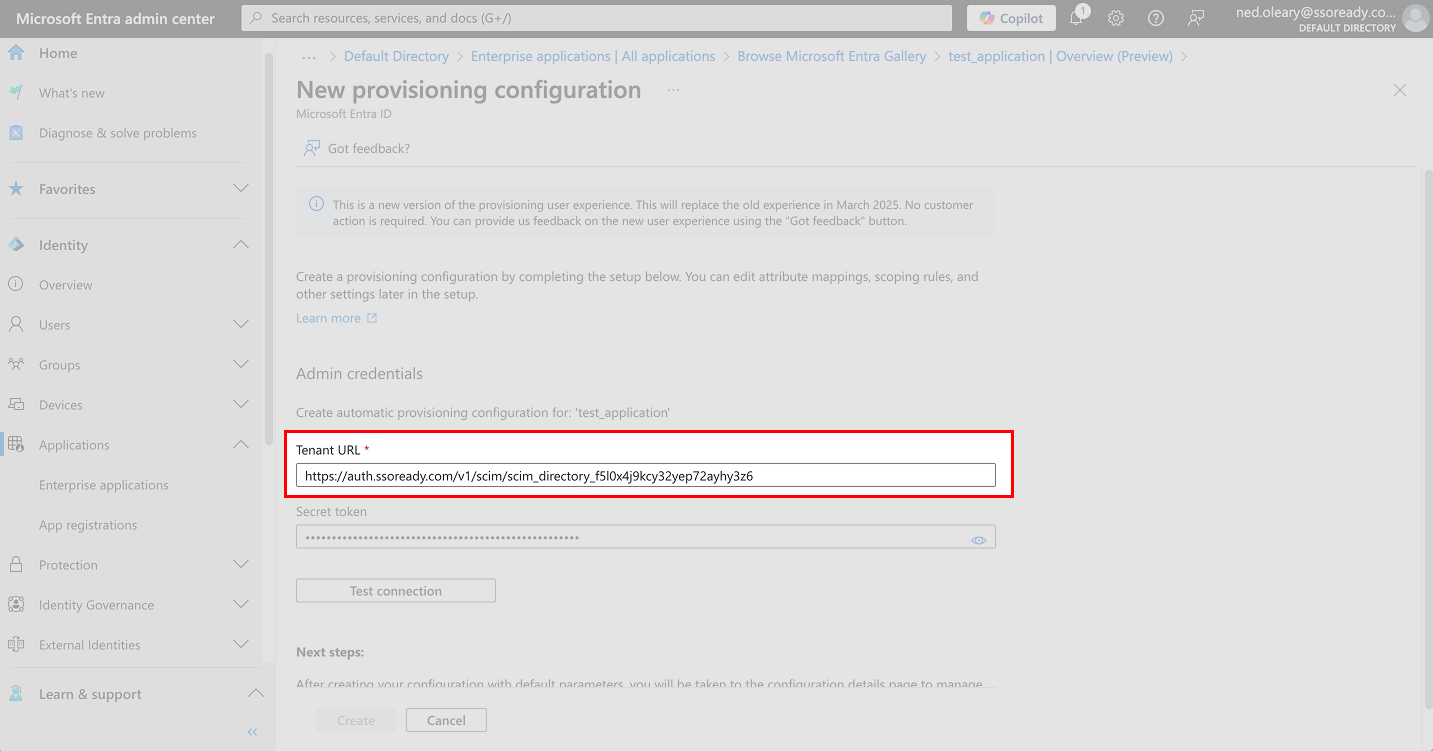
Pasting SSOReady's Base URL as the Tenant URL in Entra
Next, look at the field labeled Secret token directly below the Tenant URL. This is the other value that SSOReady provides: the bearer token. Paste this value from SSOReady into Entra as the Secret token.
The Secret token is sensitive. Please treat it like a password. Do not share it.
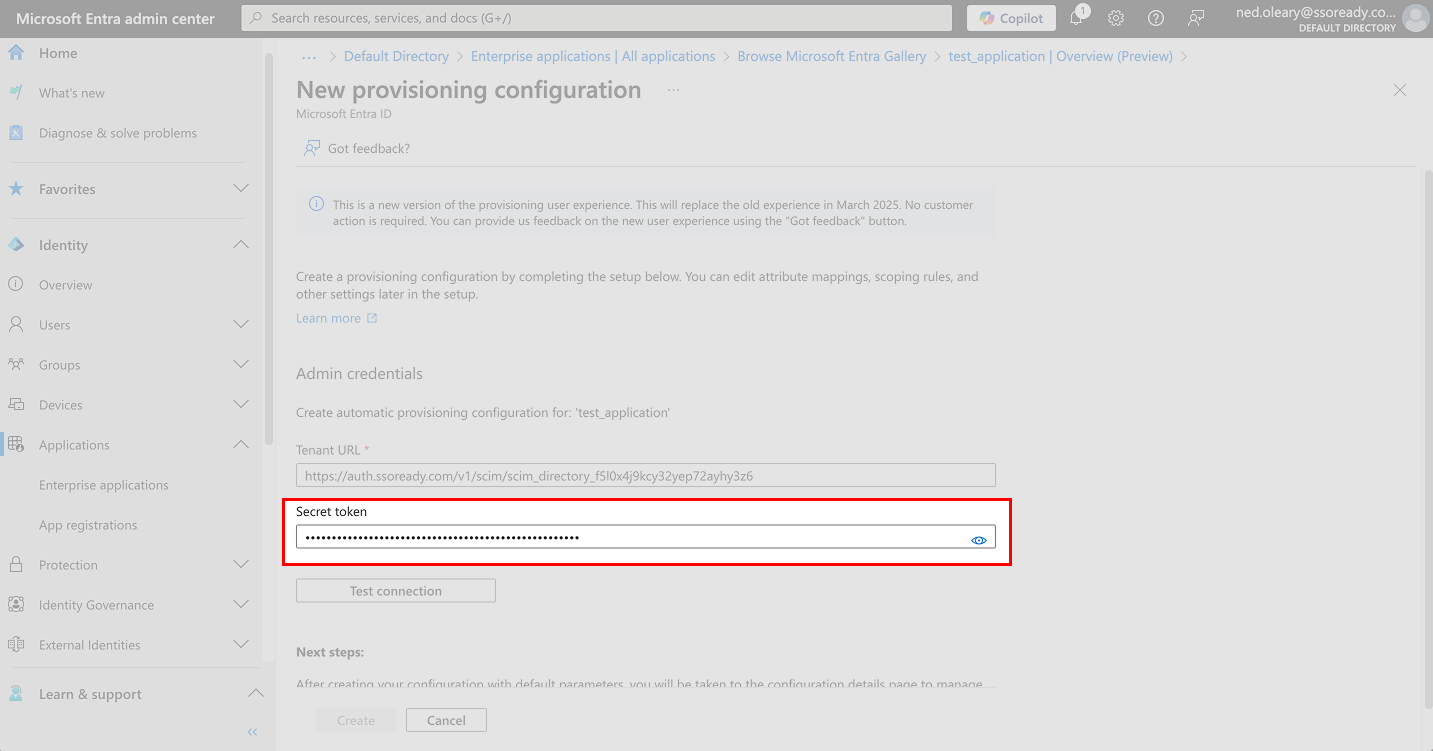
Pasting the Secret token in Entra
In Entra, you need to click Test connection to move on. Click this button and wait a moment.
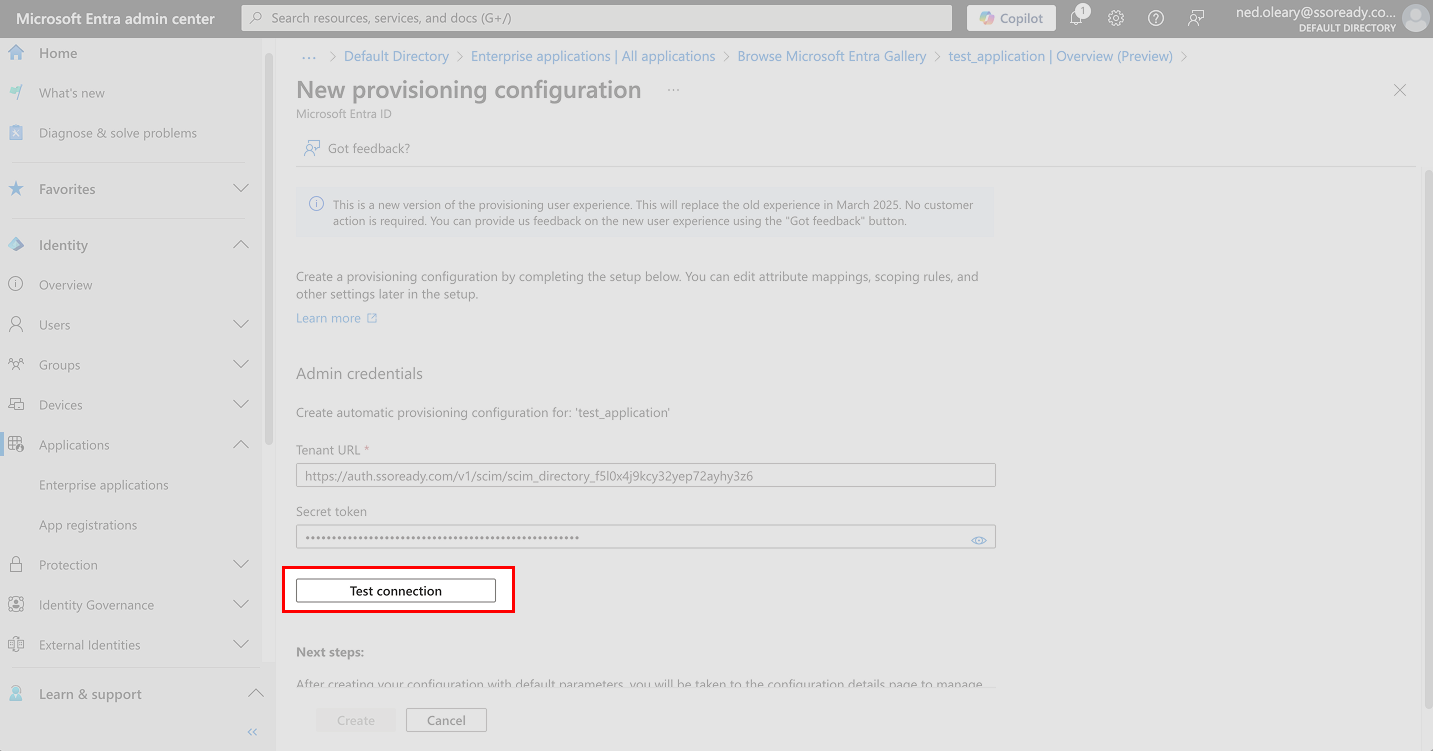
Clicking Test connection in Entra
Once it’s clickable, hit Create in the lower left.
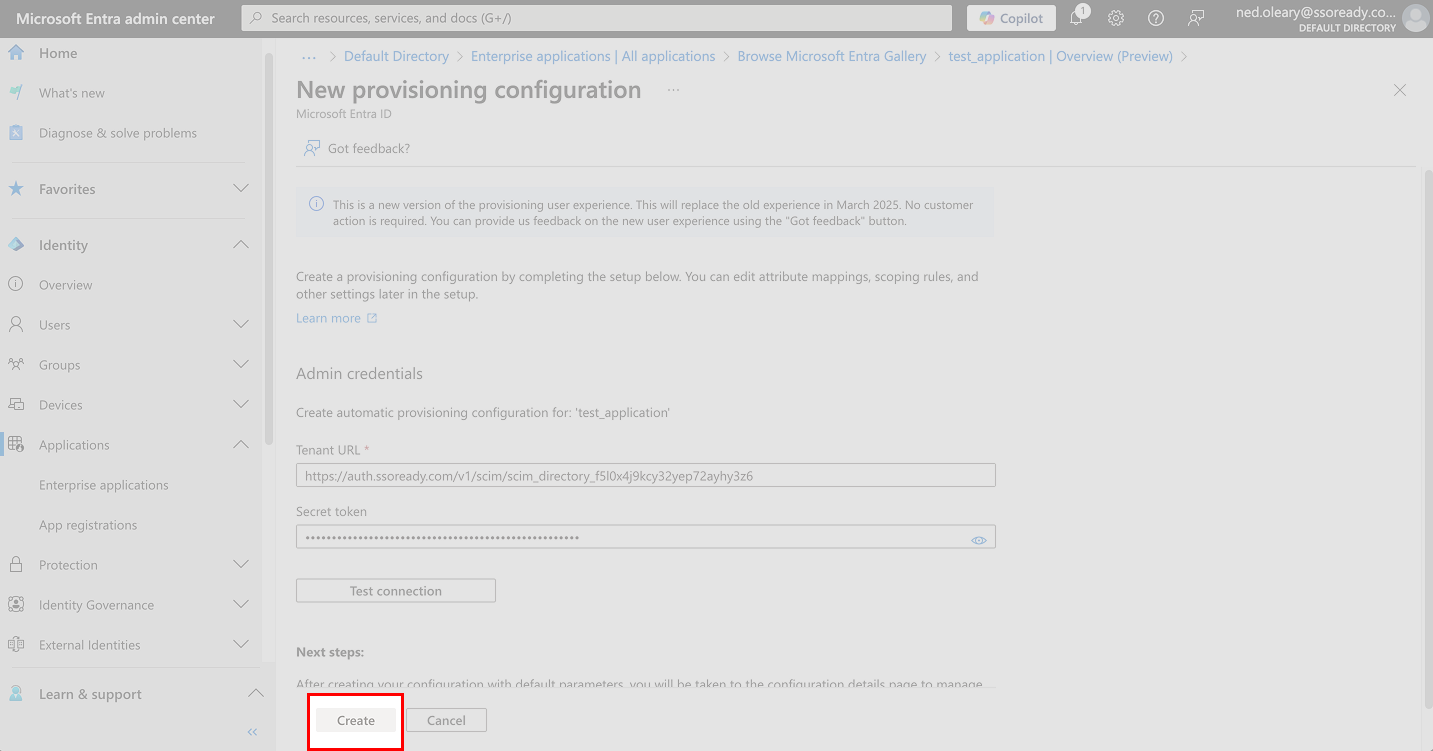
Pressing the Create button in Entra
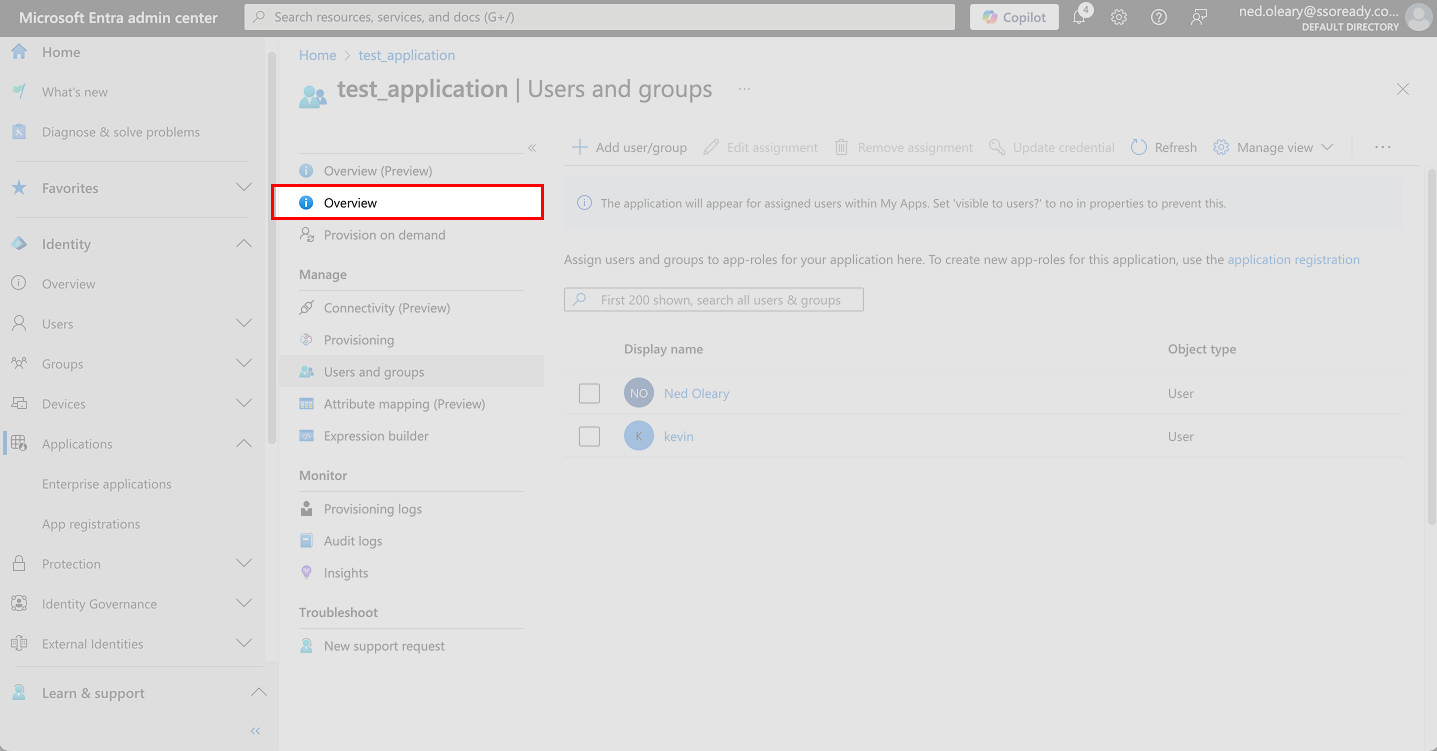
You’ll land on a new page showing an overview of the Entra application. Find the Users and groups button in the left navbar and click it.

Visiting Users and groups in Entra
We need to assign users and/or groups to the application. Start by clicking the Add user/group button toward the top/center of the page. It’s marked with a plus icon.
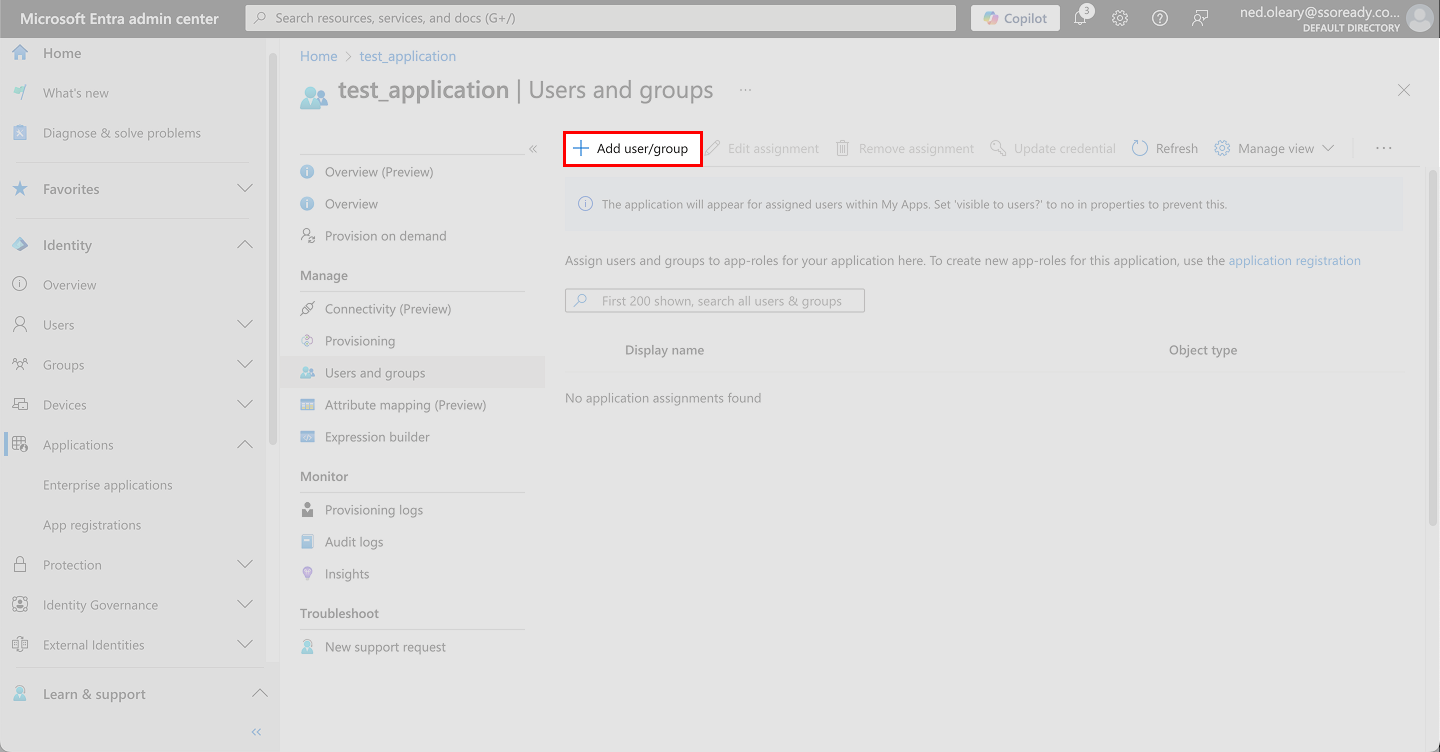
Hitting Add user/group in Entra
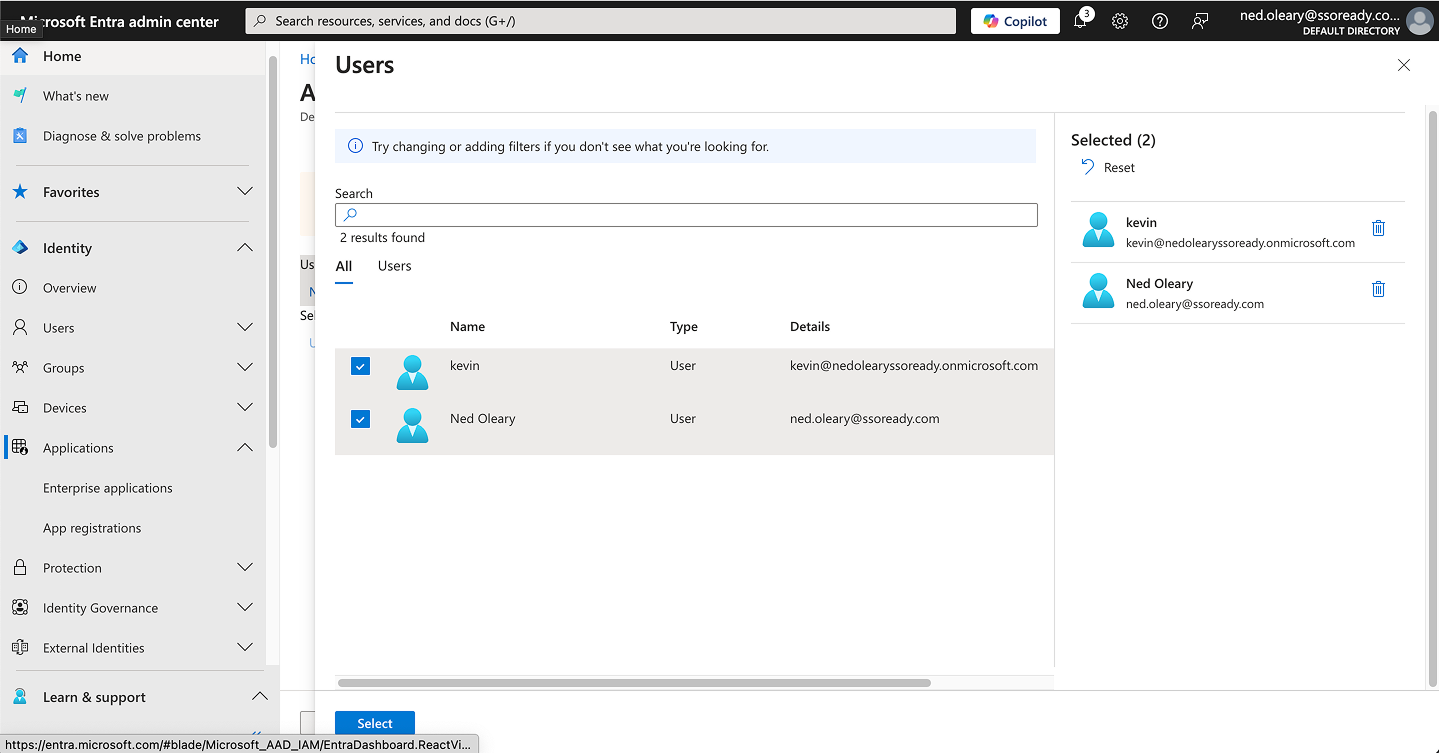
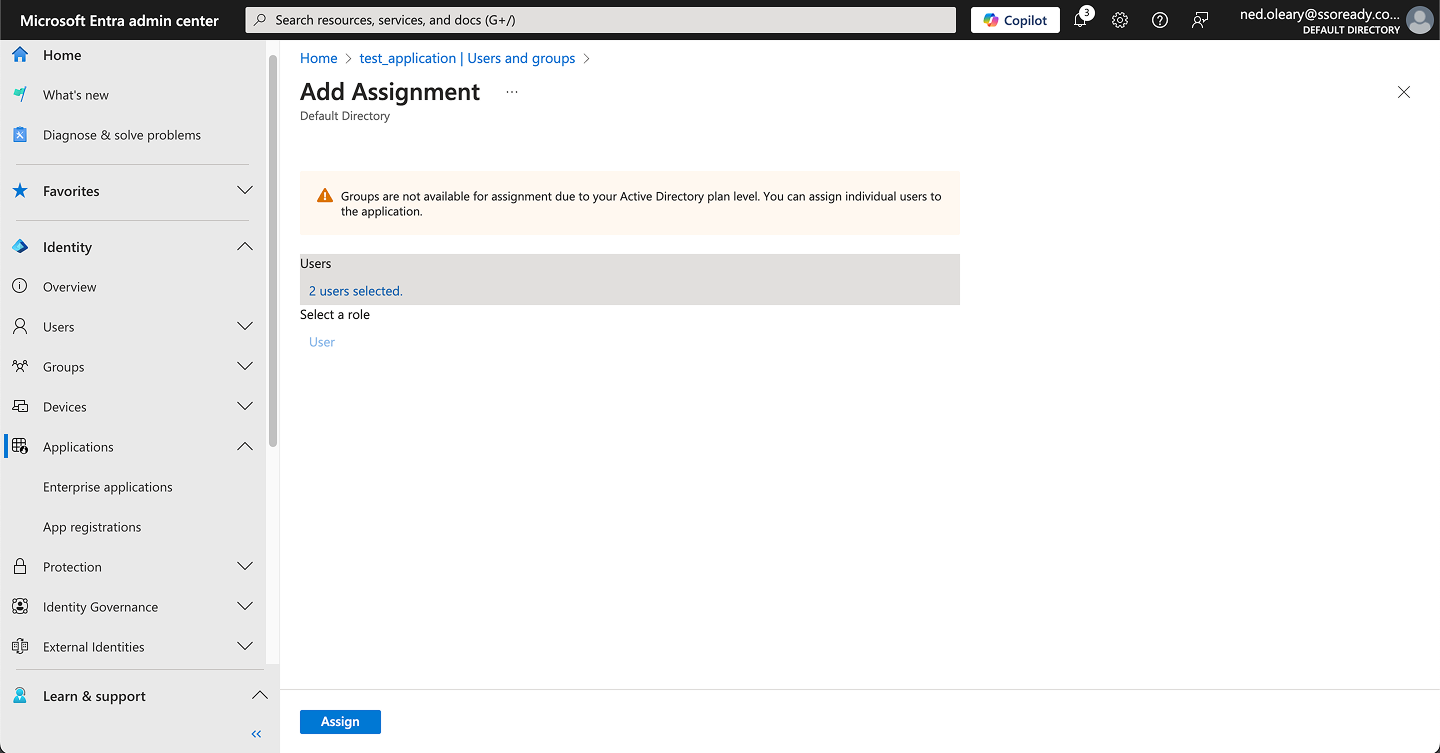
Exactly what you’ll see might vary here, but you’ll see a searchable list of users and/or groups. Decide which users should have access to the application, select each, and then press Select in the lower left.
You’ll see another menu. If you’re content with your selection, press the Assign button in the lower left. Entra will now consider those users and/or groups to be assigned to the application.
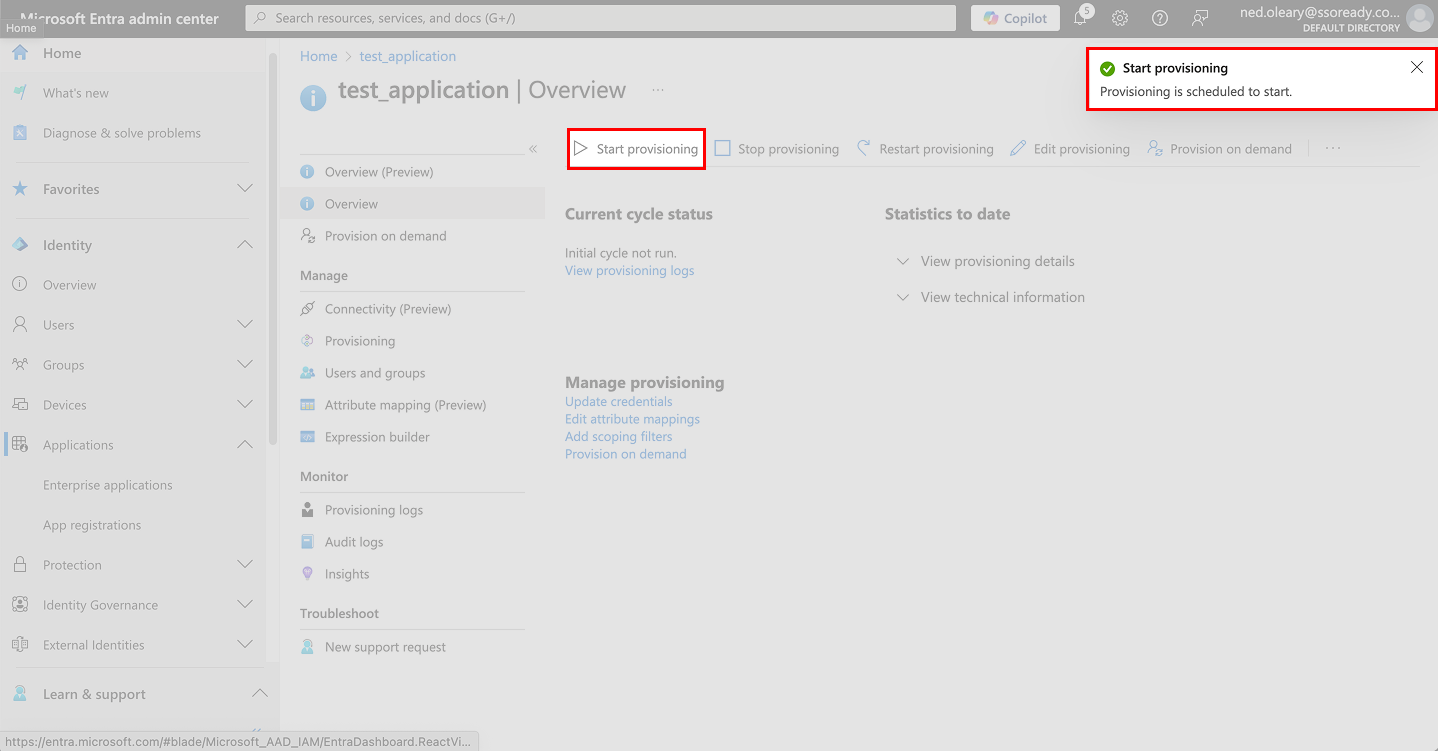
Entra will not yet have begun SCIM provisioning. To get Entra to begin SCIM provisioning, press the Overview button in the left navbar.
Returning to the application's Overview for the application
Press the Start provisioning button. It has a play button icon — kind of like you’d see on a remote control.
Within a few moments, you’ll see a pop-up in the top right. It will say Provisioning is scheduled to start.
This means that Entra has successfully begun its communications with SSOReady. Configuration is complete.
Visiting enterprise applications in Entra