SAML with Okta
As a first step, you need to create an Application in Okta. The Okta Application will mediate all login interactions with SSOReady. Once you’ve finished setting it up, your users may see it as a tile in their Okta accounts.
Once you’ve successfully created an Application, you’ll swap details between SSOReady and Okta to enable single sign-on.
Create an application in Okta
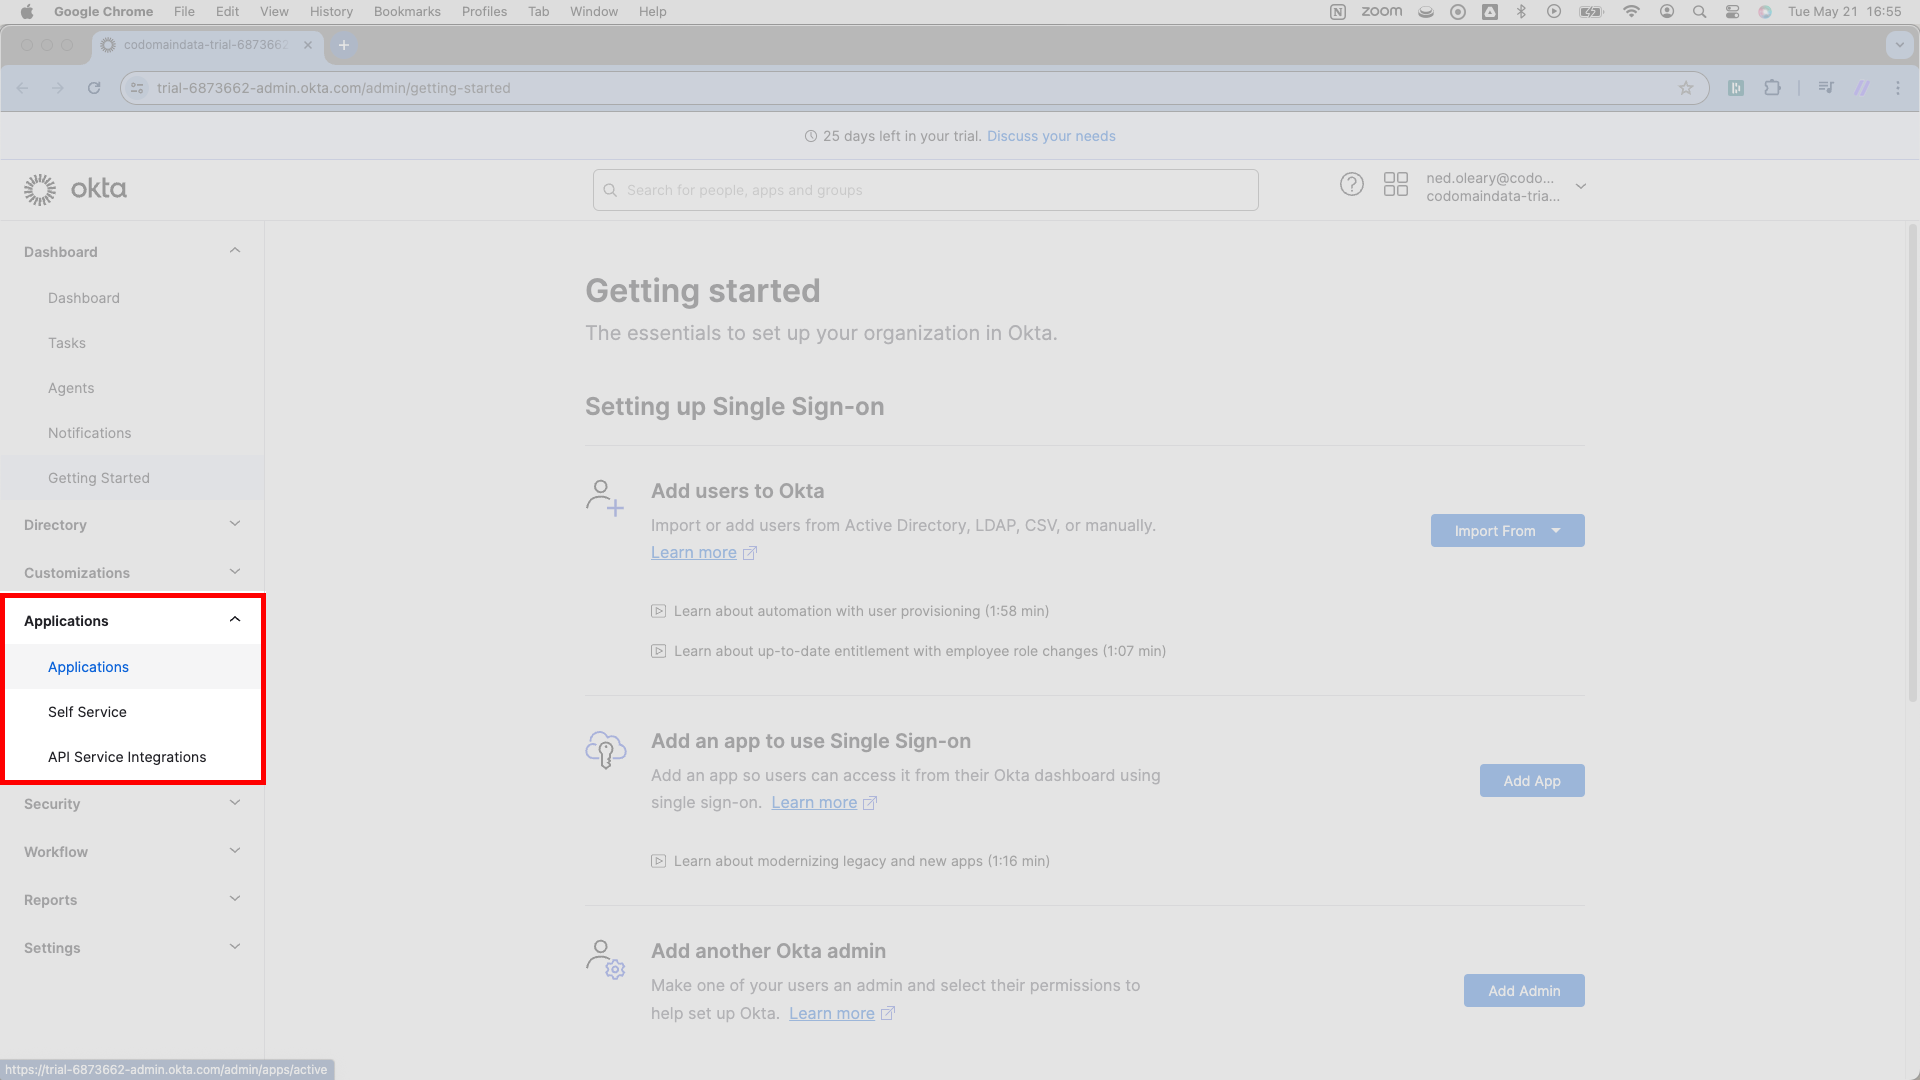
To create an Application in Okta, you’ll need your customer’s Okta administrator to select Applications > Applications in the left nav panel.
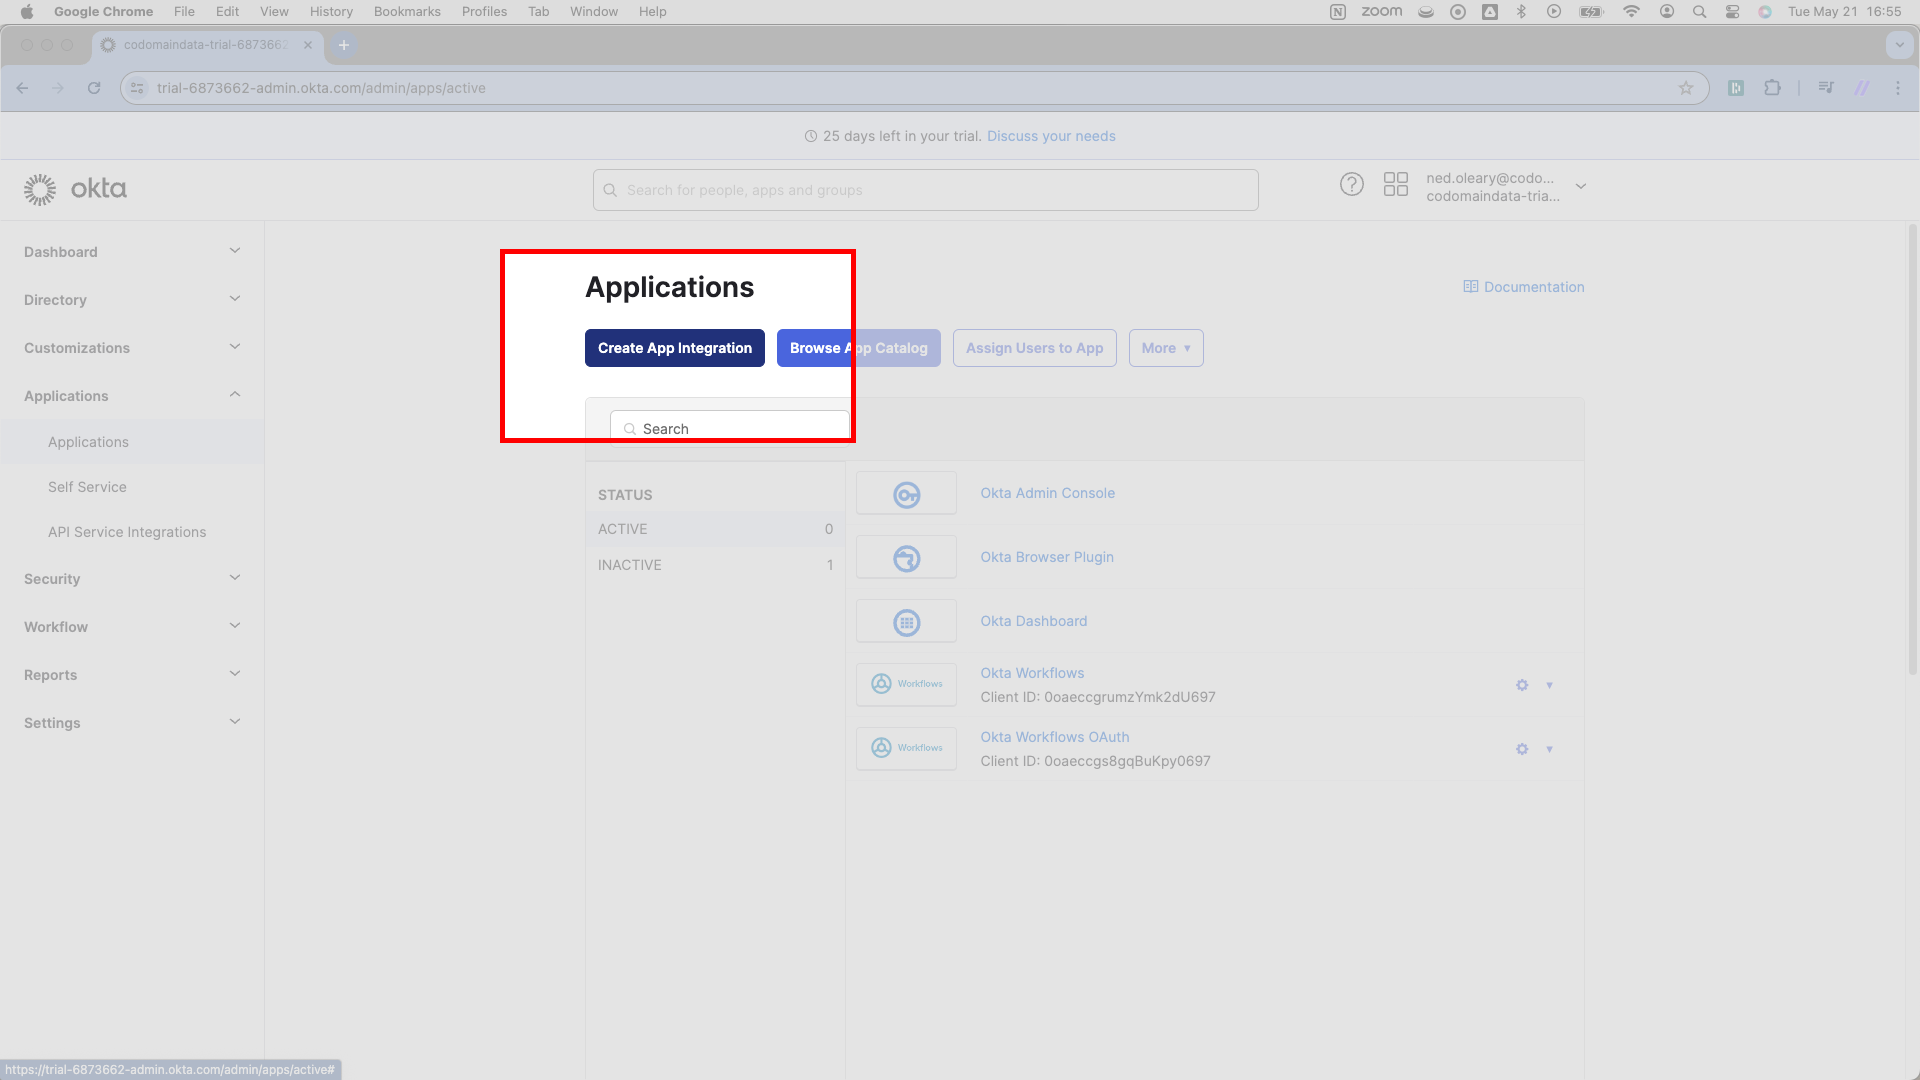
You’ll land on a page with a bold Applications header. Right under the header, select the dark blue button that reads Create App Integration.
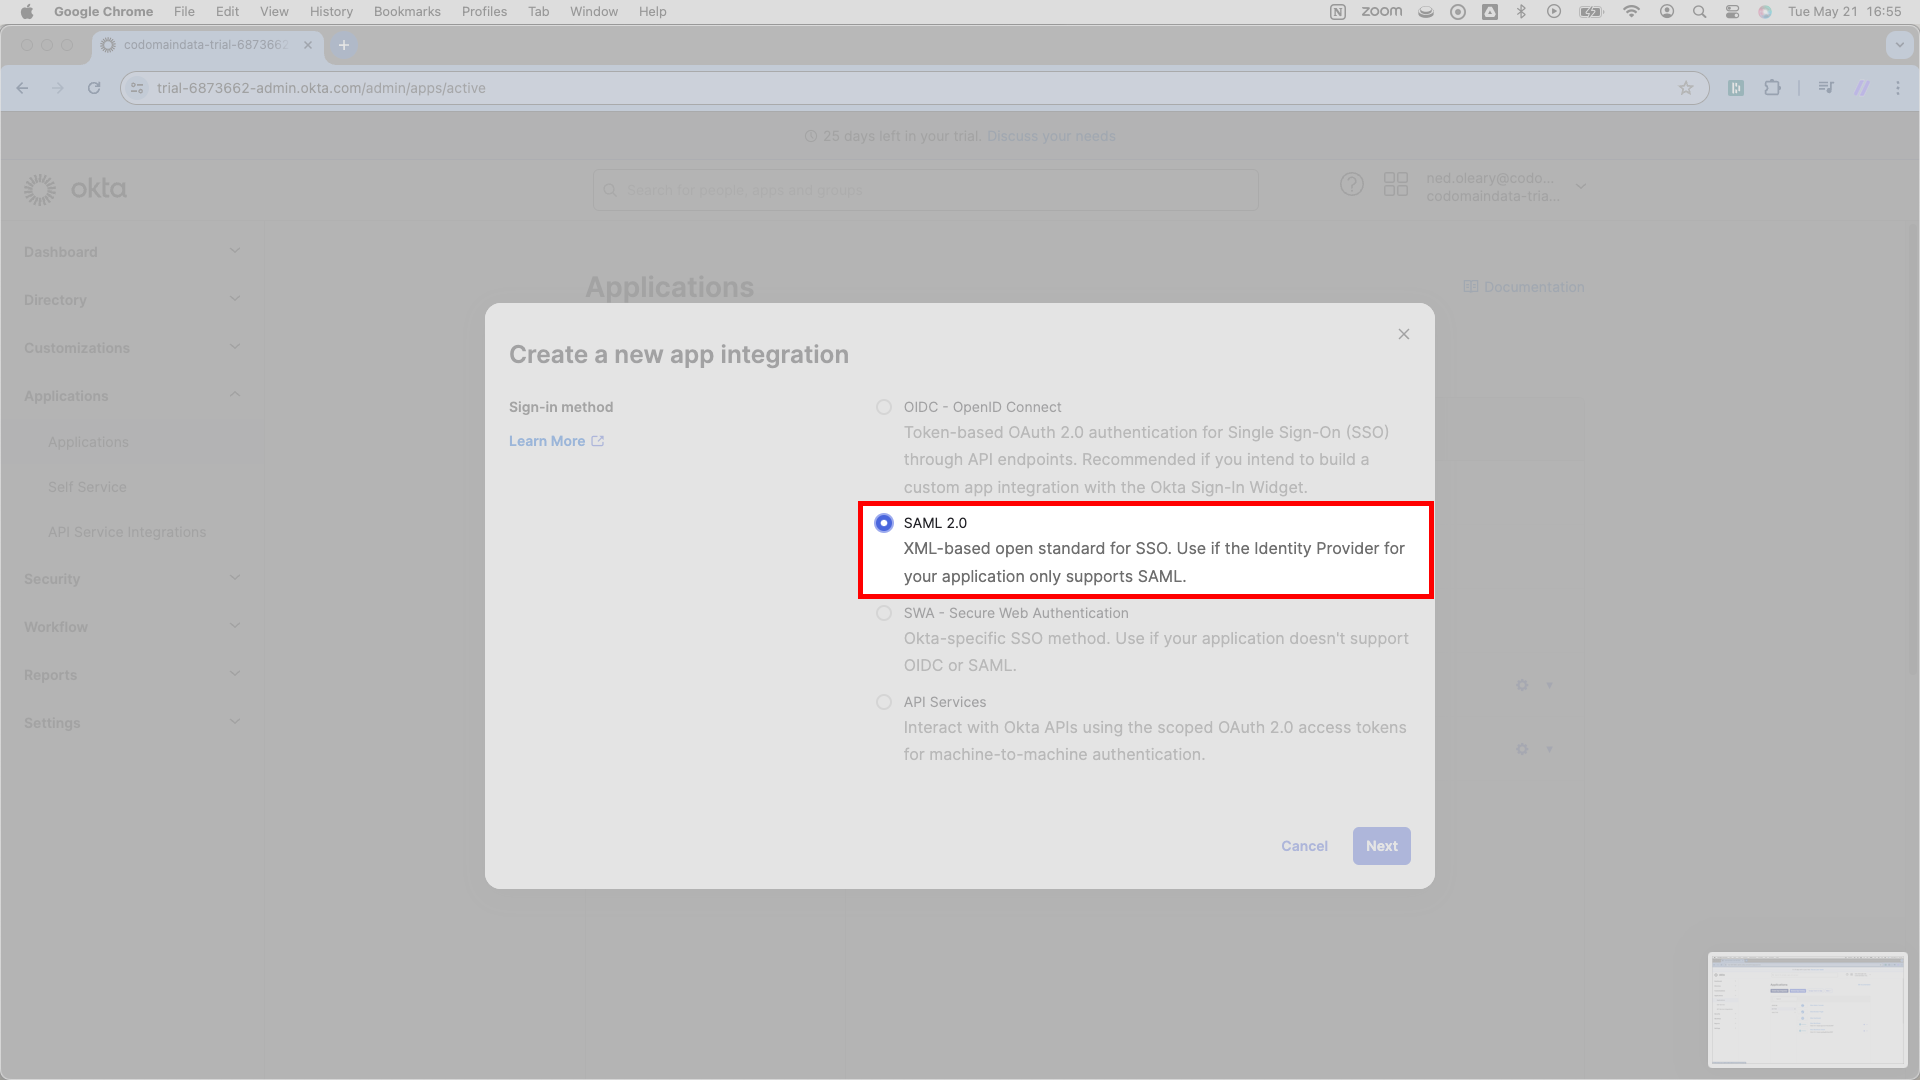
Okta will flash a model offering you several radio button choices. Of these, select SAML 2.0 and then press Next in the lower right corner.
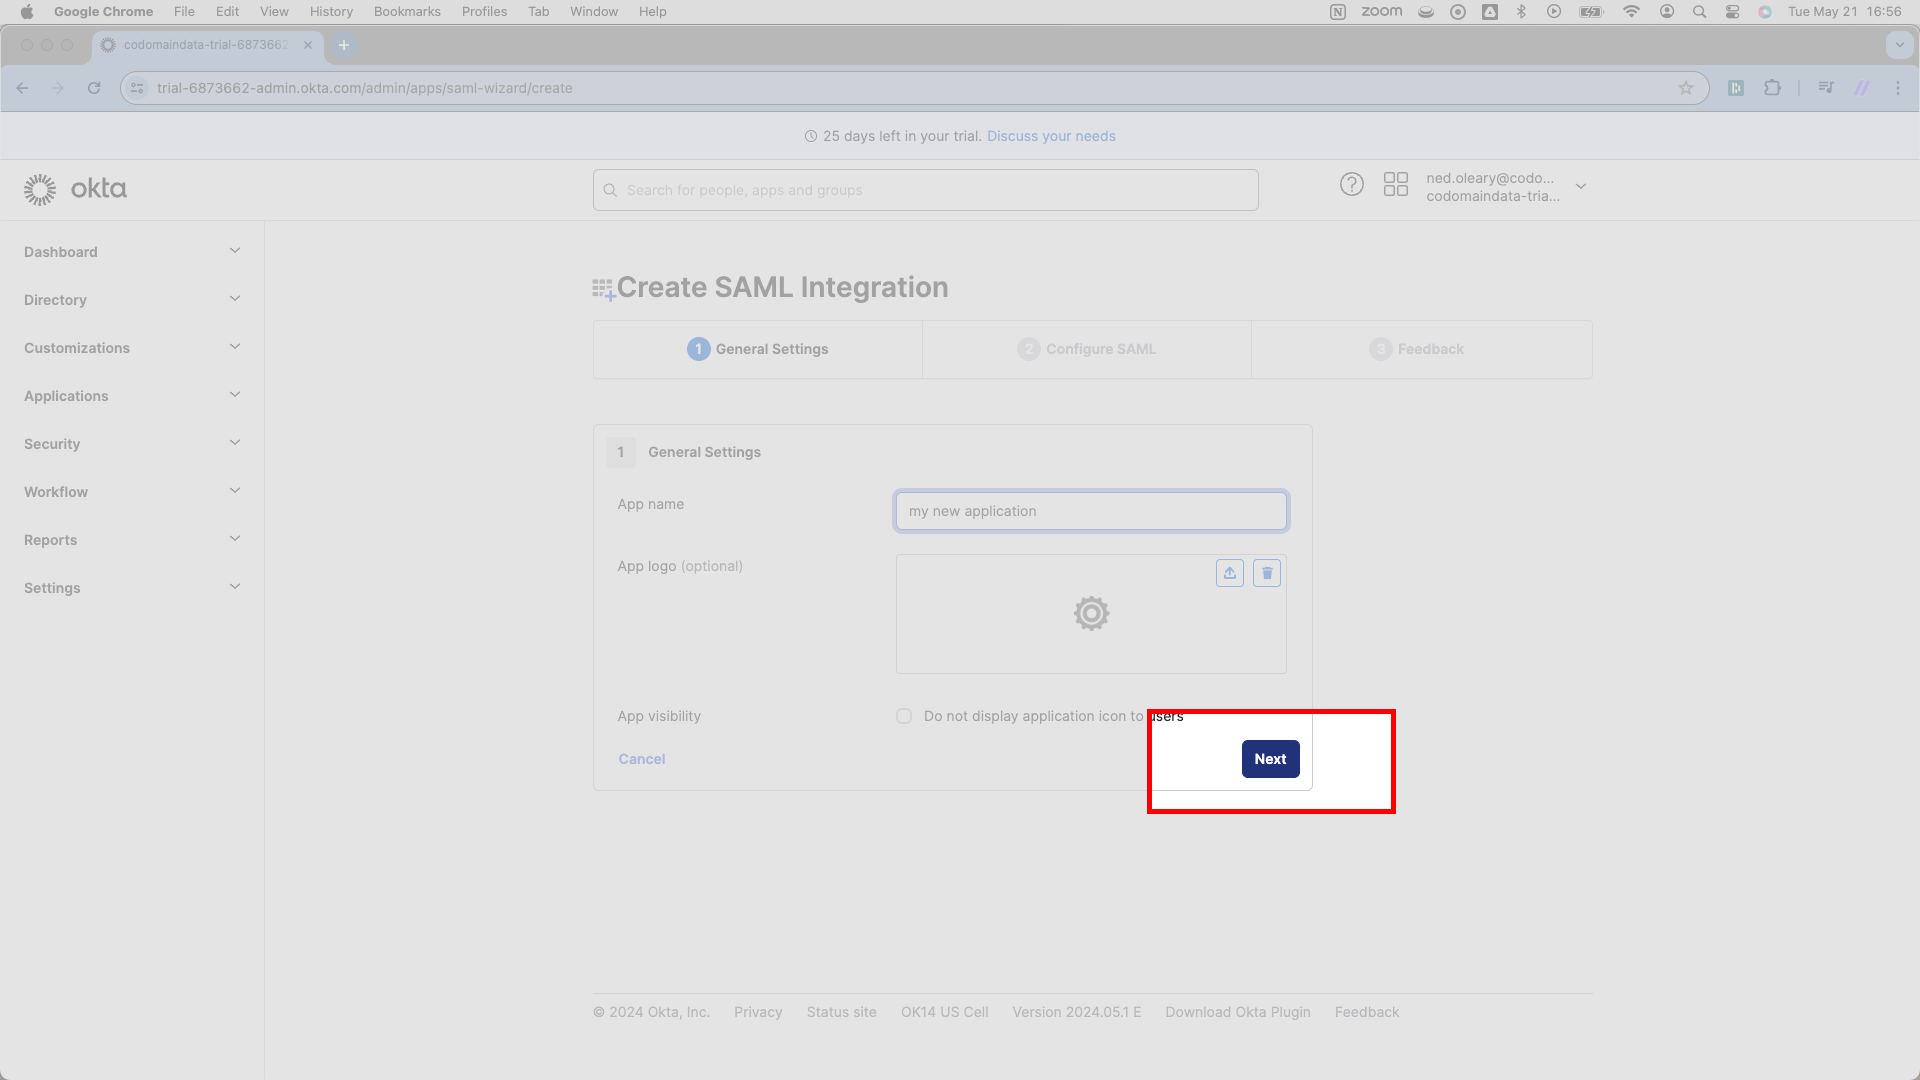
Once you’ve selected SAML 2.0, Okta will change the header to read Create SAML Integration as below. Okta requires a display name. Write your product’s name.
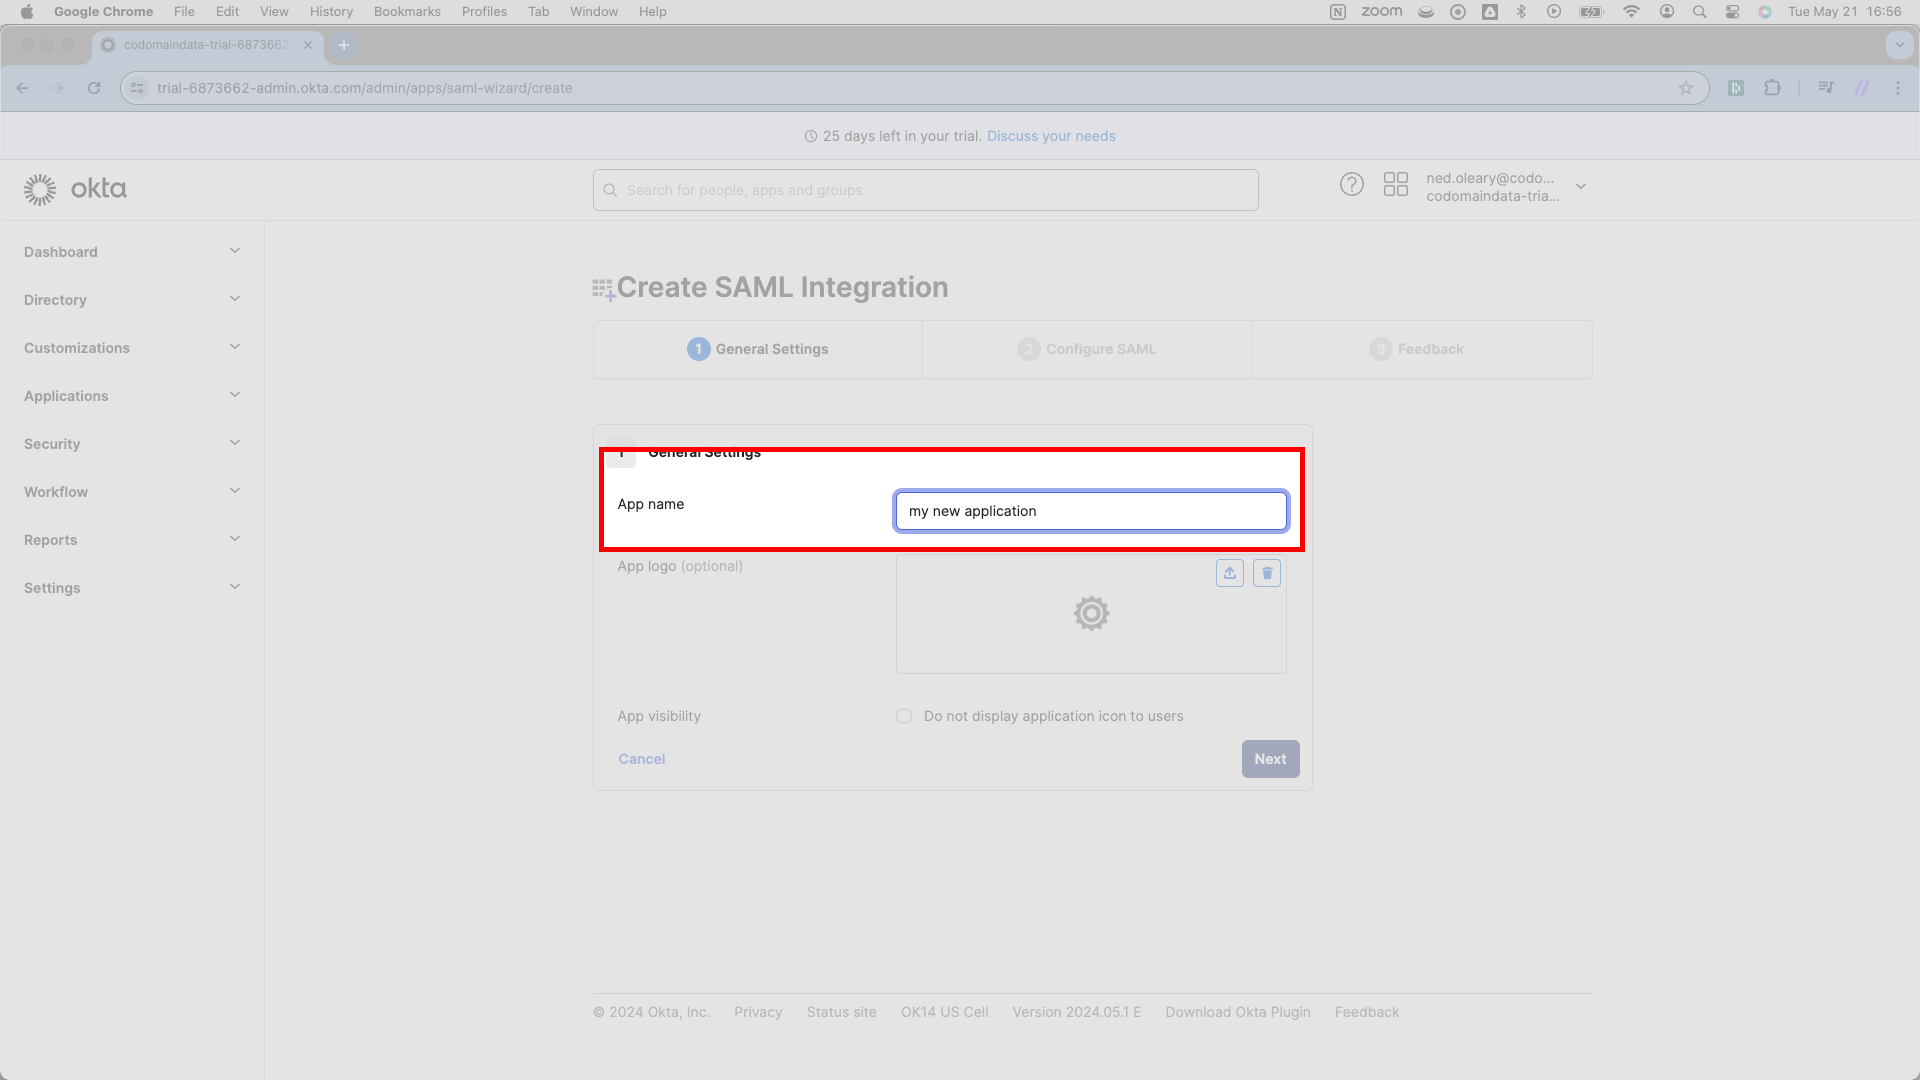
The remaining options on this page aren’t especially important; select Next here, which finalizes creation of an Okta Application.
Configure SAML Connection | Enter SSOReady details in Okta
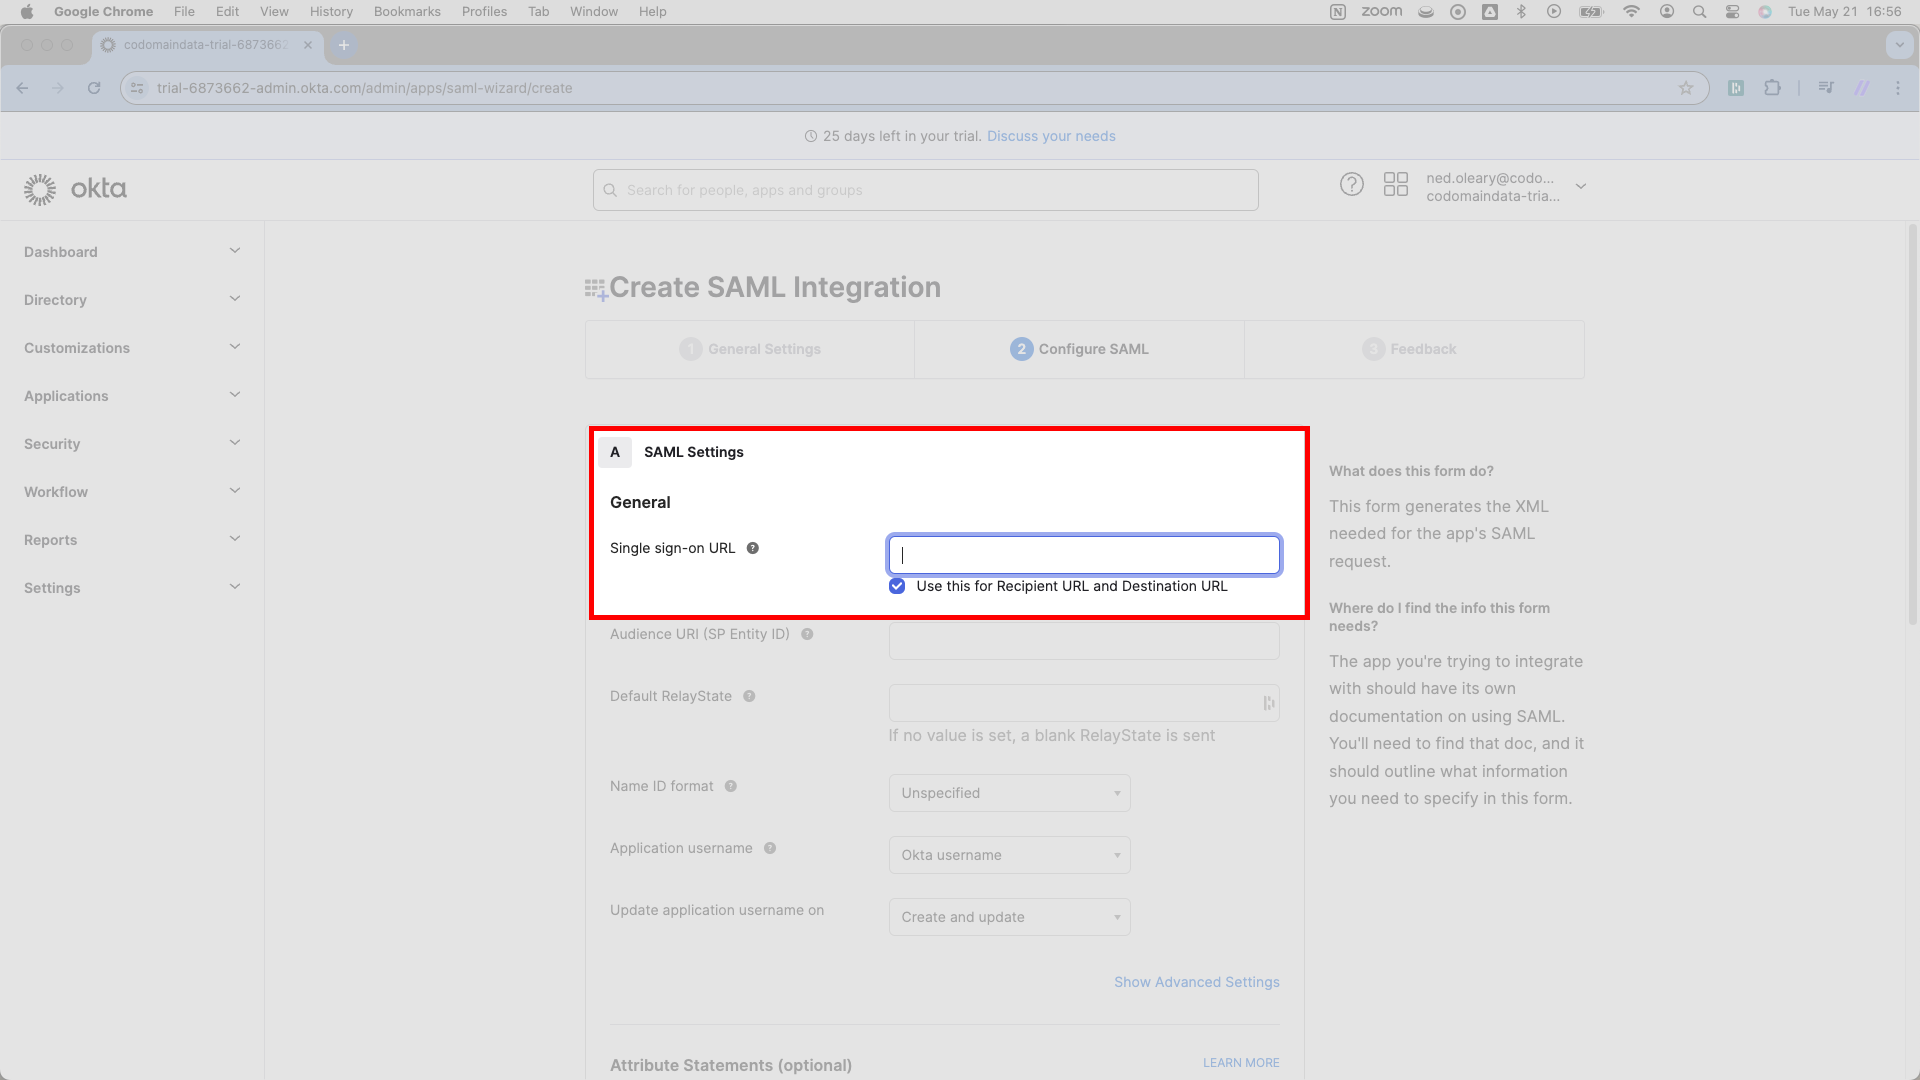
Hitting Next on the prior page will have nudged you into a new tab, marked Configure SAML. Here, you’ll start copy two pieces of data from SSOReady into Okta.
At the top of the page, Okta asks for a Single sign-on URL. You will find this URL in SSOReady on the detail page for your SAML Connection. SSOReady calls it the Assertion Consumer Service (ACS) URL. It ends in /acs. Copy this Assertion Consumer Service (ACS) URL and paste it where Okta has written Single sign-on URL.
From here, proceed to the next field on the same page. It reads Audience URI (SP Entity ID). SSOReady calls this the SP Entity ID. You’ll find it directly under the Assertion Consumer Service (ACS) URL in the SSOReady app. It usually looks just like the ACS URL, except it does not end in /acs.
Paste the SP Entity ID URL from SSOReady into Okta’s Audience URI (SP Entity ID) field.
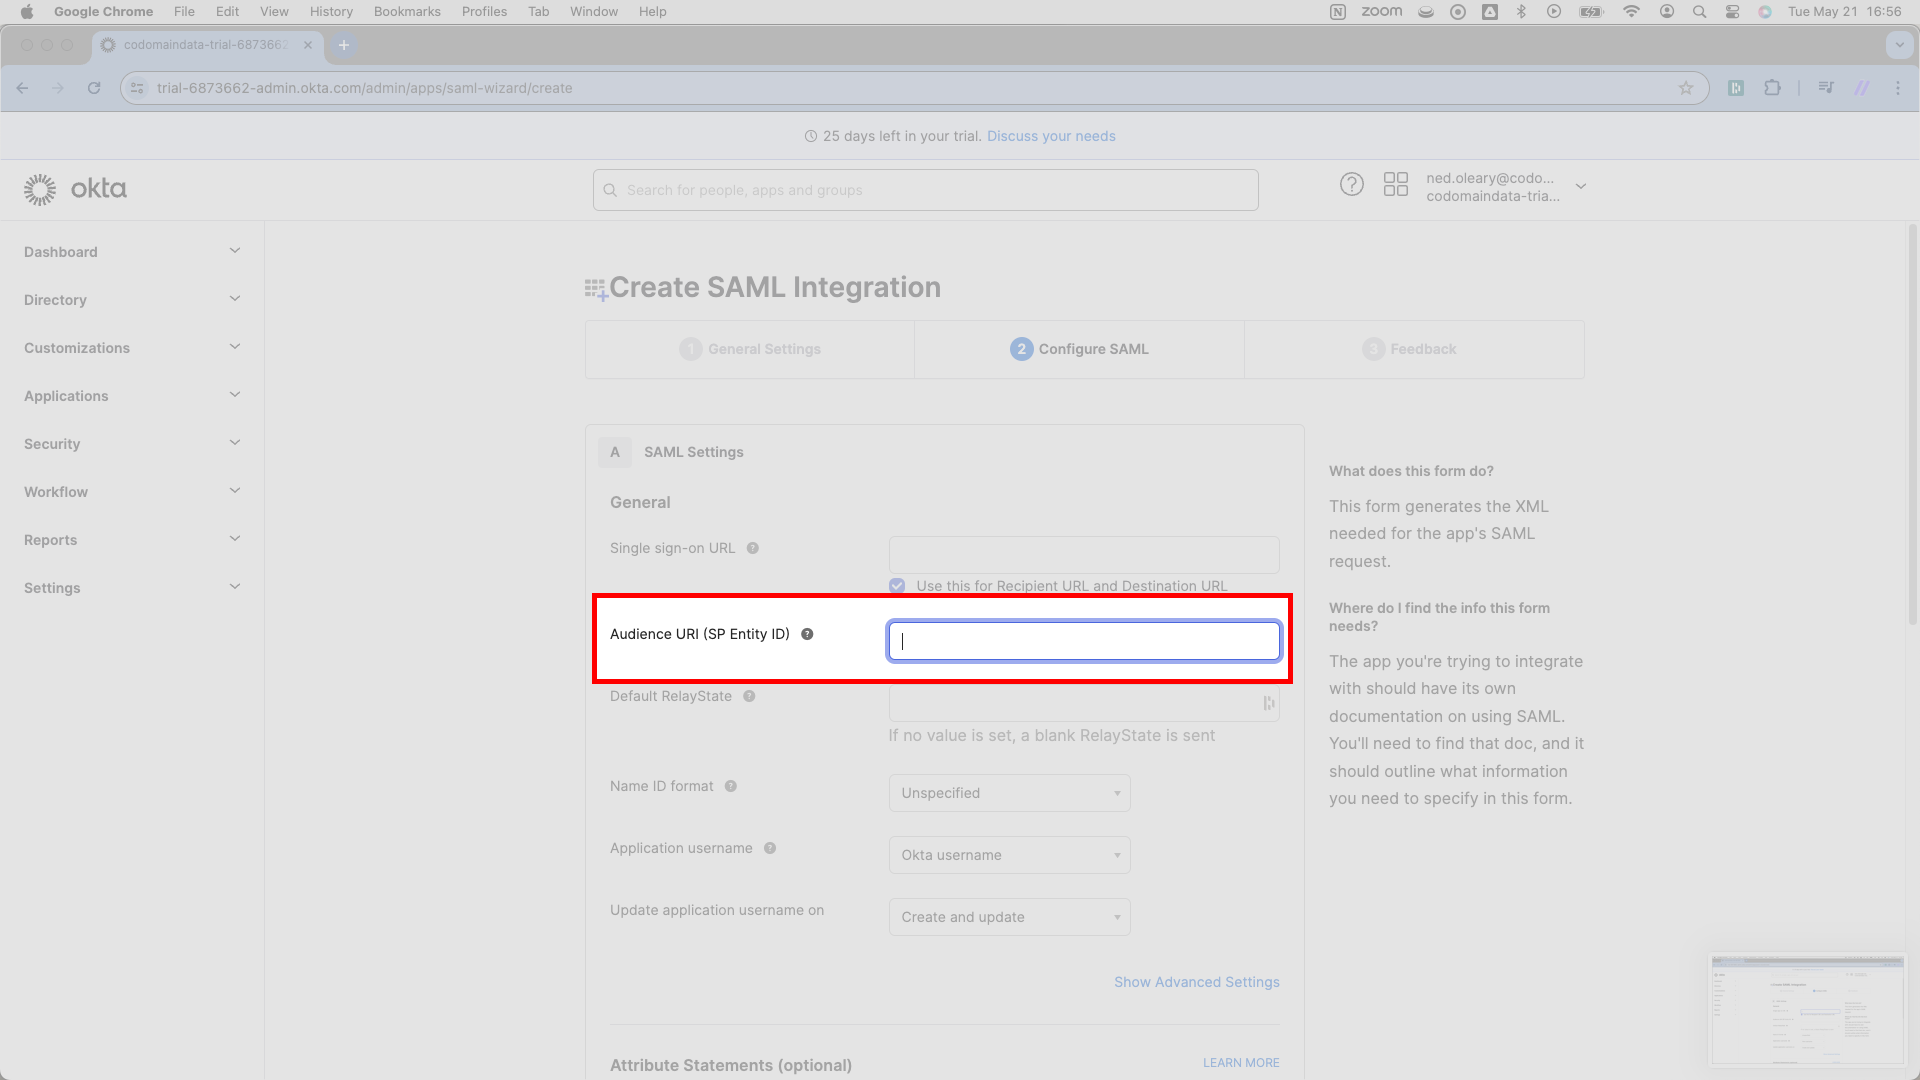
Once you’ve filled the Audience URI (SP Entity ID) field (and scrolled down to hit Next in the lower right corner), you’ve completed all the necessary data entry from SSOReady into Okta.
Configure SAML Connection | Enter Okta details in SSOReady
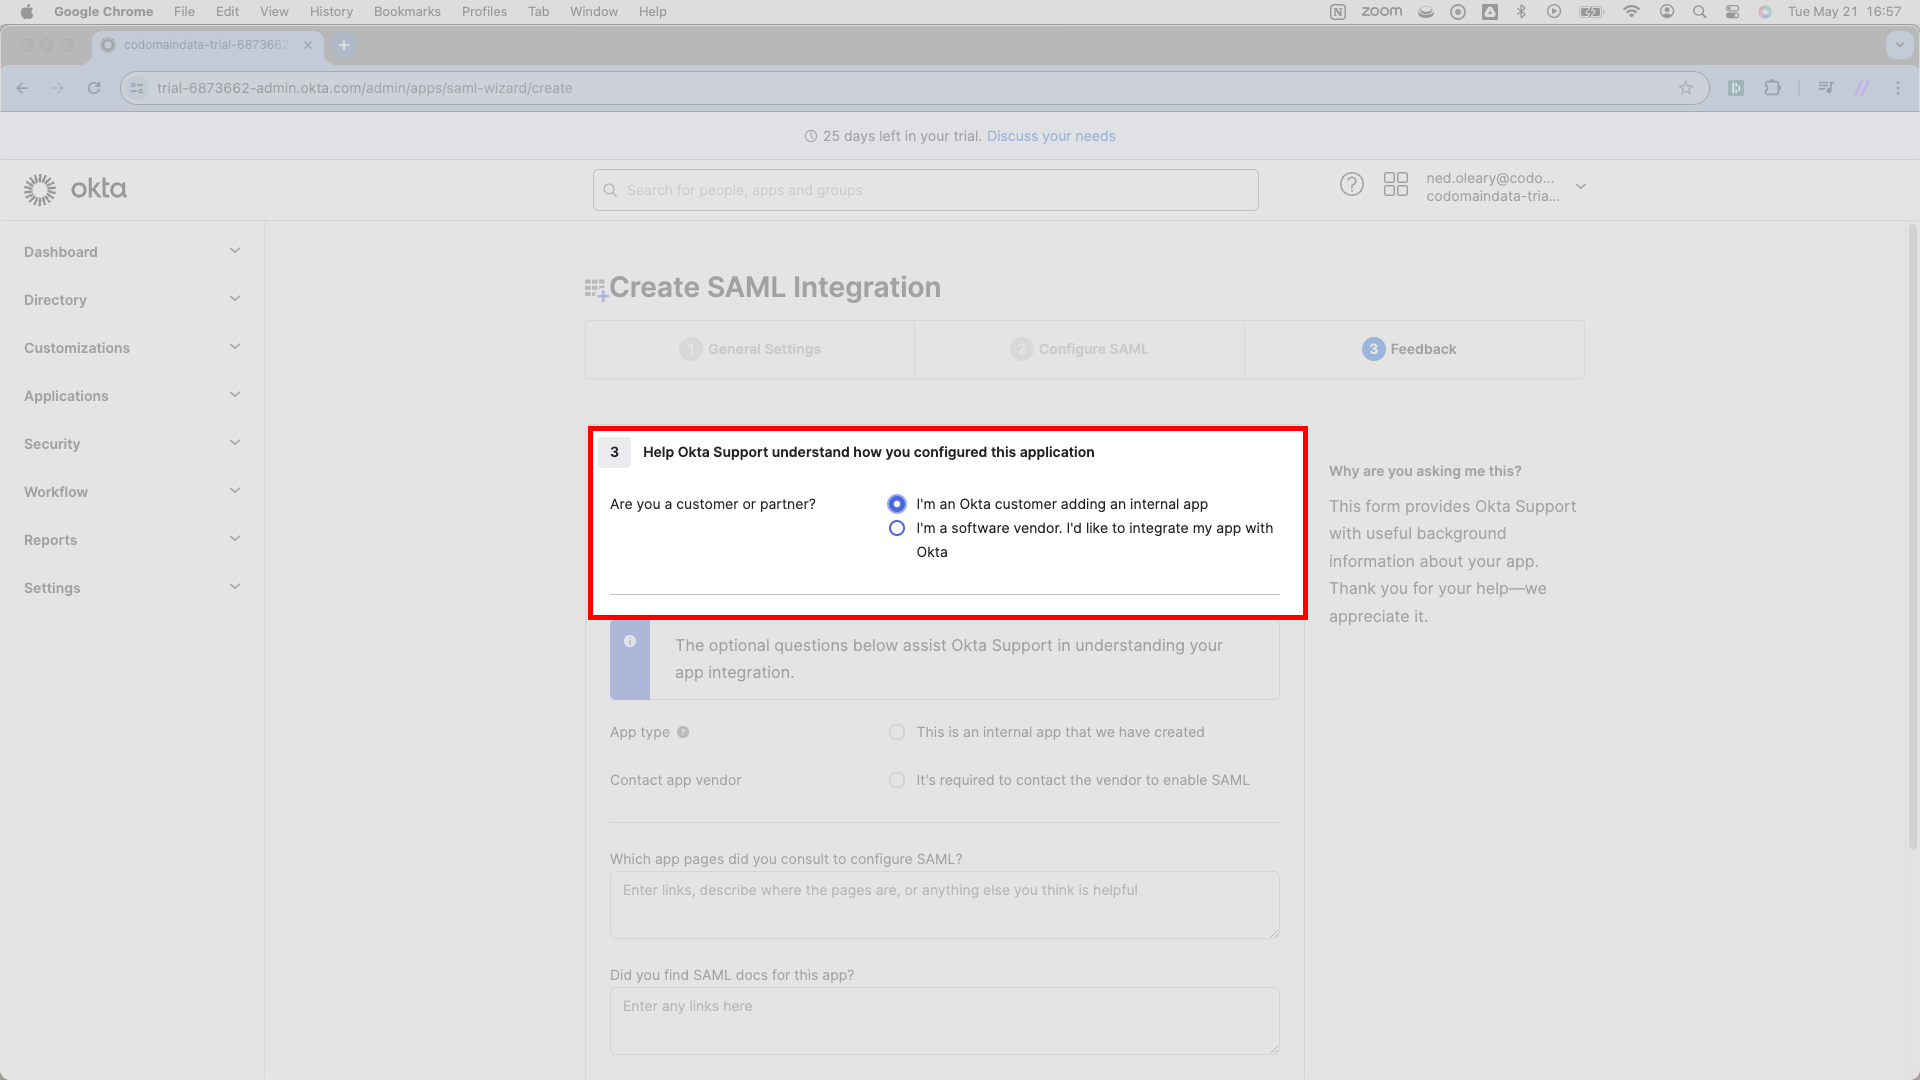
Okta requires one brief detour wherein we supply feedback to their team.
Select I’m an Okta customer adding an internal app, skip the remaining questions, scroll down, and press Finish in the lower right corner.
Now you can enter Okta data into SSOReady. The previous step will have routed you to a page with your application’s name at the top.
From here, scroll down a bit and hit More details. It’s not always easy to see.
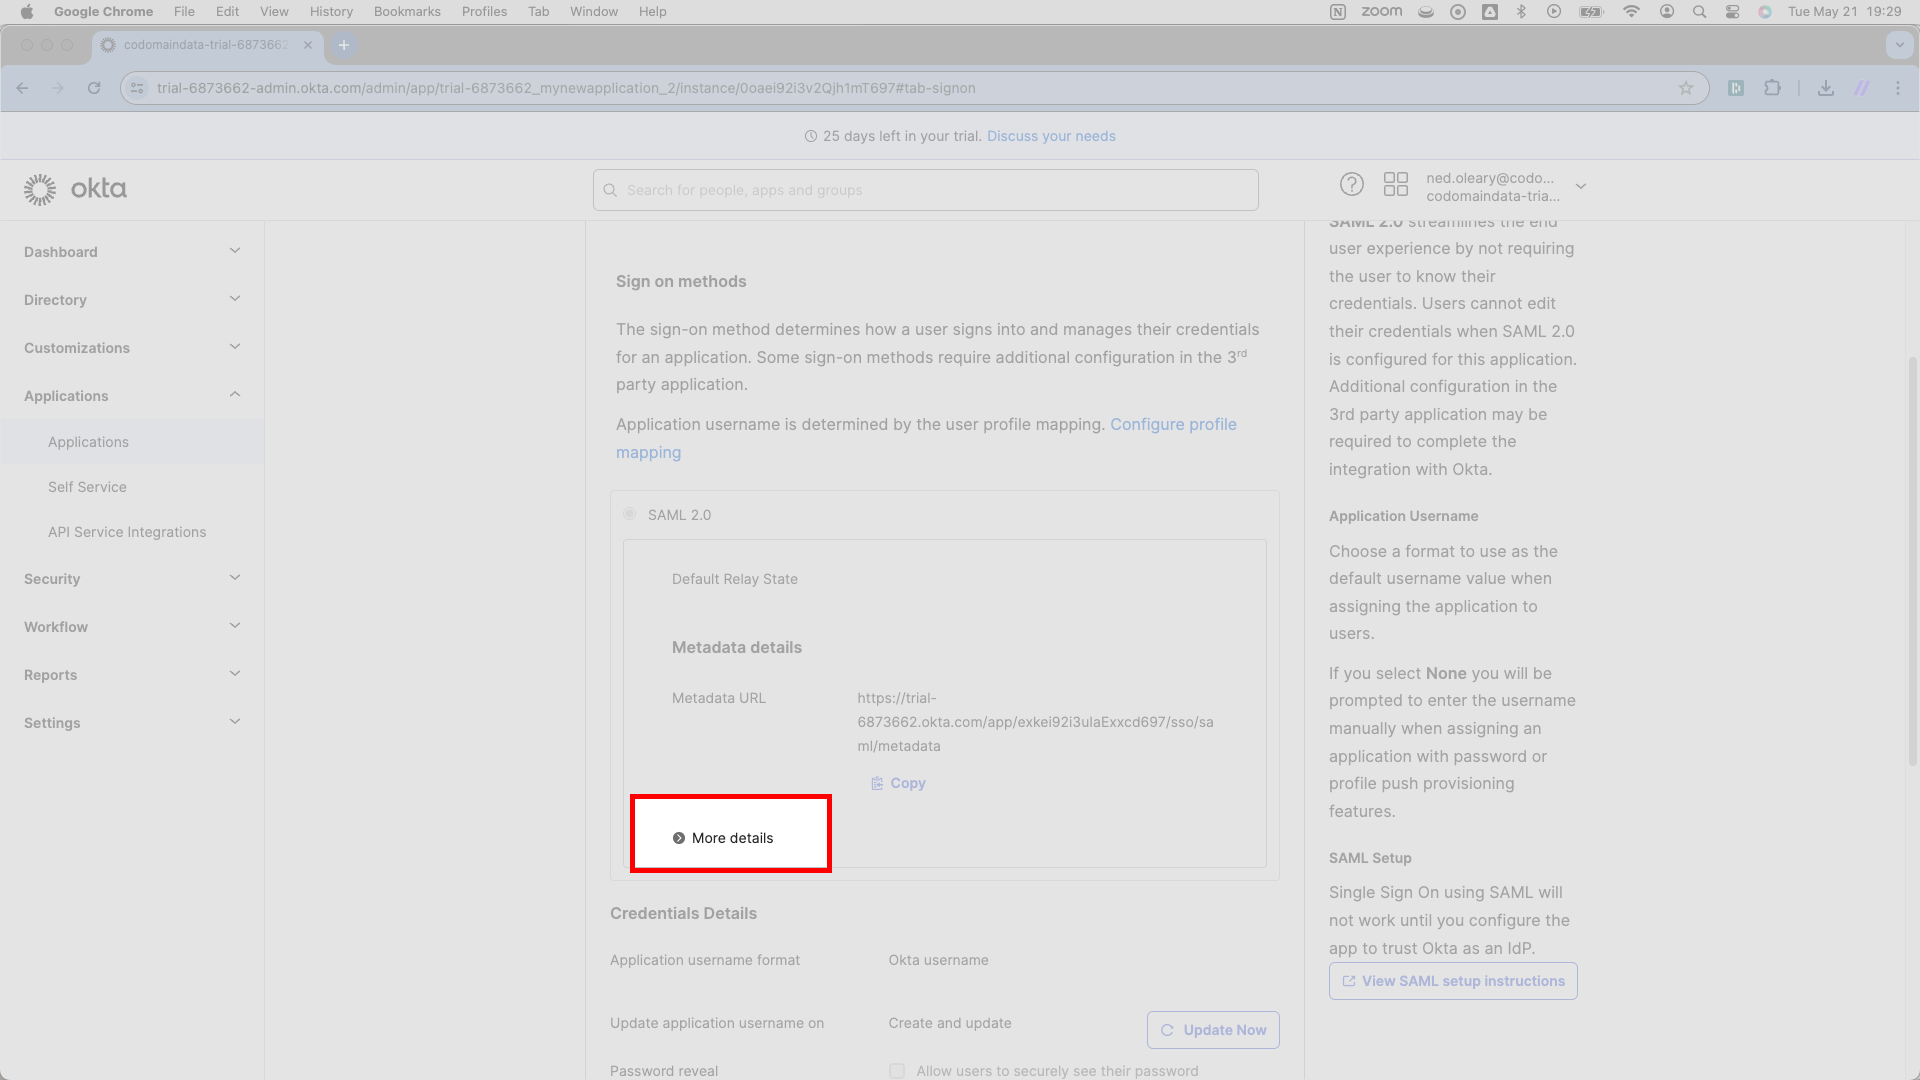
Once you’ve expanded the details for the SAML application, you’ll see a bunch of data.
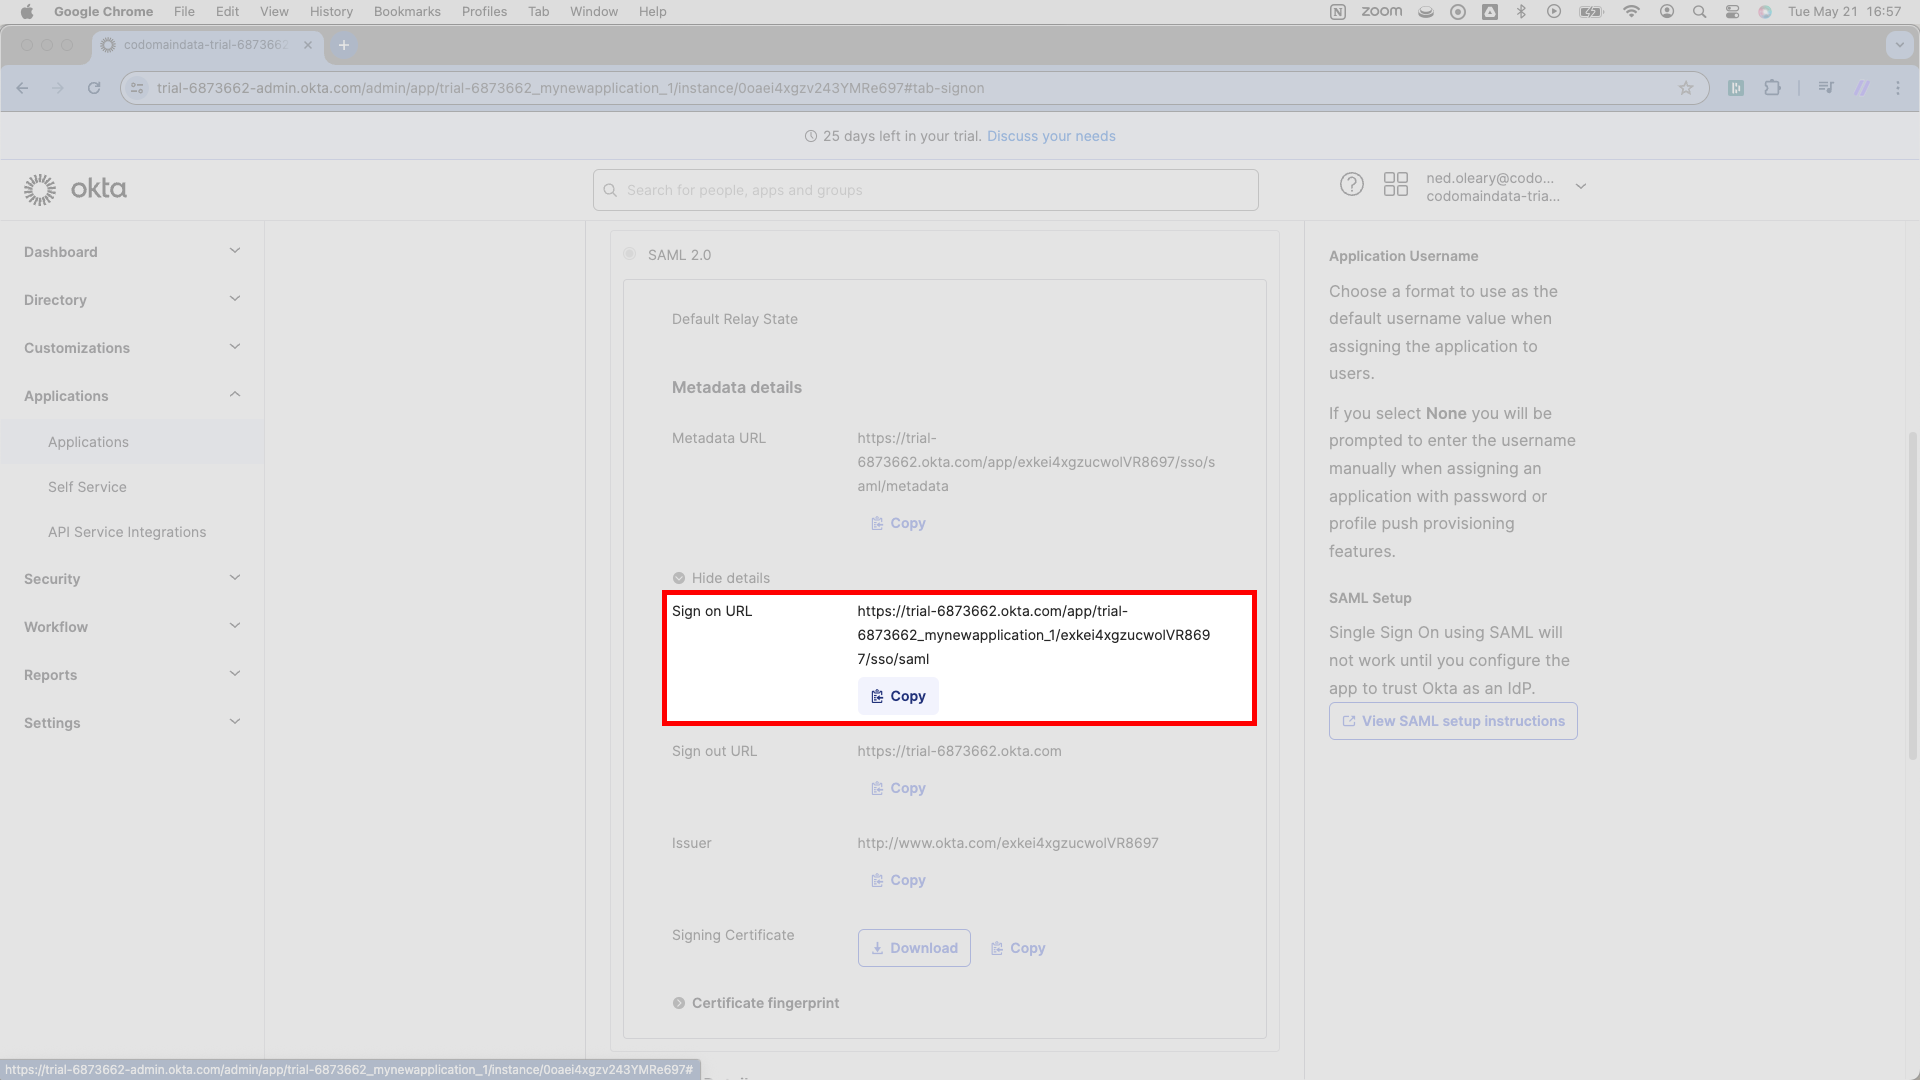
Directly under the More details button, there’s a URL marked Sign on URL with a light purple Copy button. SSOReady calls this the Redirect URL. Copy this URL and paste it into SSOReady as the Redirect URL.
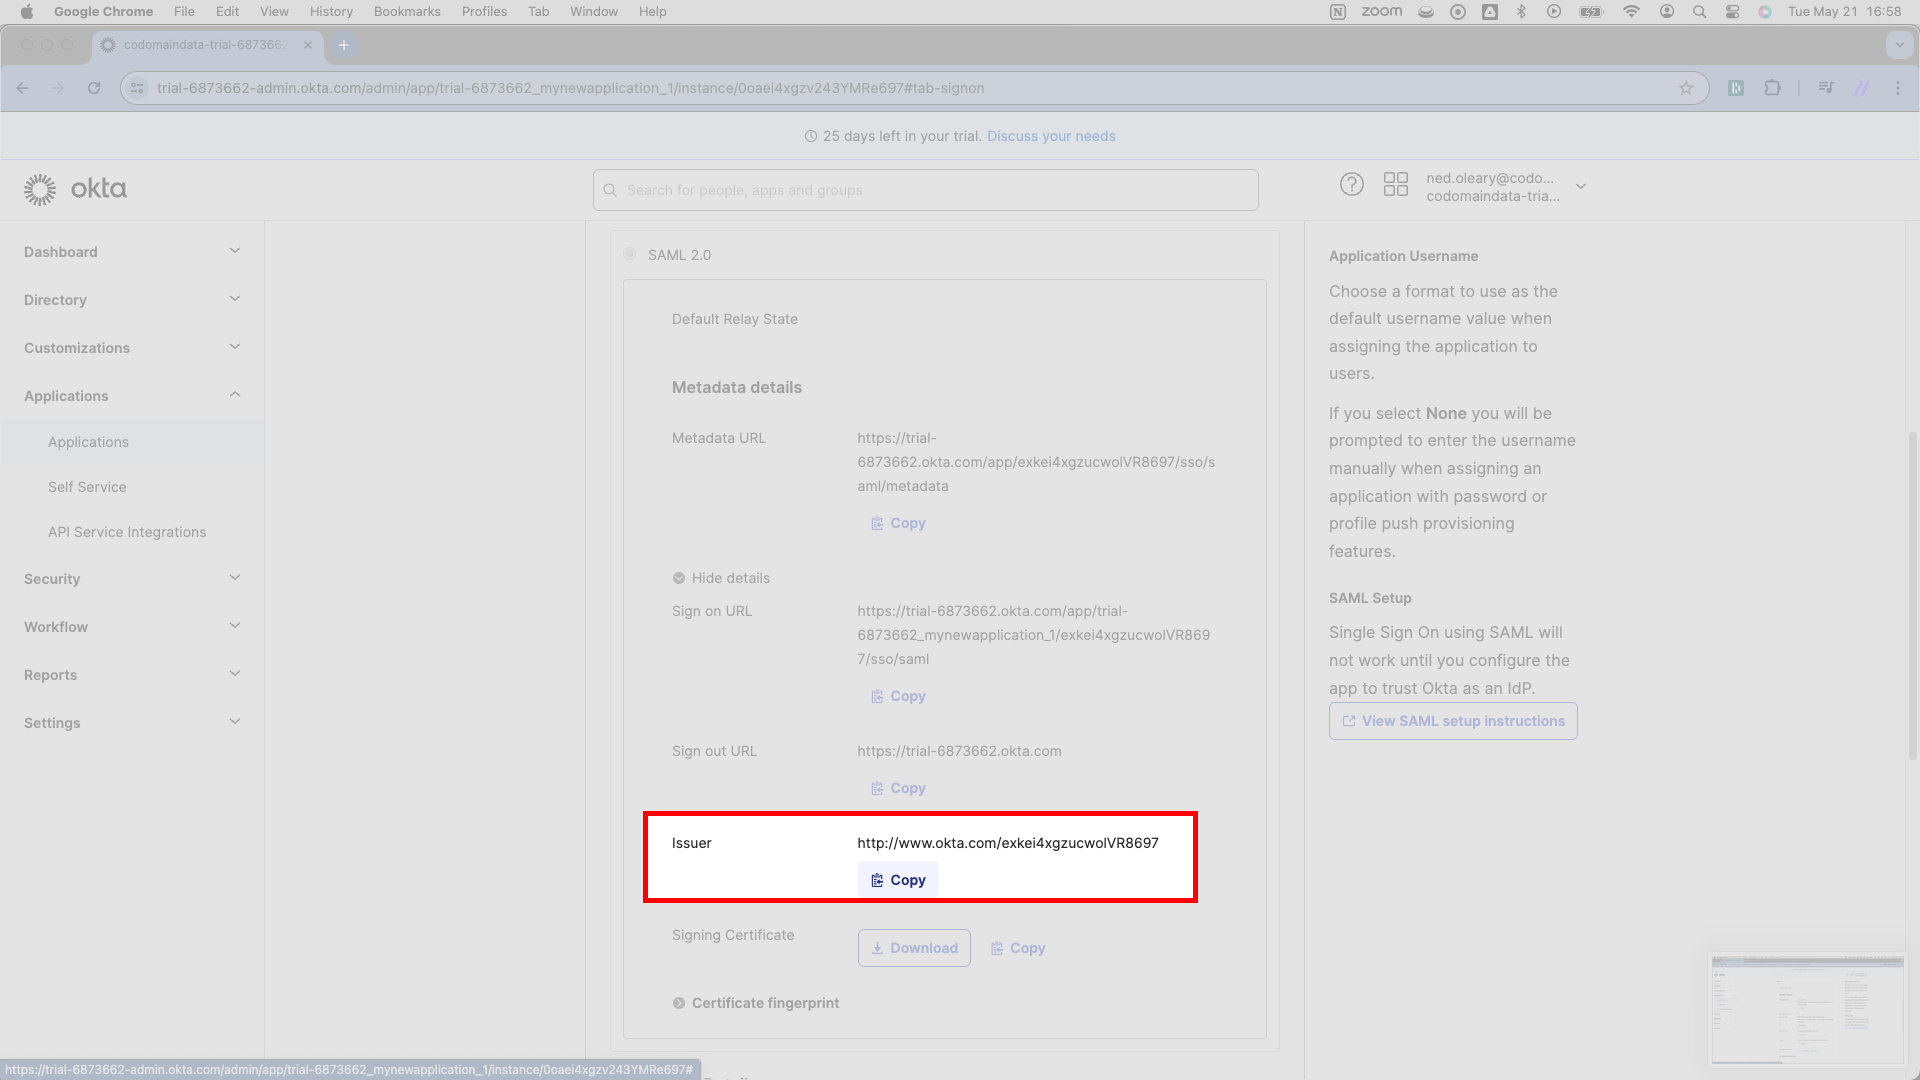
Scrolling further down, you’ll see a similar line for a URL that Okta labels Issuer. SSOReady calls this the IDP Entity ID. Copy this Issuer URL and paste it in SSOReady as the IDP Entity ID in SSOReady.
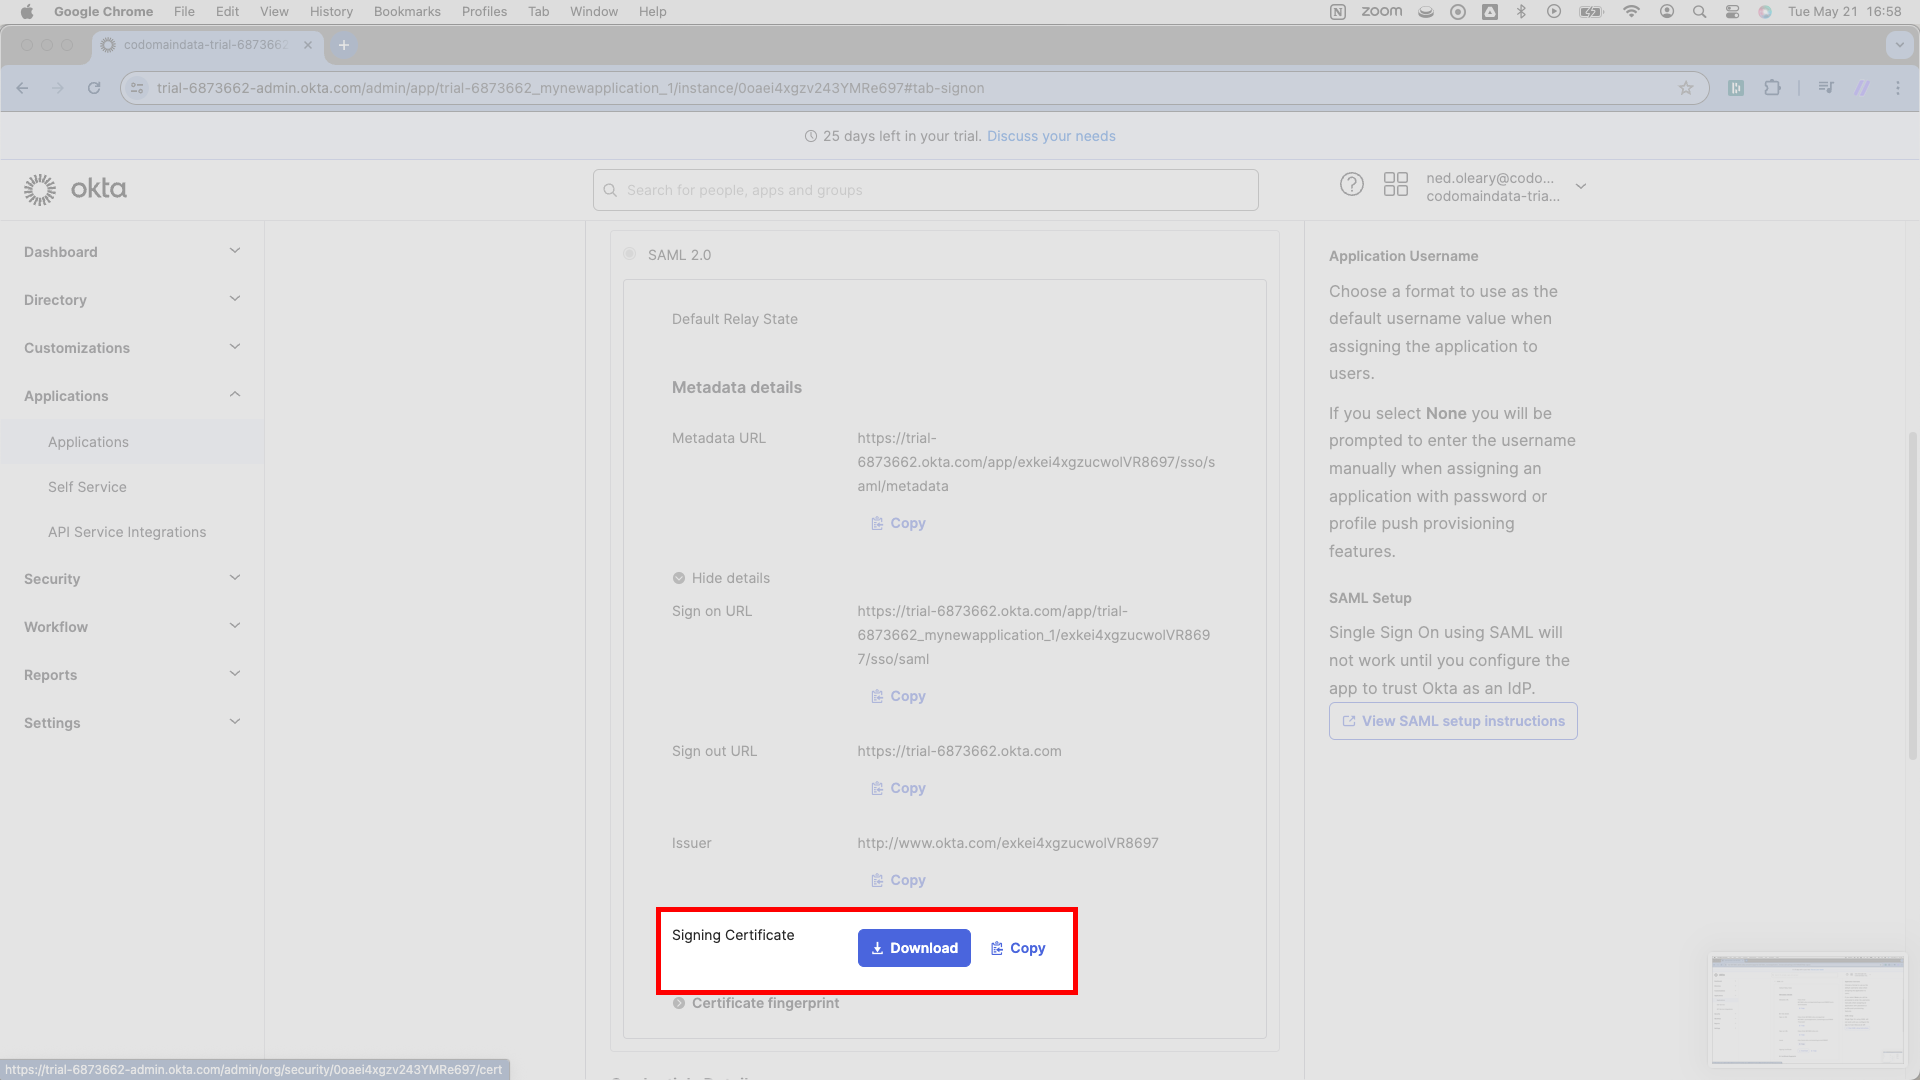
Finally, SSOReady requires a Certificate. You’ll find this further down on the same page in Okta. Okta labels it the Signing Certificate. (Please be aware that Okta has several related buttons that will not give you what SSOReady needs.) Press the rectangular Download button, which will download an okta.cert file.
Upload okta.cert to SSOReady as the Certificate for this SAML Connection.
Once you’ve uploaded the Certificate, we’re all set! You’ve finished the SAML configuration. It’s important to remember, though, that your customer’s Okta administrator will still have to assign users to your application before they can sign in.