SCIM with Okta
SCIM (system for cross-domain identity management) allows your application to communicate on a recurring basis with your customer’s IDP. You will receive information from your customer regarding the users that should have access to your application — and which should not. In many cases, you will also receive useful information regarding your users’ attributes.
SSOReady helps you use SCIM without integrating your product directly with Okta. You will instead integrate with SSOReady, which will communicate with Okta on your behalf.
Connecting SSOReady to your customer’s Okta implementation requires that you share two pieces of information with Okta, both of which you’ll find in SSOReady:
- A base url that Okta will perform operations on (e.g. via HTTP PATCH)
- A bearer token that Okta will include with its requests
However, configuring Okta can involve a few more steps. This guide therefore starts by focusing briefly on SSOReady and subsequently focuses on Okta configuration.
Configuring SSOReady
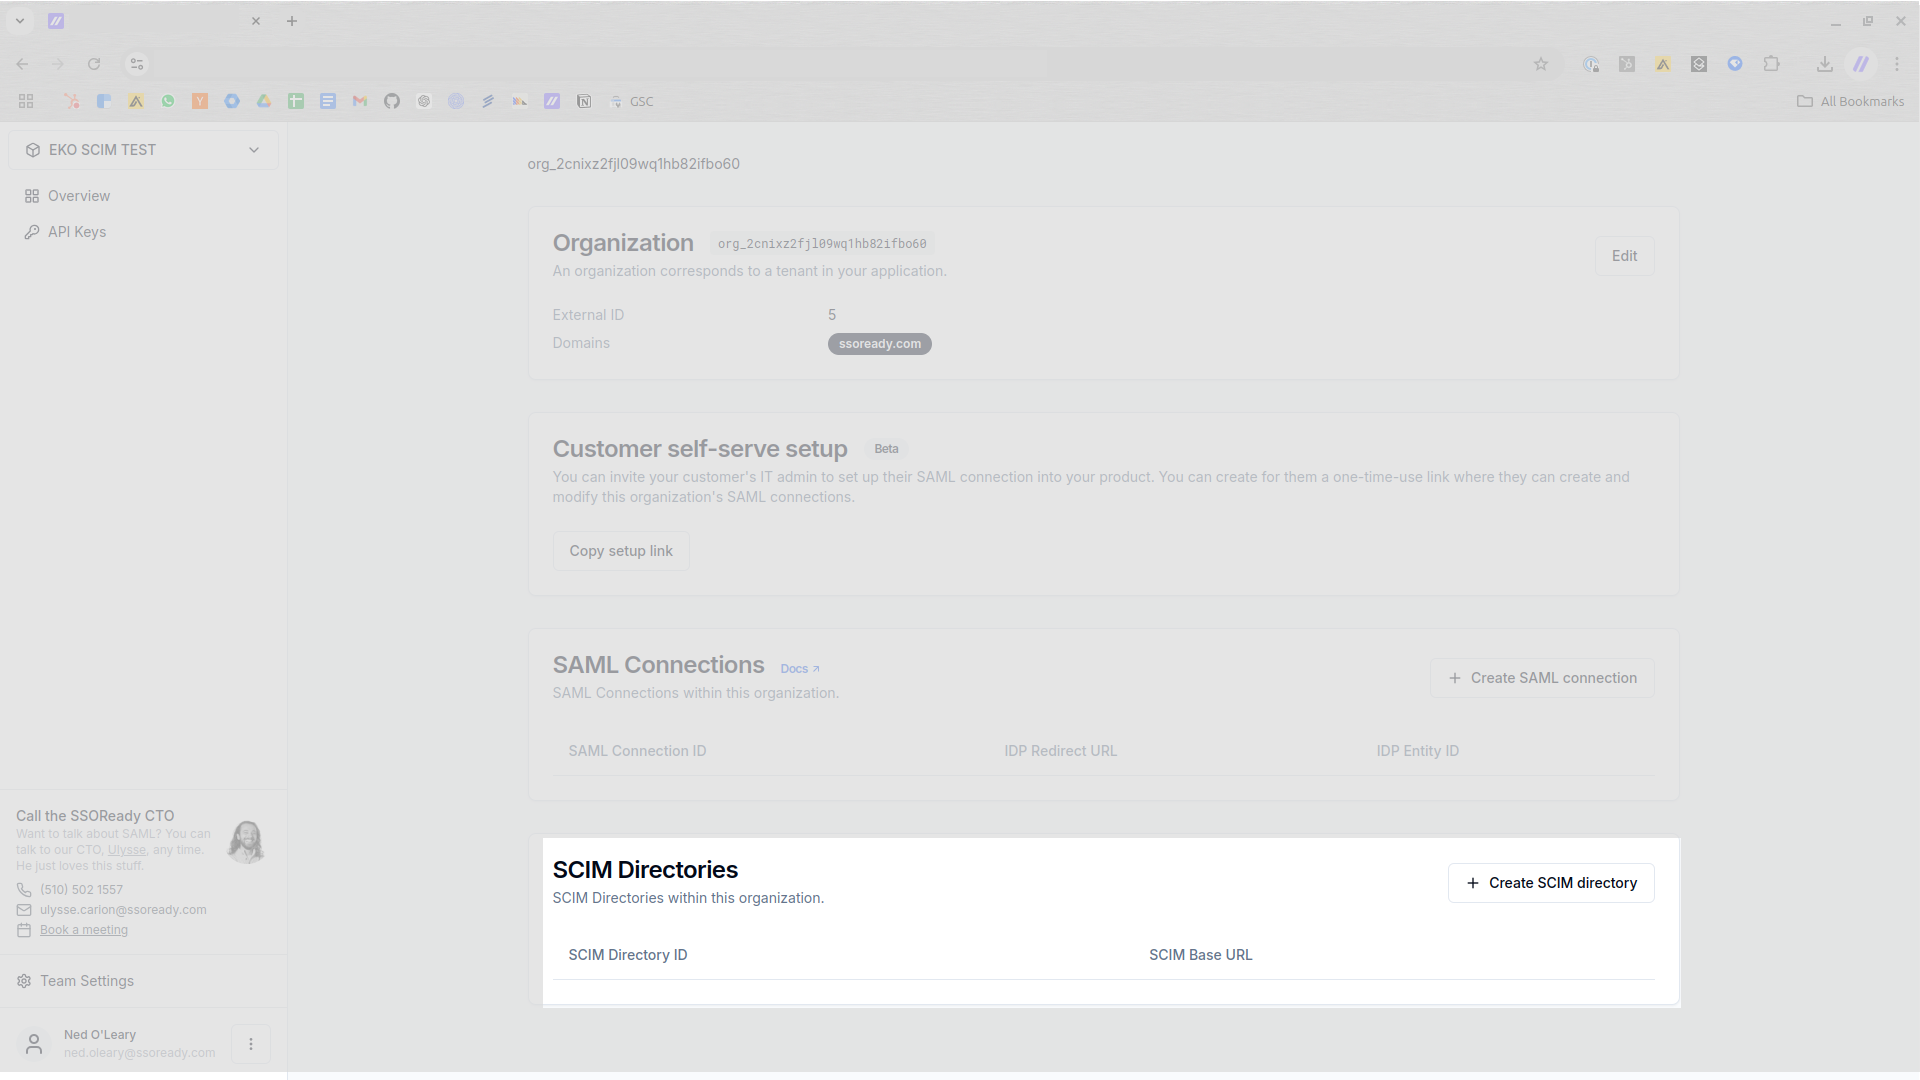
To create a SCIM Directory within SSOReady, you’ll first need to create an Environment and an Organization. SCIM Directories belong to Organizations. You can create a SCIM Directory for an Organization by navigating to the Organization in SSOReady and selecting Create SCIM directory.
From there, you can find the base URL and generate the bearer token you’ll need to give your customer. Hold onto these.
SSOReady does not store bearer tokens. You will not be able to access the bearer token in SSOReady again. You may at any time, however, replace the existing bearer token with a new one. When you create a new bearer token, you simultaneously invalidate the previous bearer token.
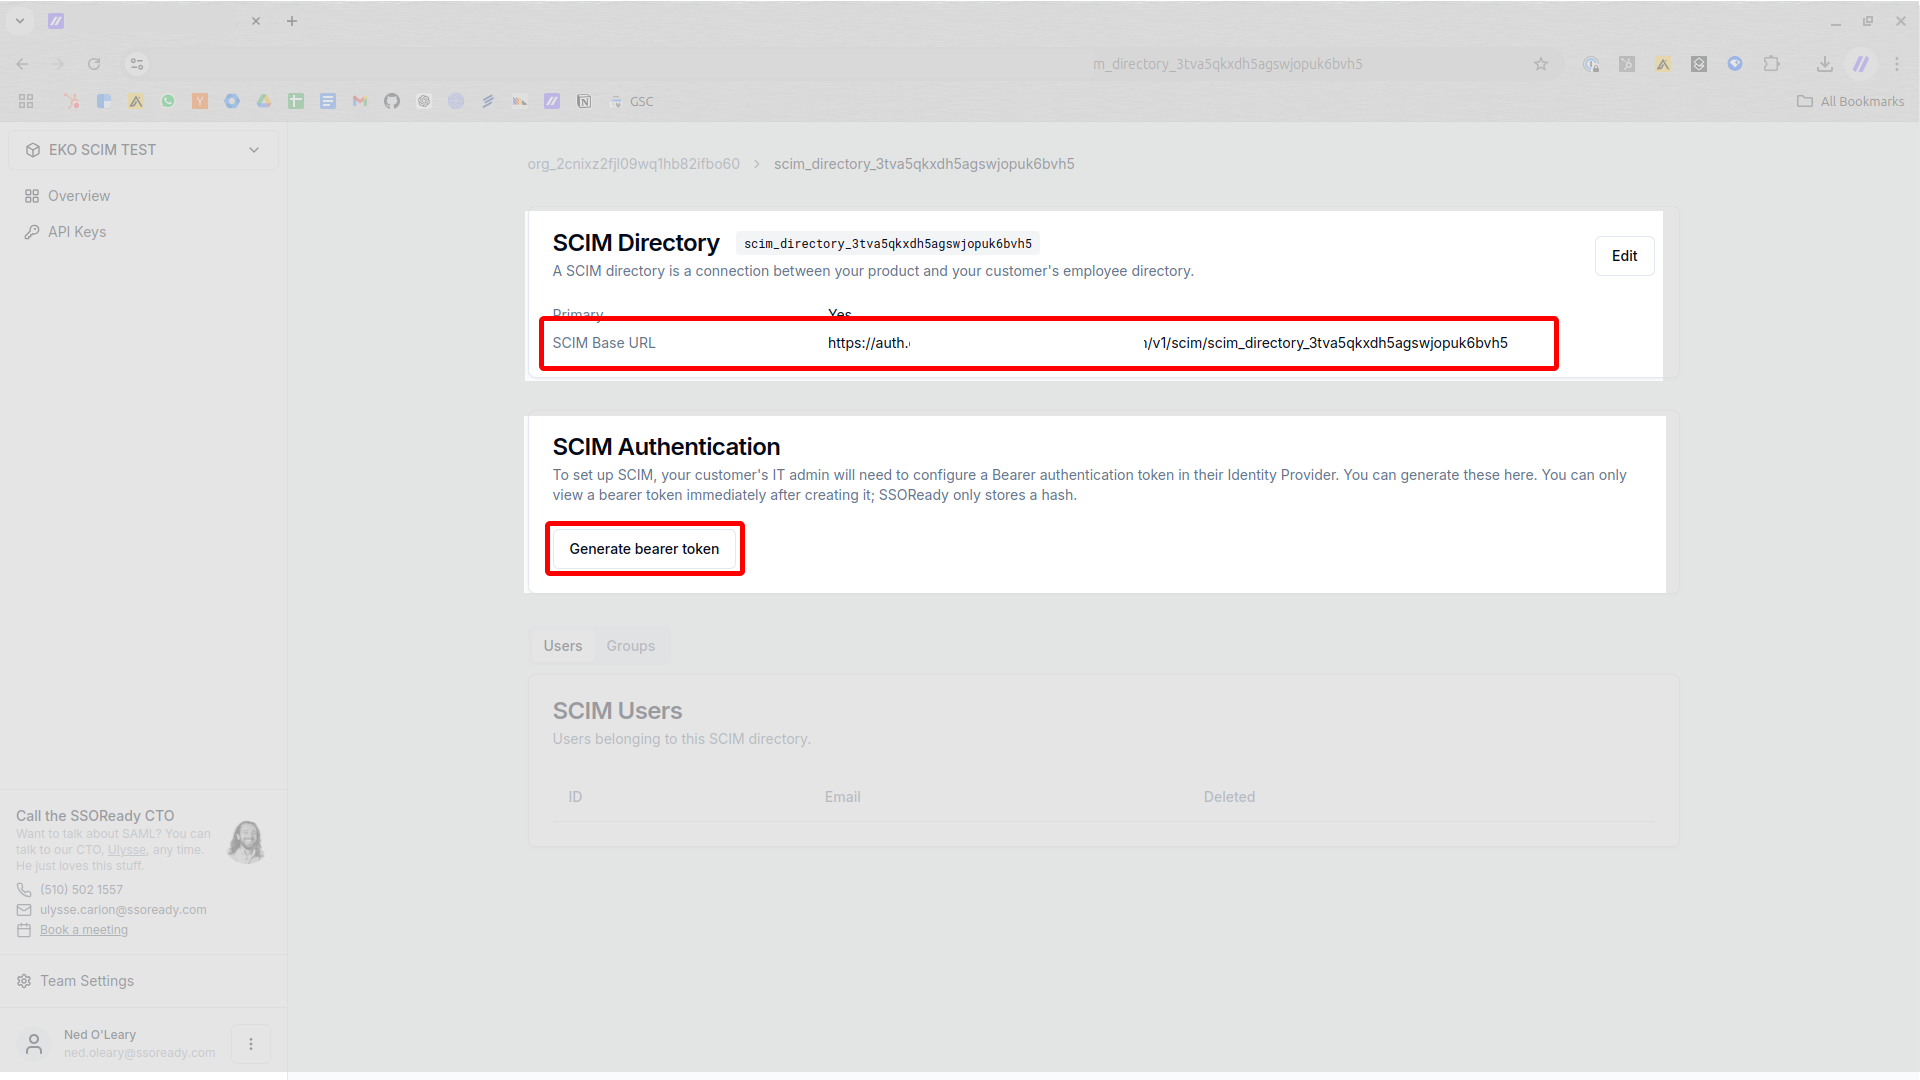
Once you have created a SCIM Directory in SSOReady and taken note of both the base URL and the bearer token, you have finished with SSOReady configuration.
Configuring Okta
Once there’s a SCIM Directory in SSOReady, you can connect that SCIM Directory to your customer’s Okta instance.
The following steps will be most relevant to IT administrators. However, SSOReady customers may find this section helpful either as a resource to share with their own customers or for development purposes.
Start by navigating to the relevant application in Okta. If you are unsure how to create such an Application, please review this guide for an in-depth explanation.
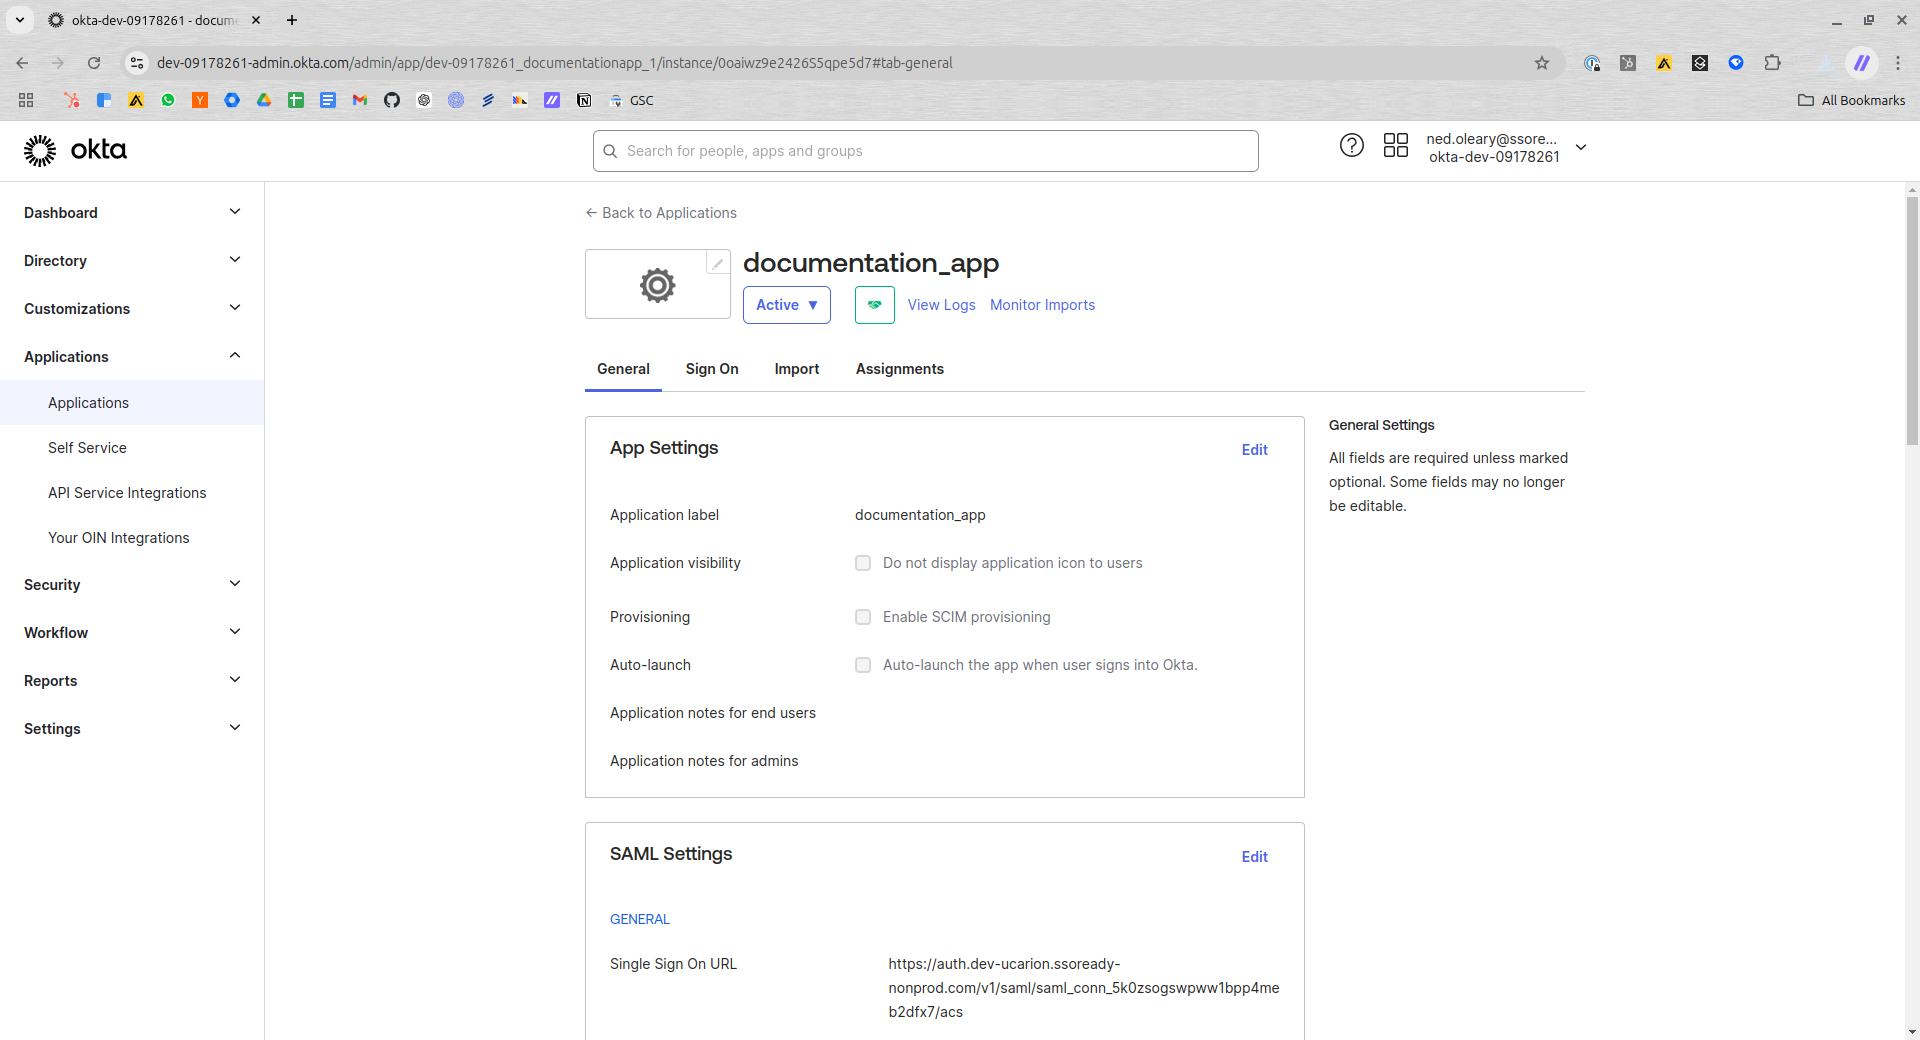
Make sure you’re on the General tab and press Edit on the App Settings card.
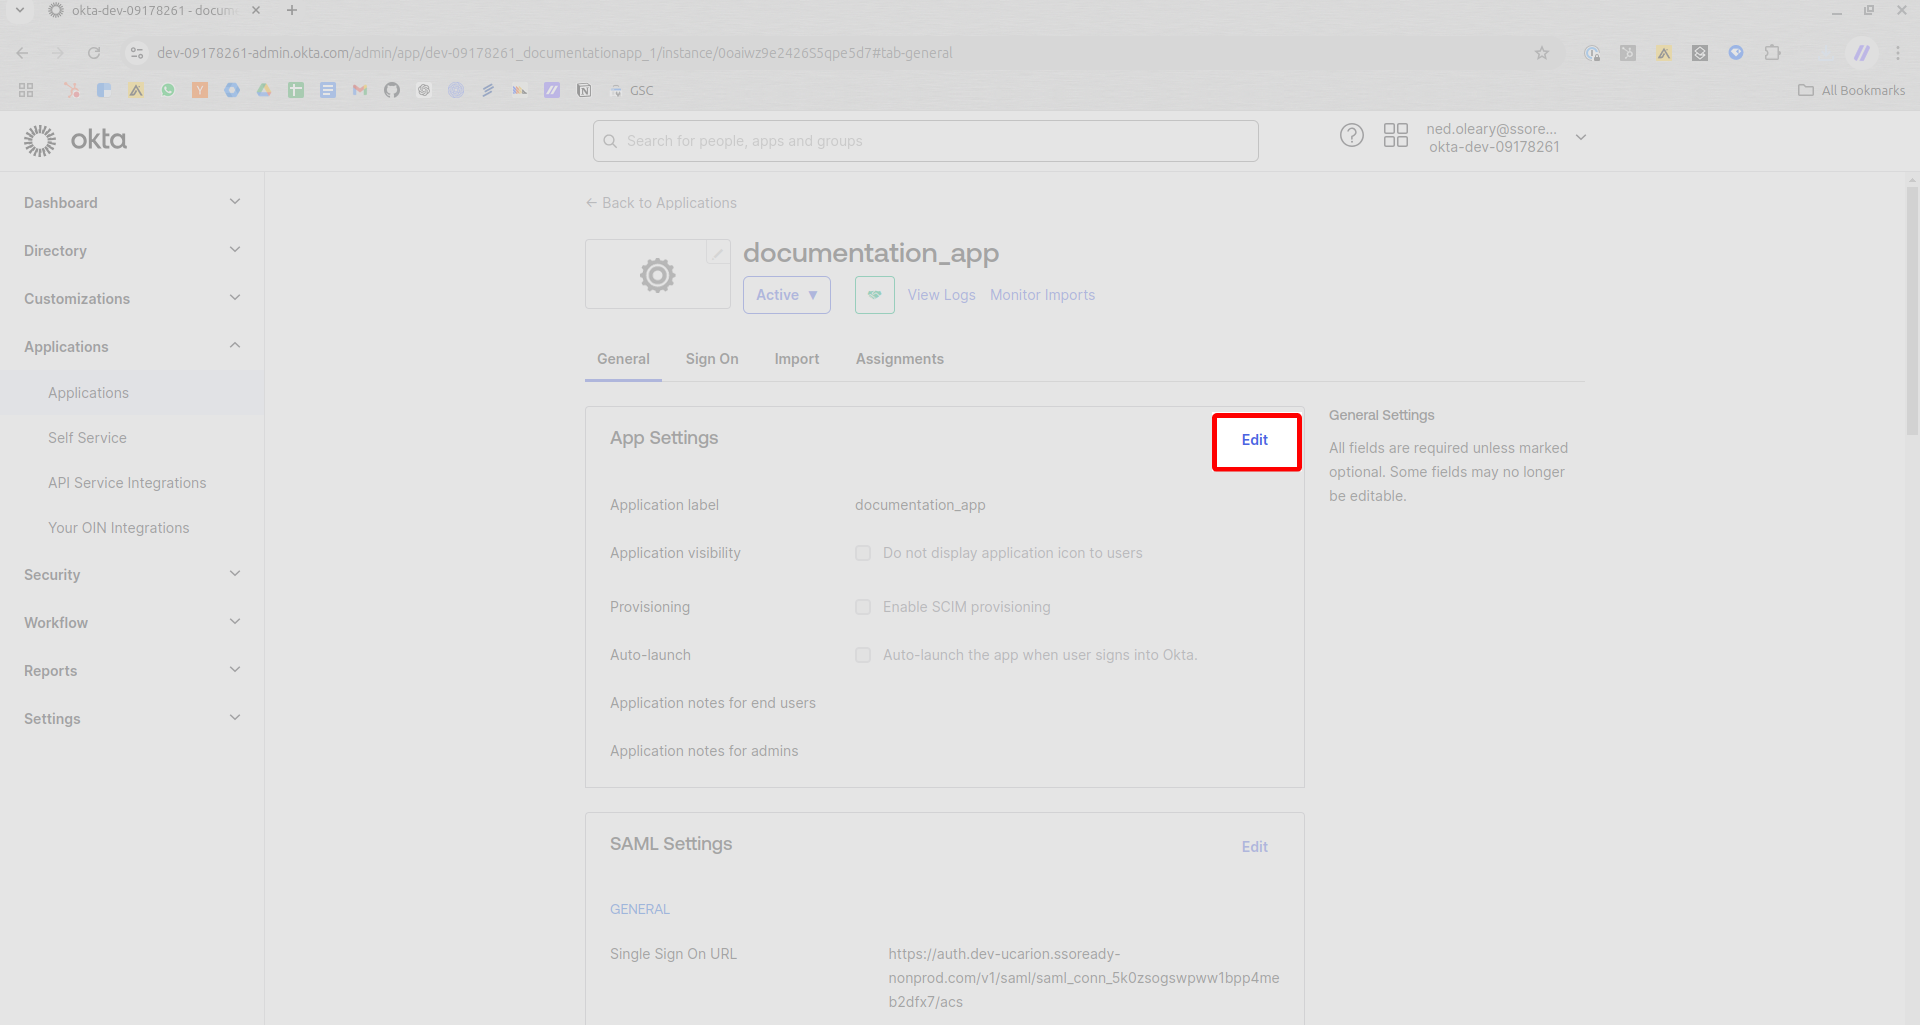
Make sure the Provisioning box shows a checkmark. By default, Okta leaves this box unchecked.
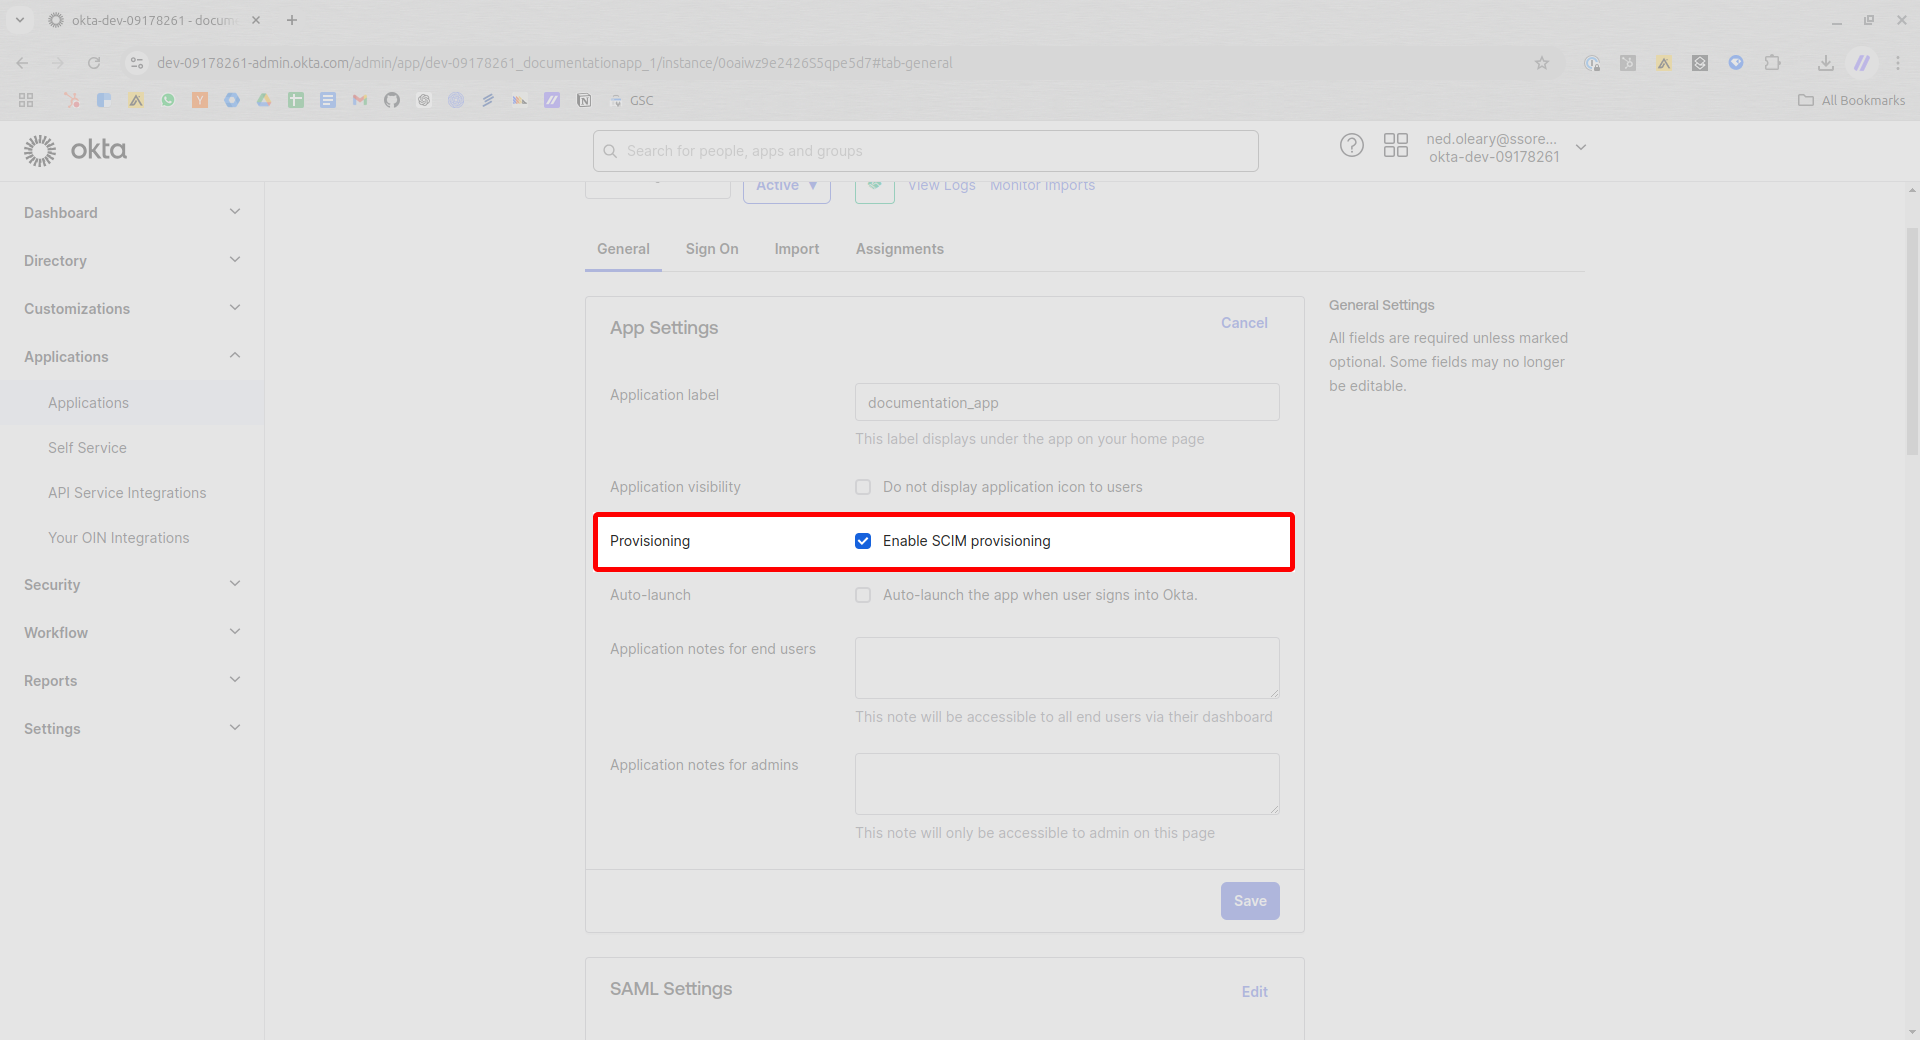
Checking the Enable SCIM provisioning field
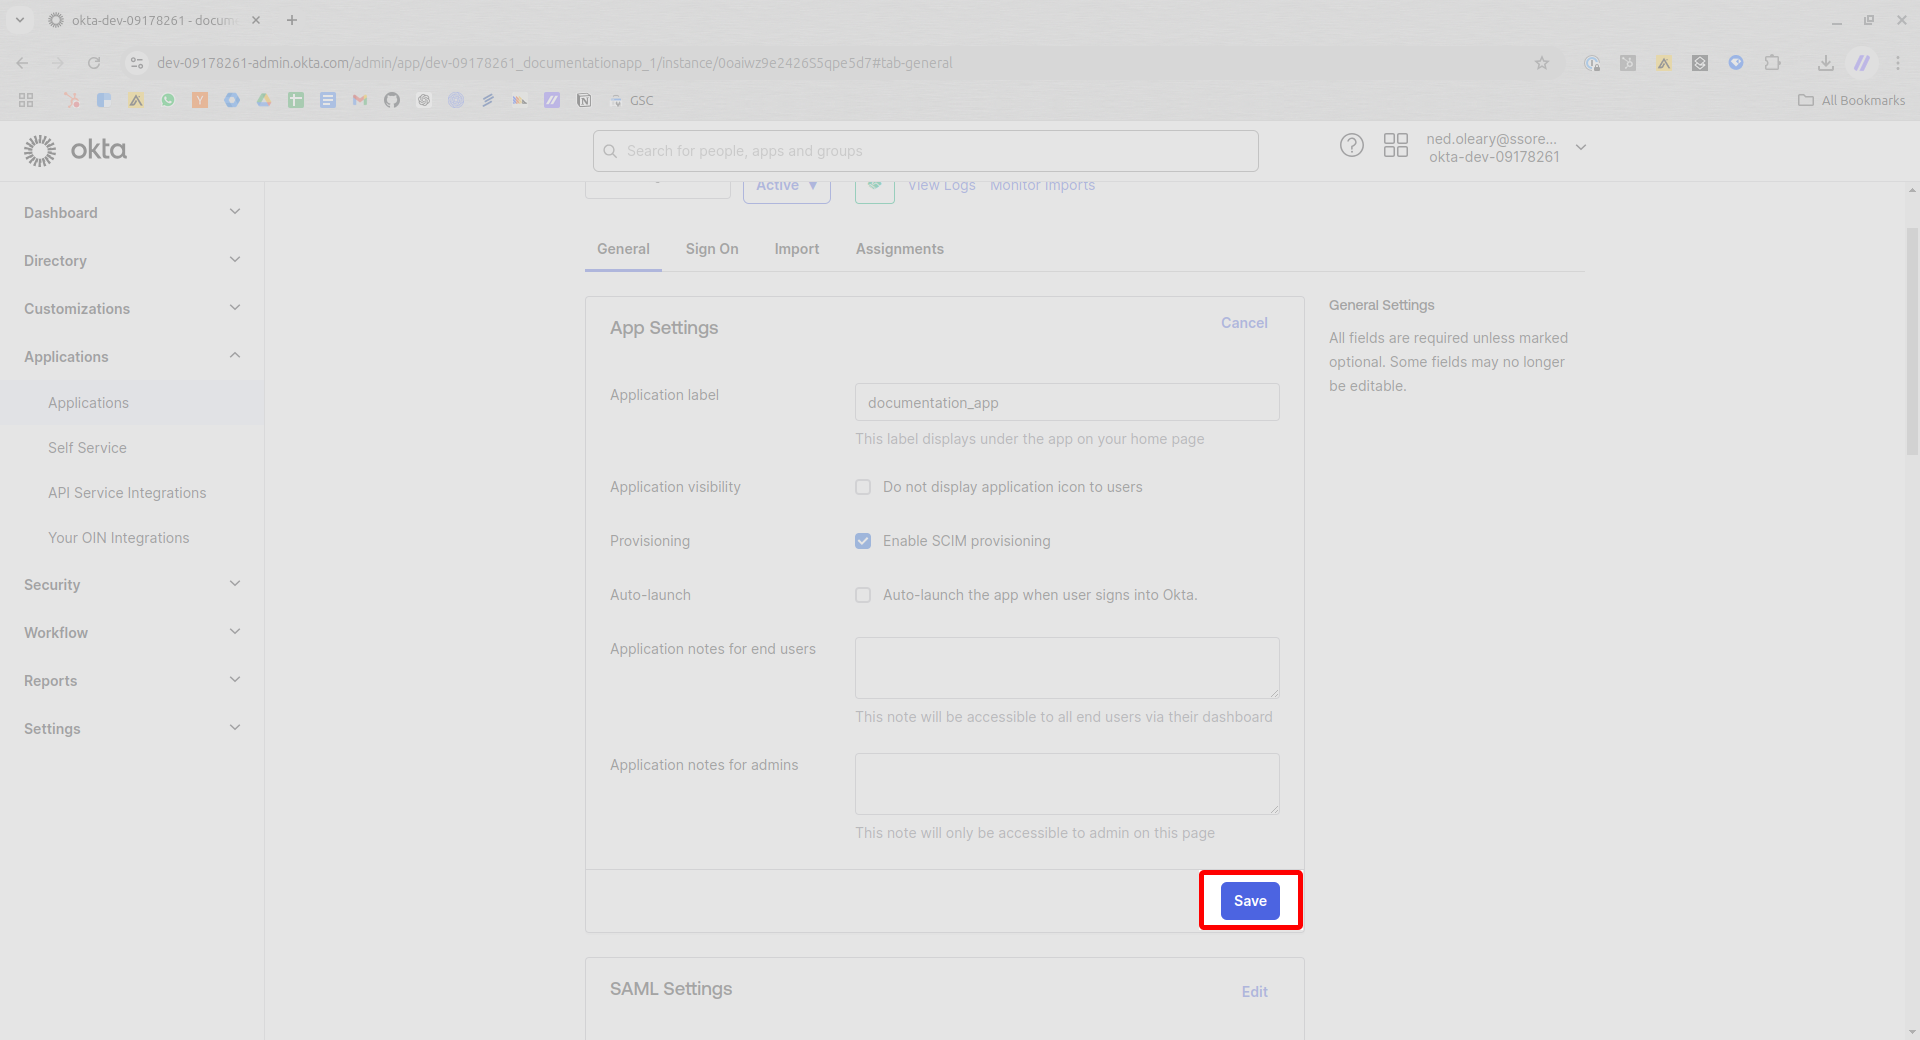
Press Save in the lower right corner.
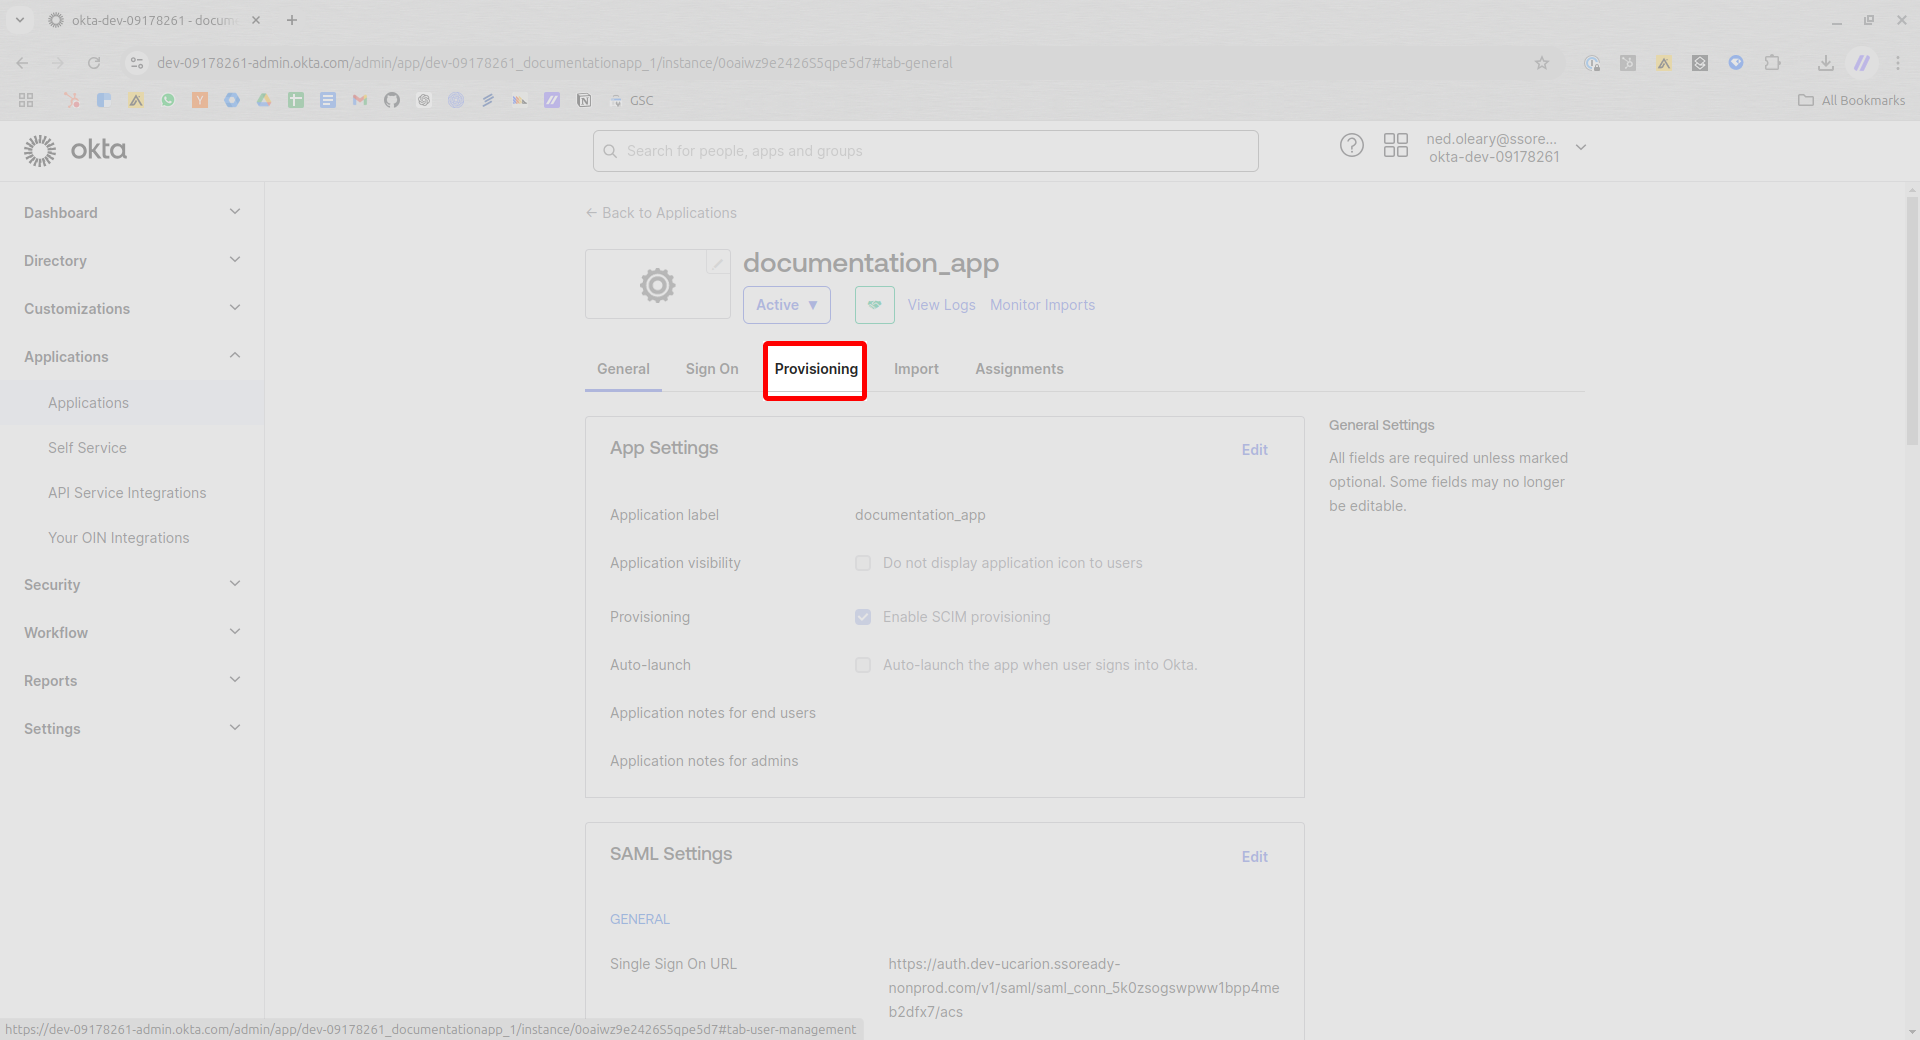
Navigate to the Provisioning tab for the Application.
On the Provisioning tab, click the Edit button toward the top right of the card.
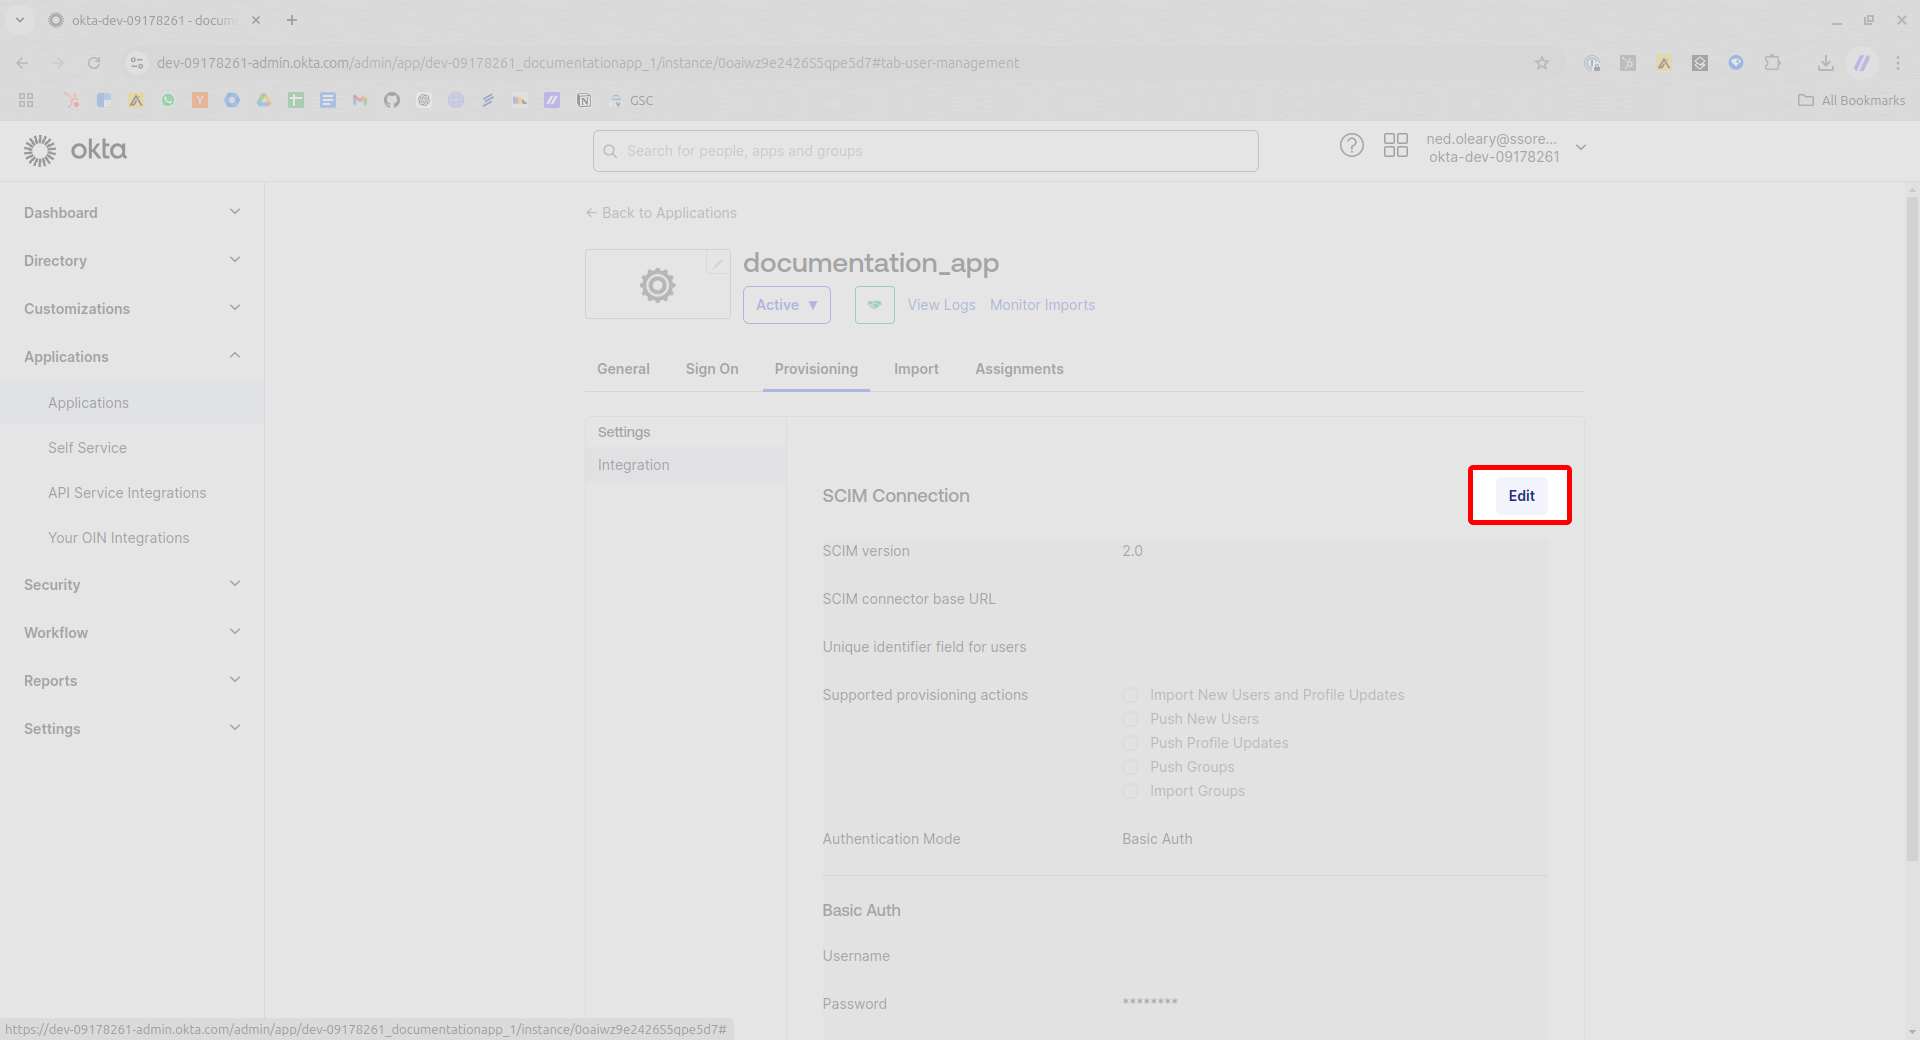
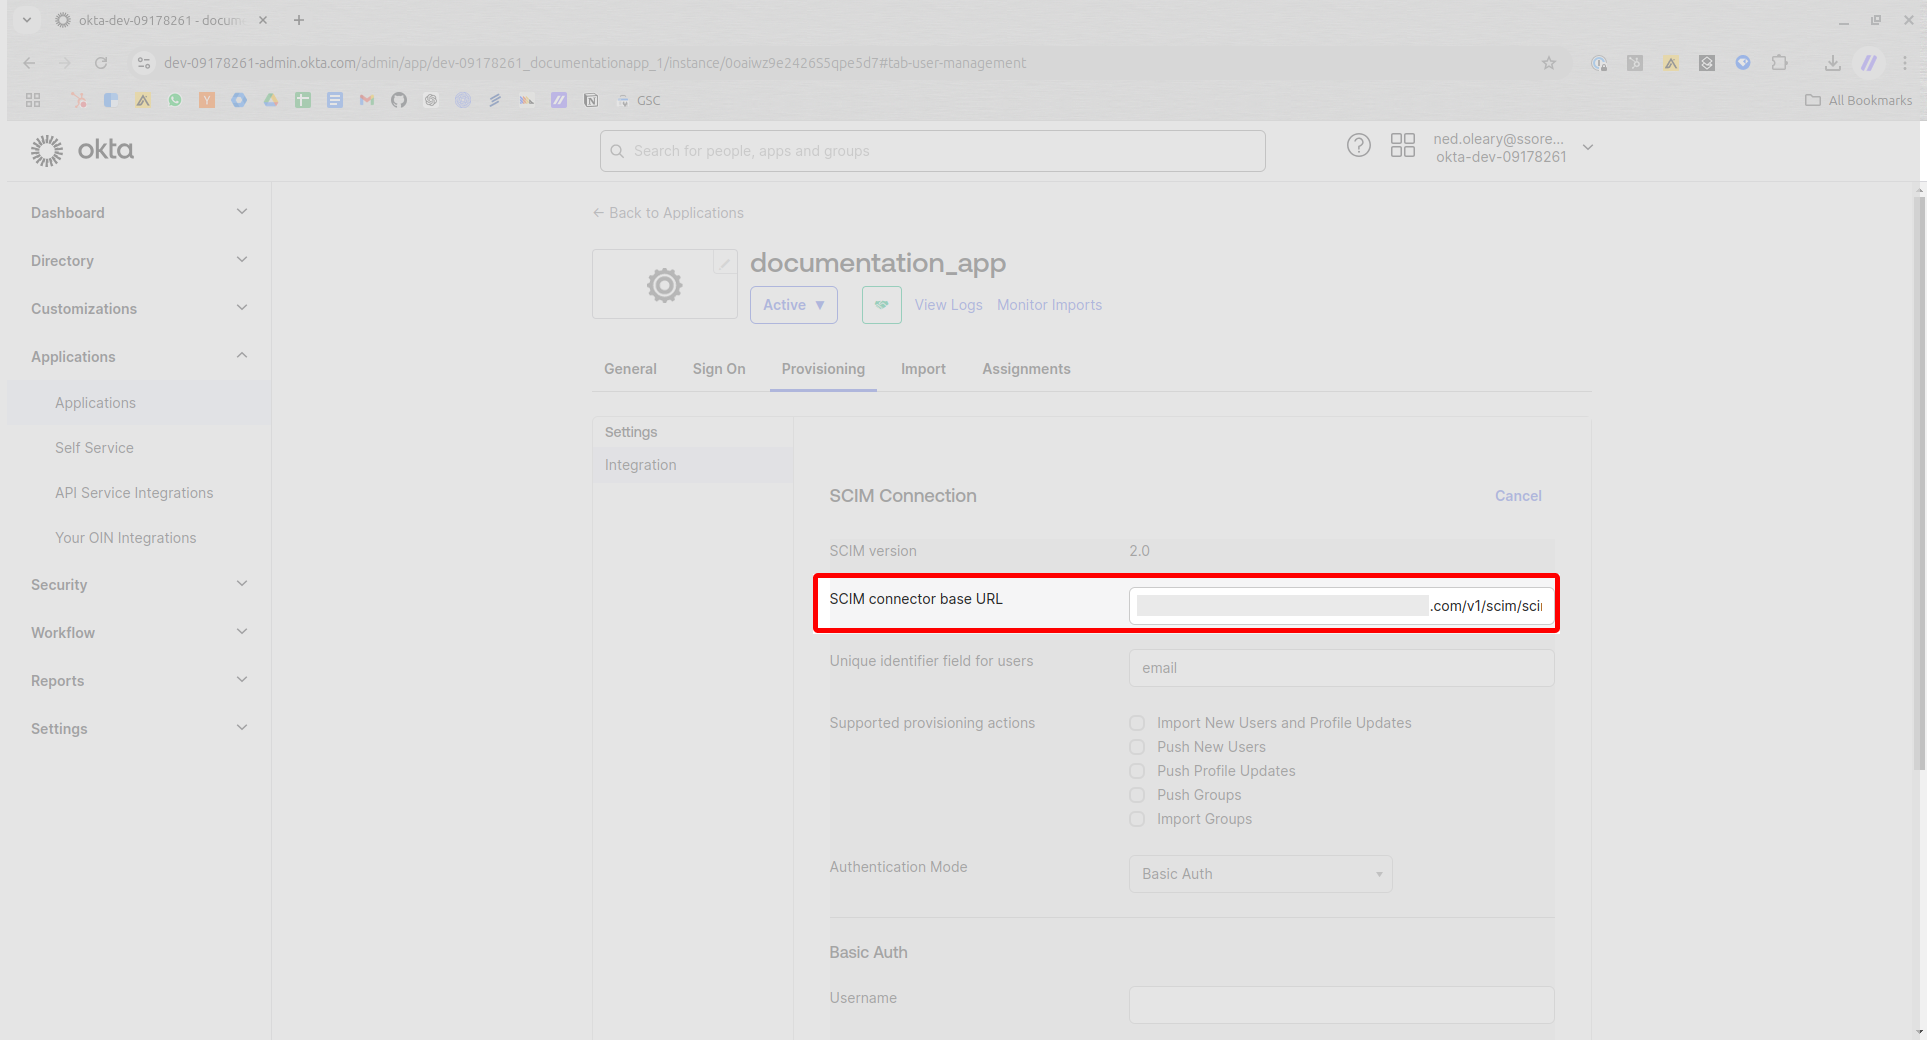
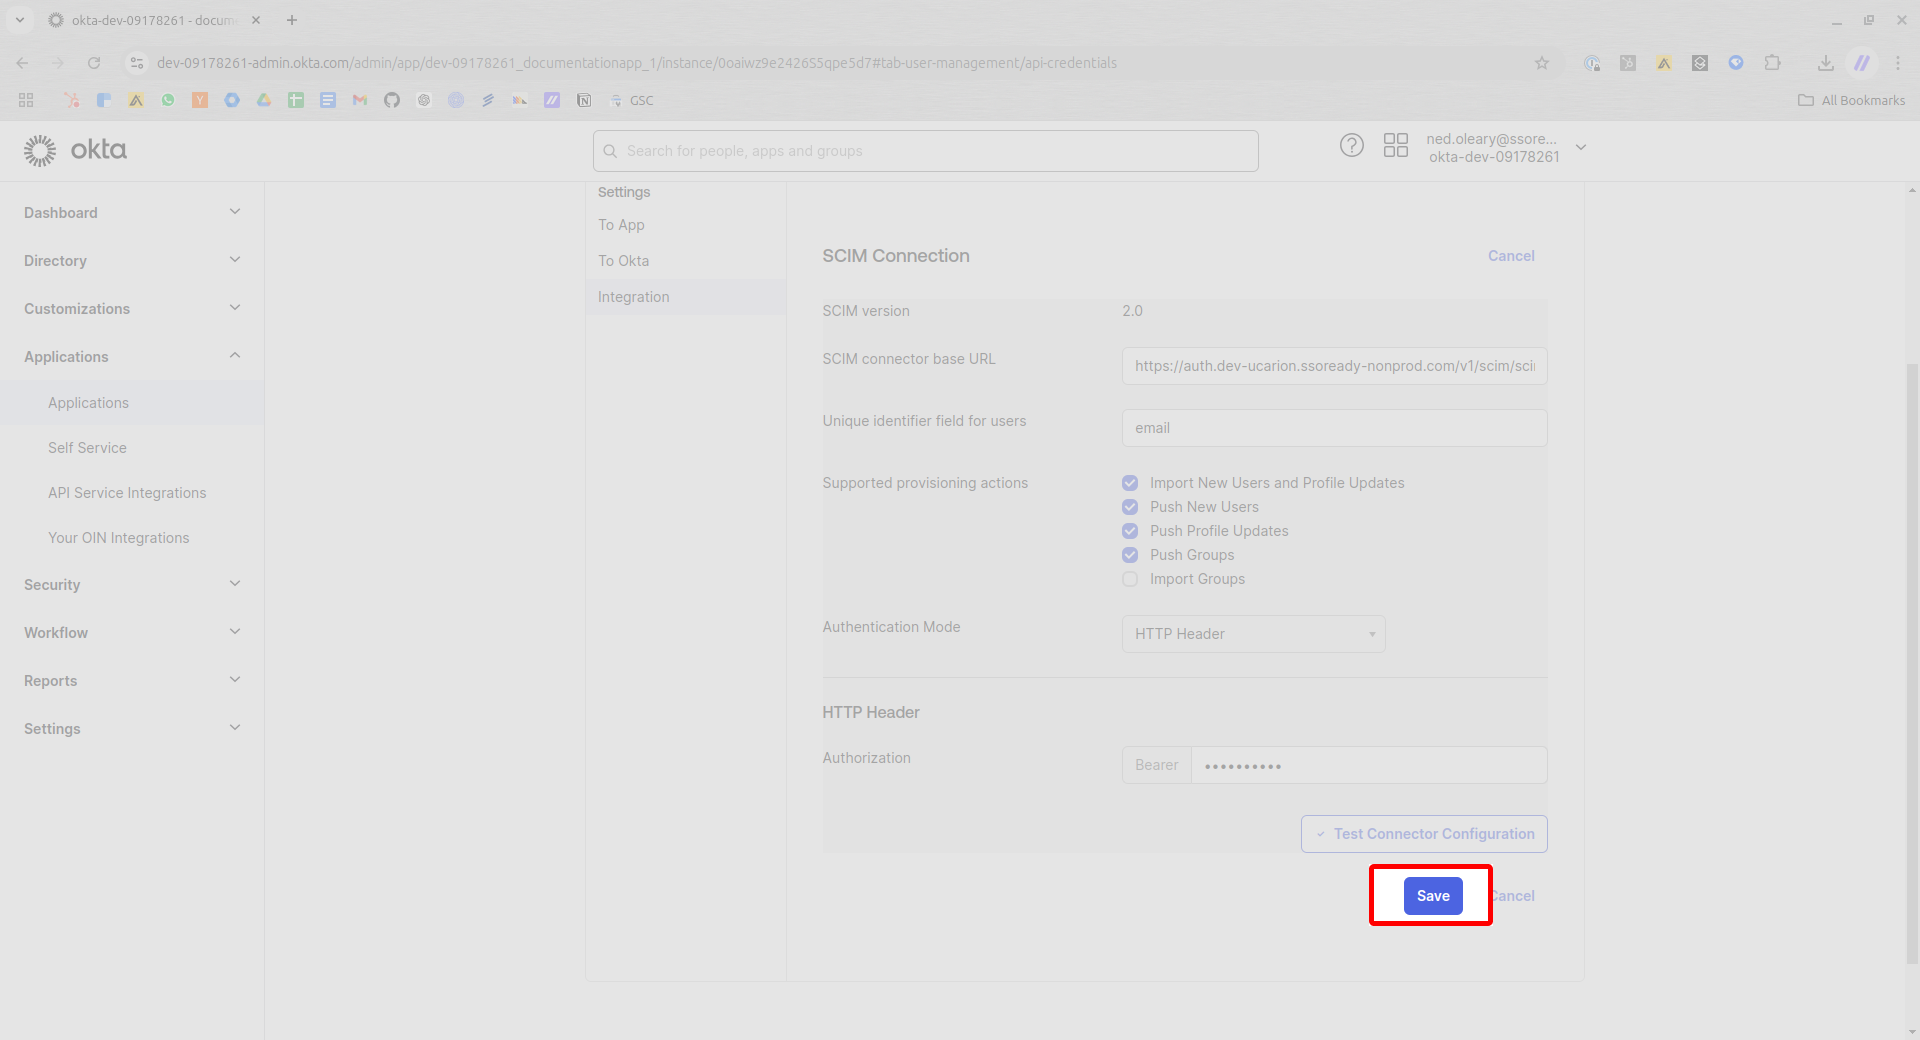
Look for a field marked SCIM connector base URL. This will be the base URL from the SSOReady configuration. Paste the base URL from SSOReady.
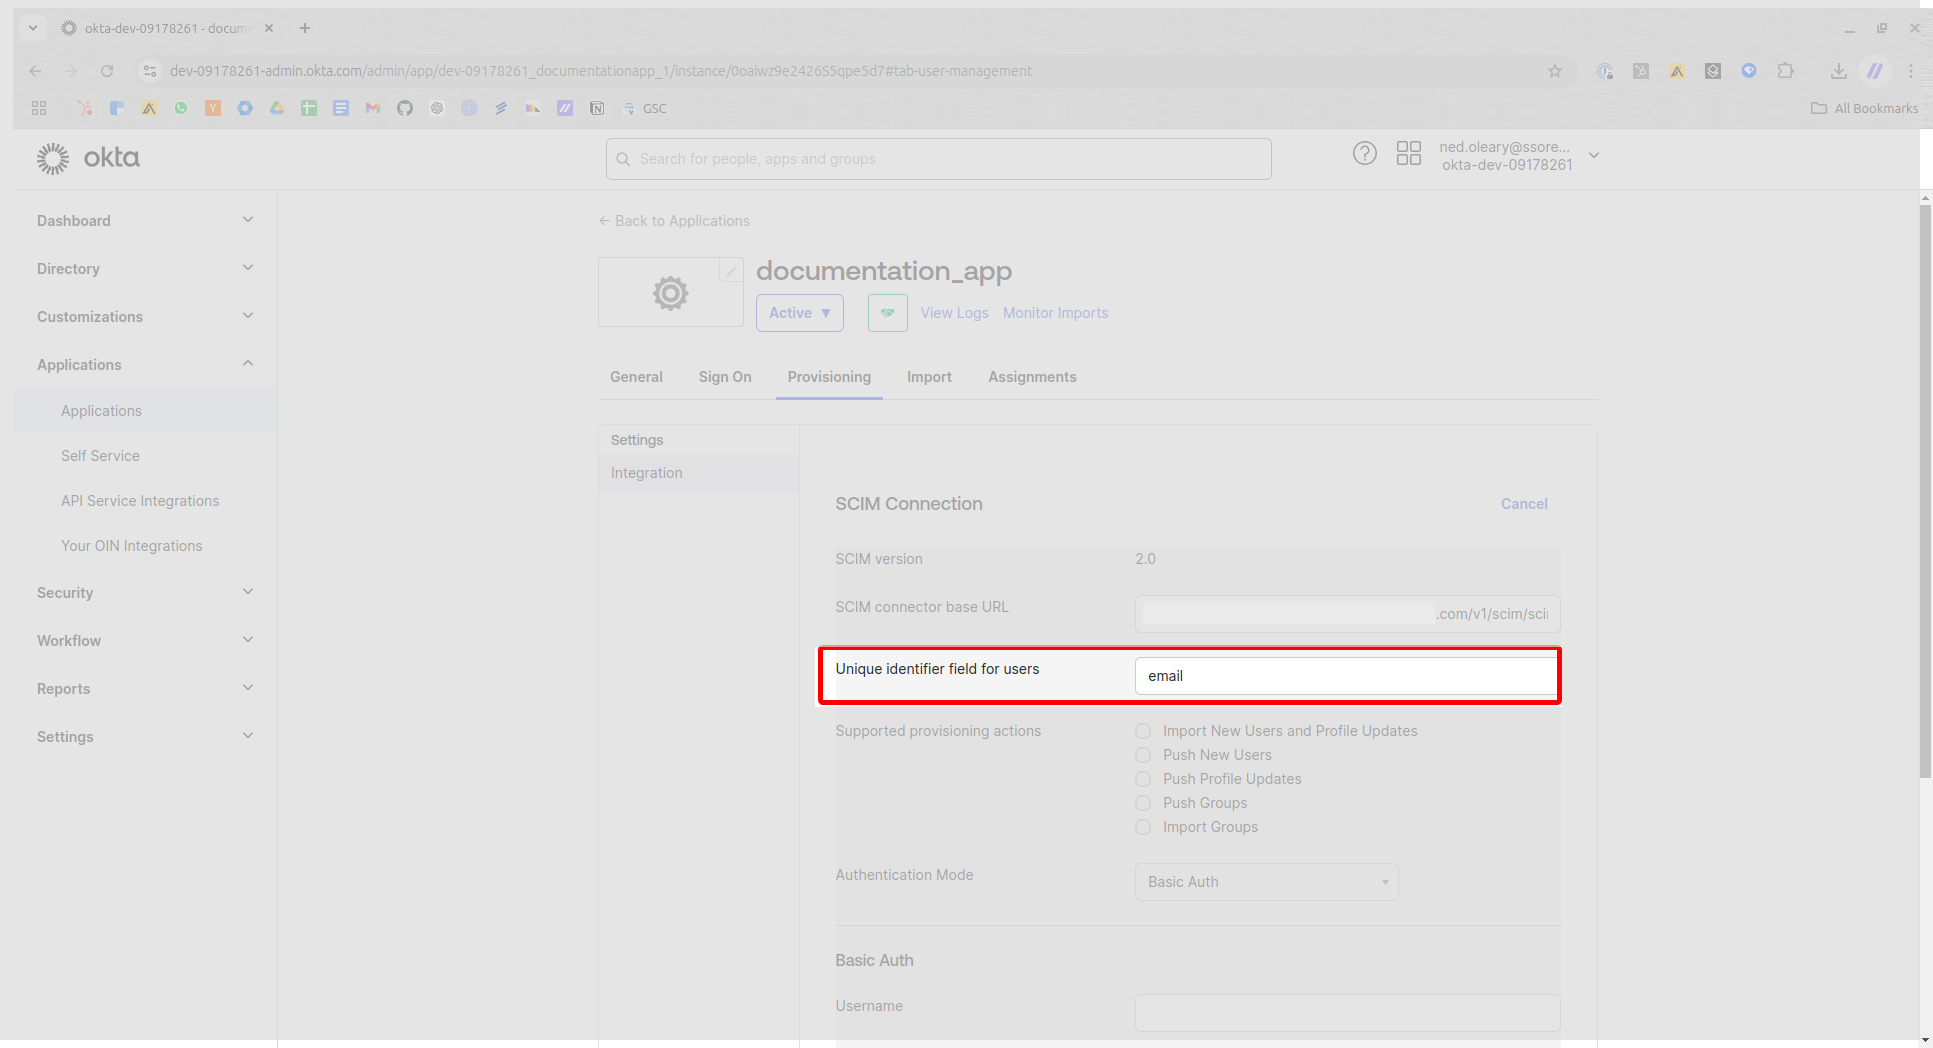
Next, look for a field marked Unique identifier field for users. We need this to say “email” exactly. SSOReady relies on users’ emails as a unique identifier.
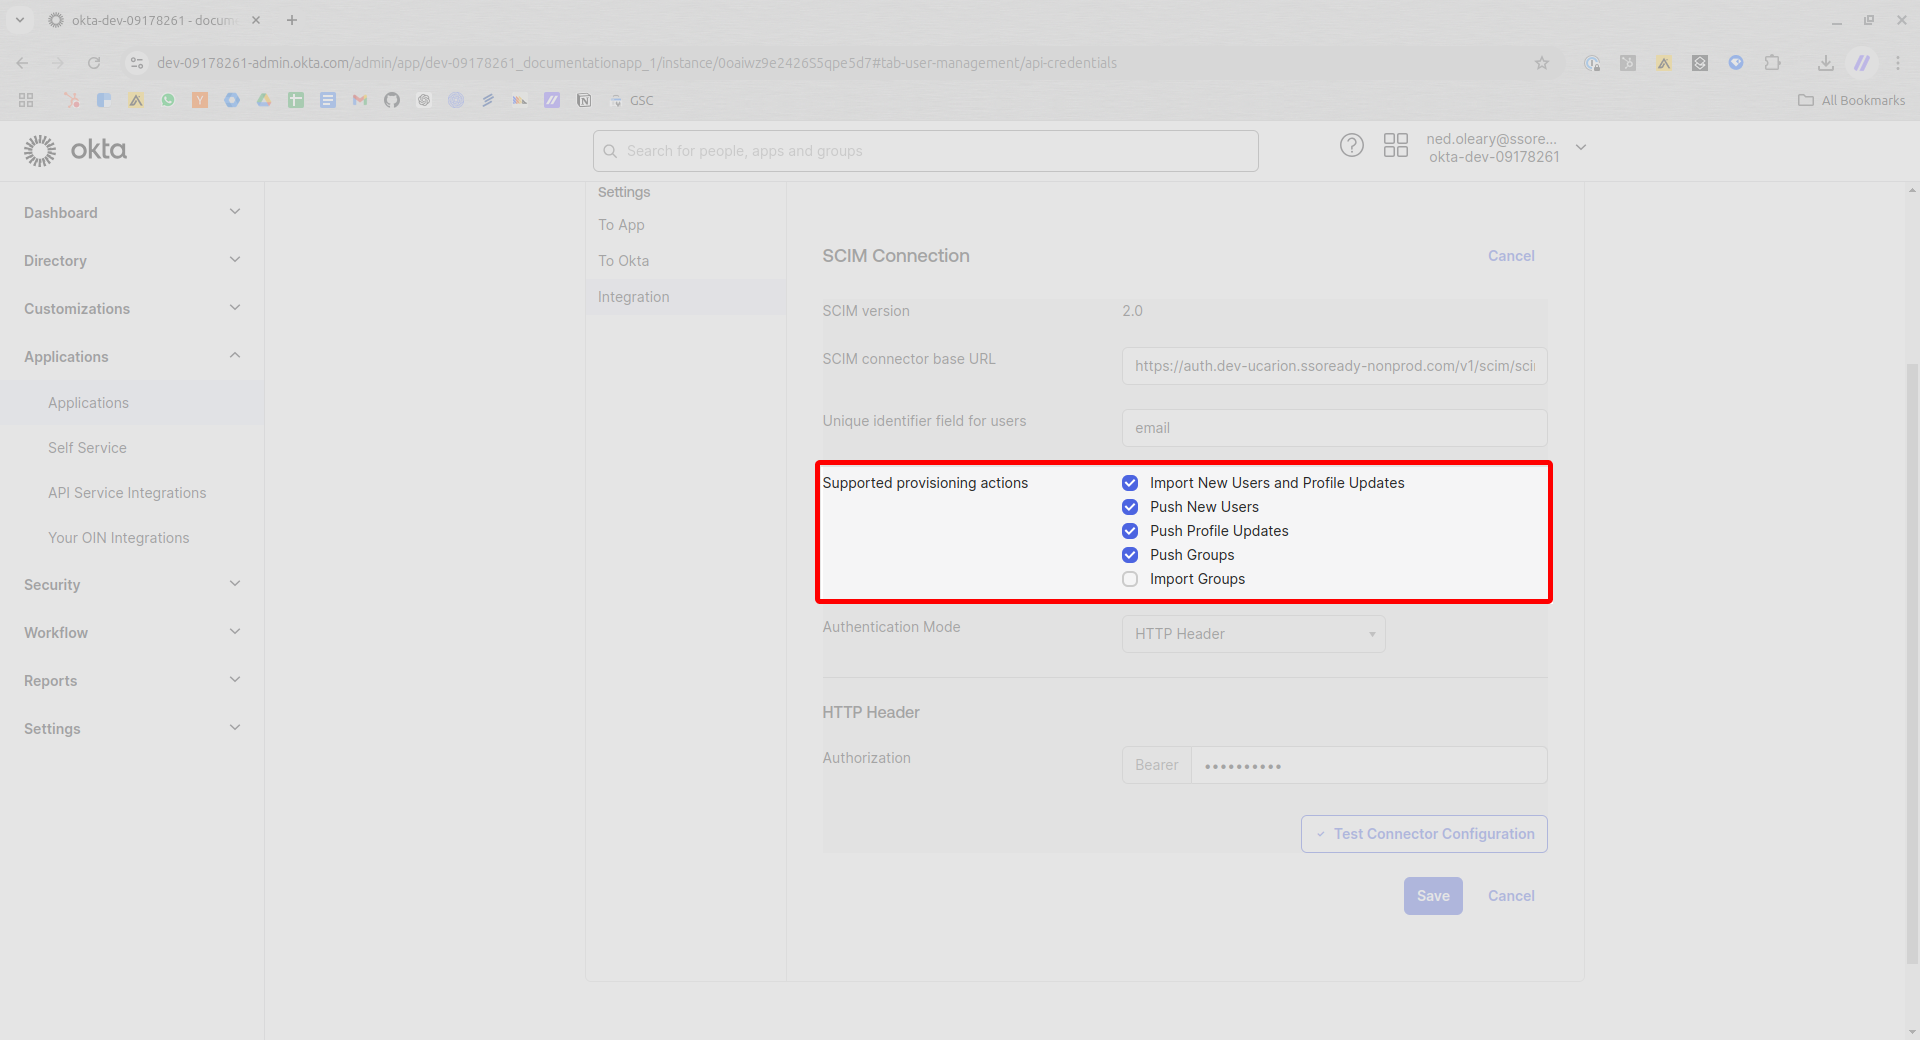
Look for a series of checkboxes labeled Supported provisioning actions. You will see five checkboxes. Set your configuration to match the following:
- Import New Users and Profile Updates
- Push New Users
- Push Profile Updates
- Push Groups
- Import Groups
Ensure that Import Groups remains unchecked. The SCIM Connection will fail otherwise.
Now look for a dropdown menu labeled Authentication Mode. This must change from its default value to HTTP Header.

Now paste the bearer token from SSOReady in the field marked Authorization.
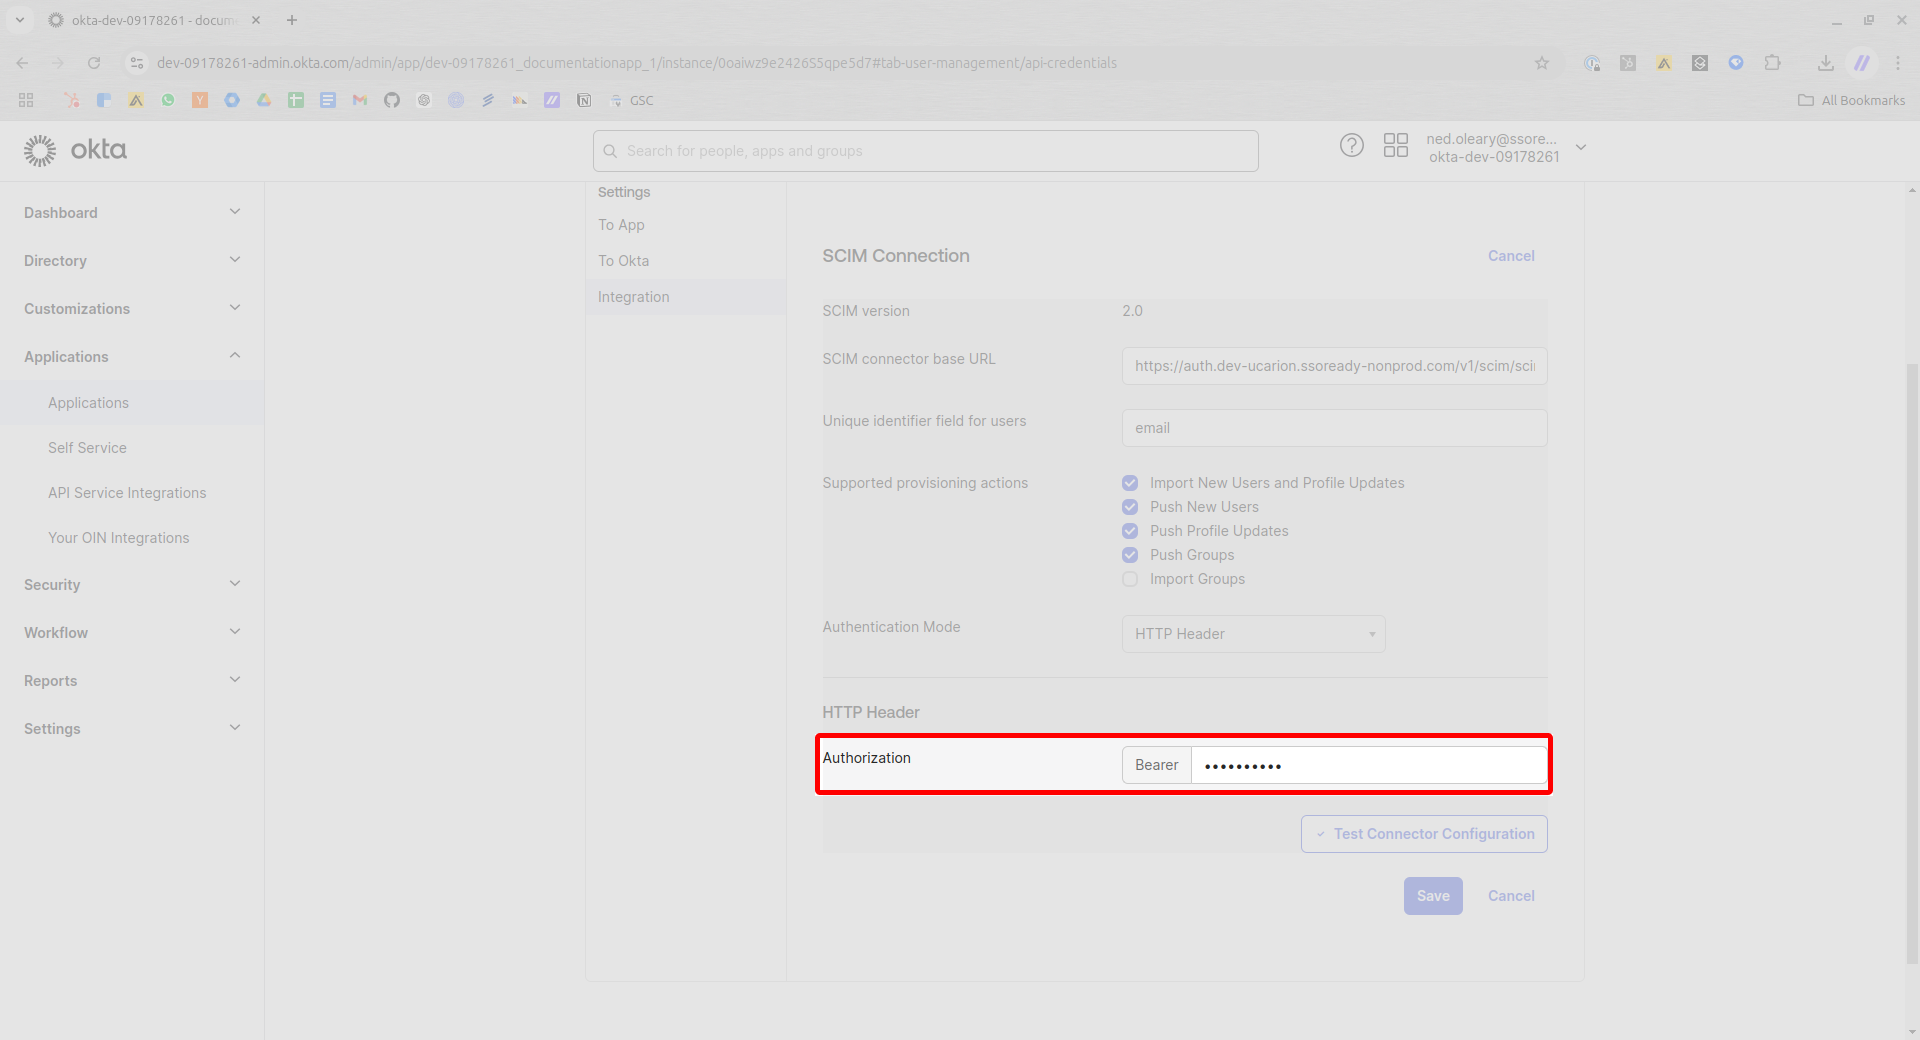
Then once more hit Save in the lower right.
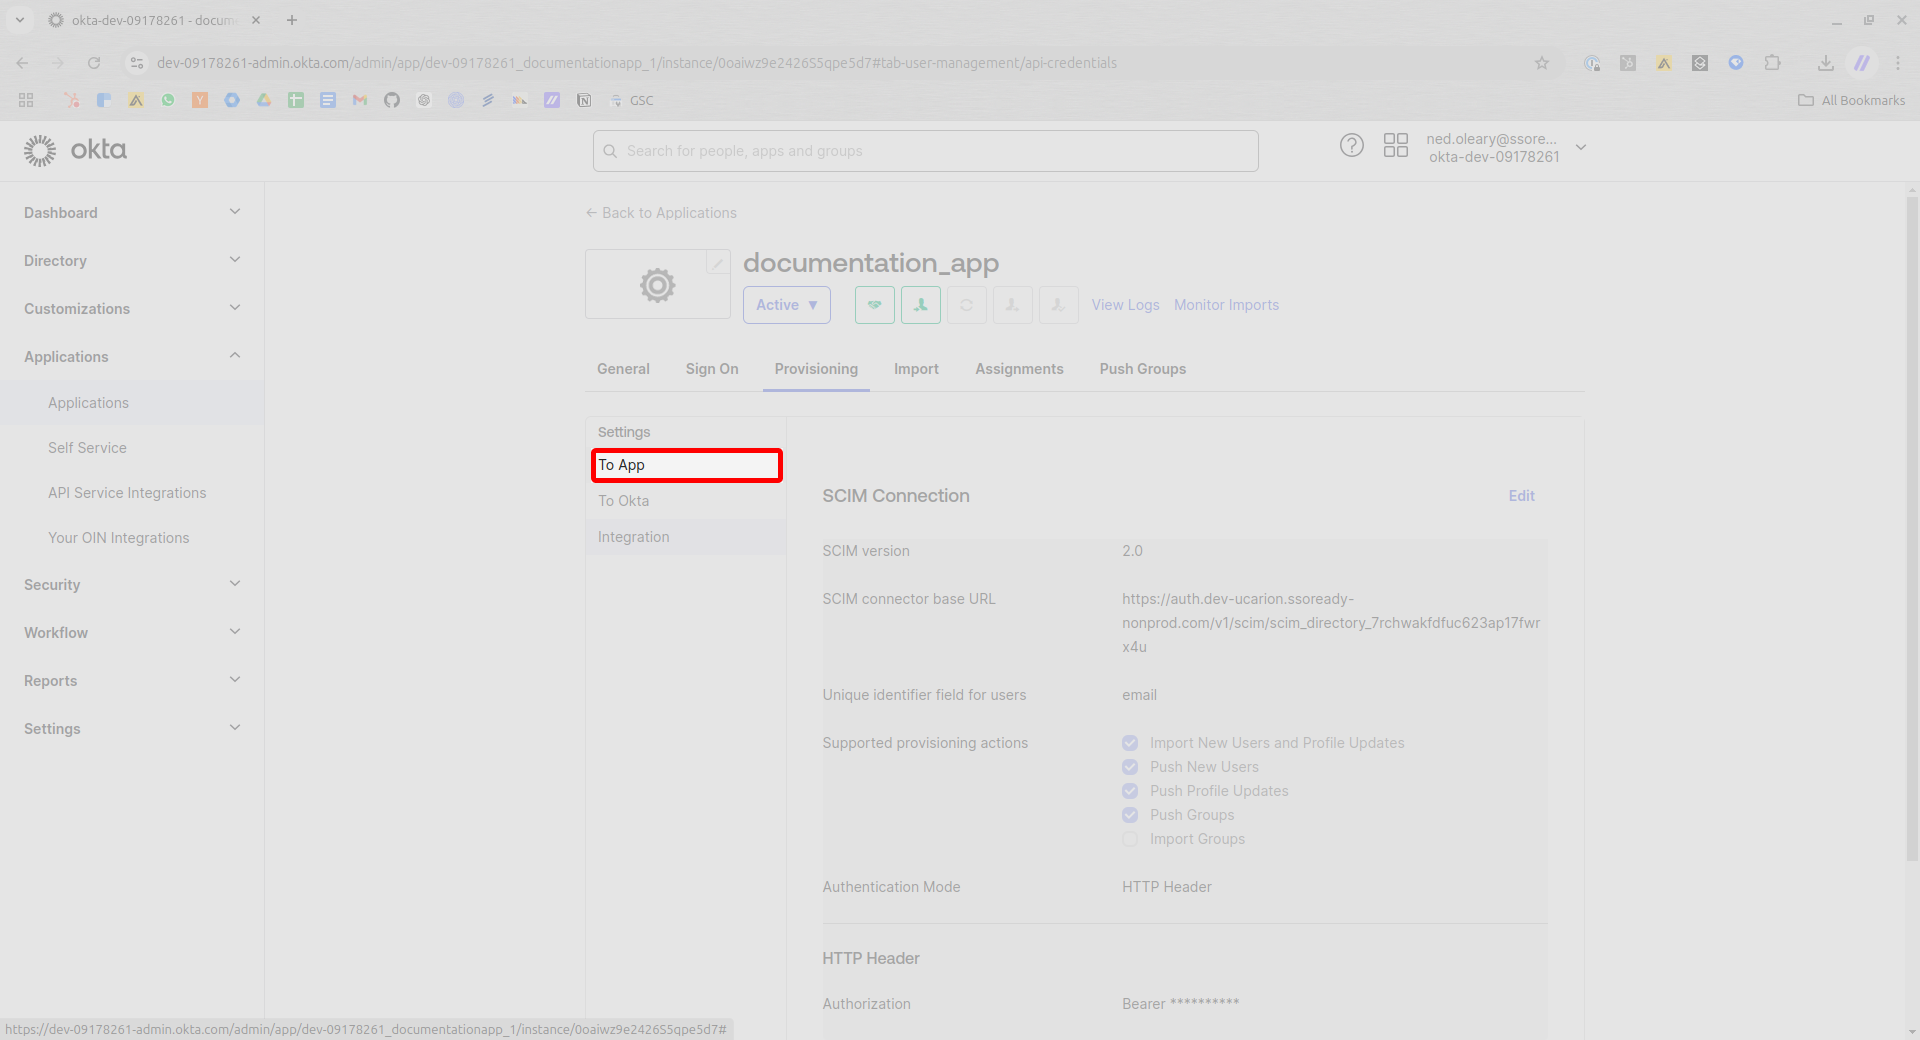
Now look in the sidebar to the left and find the item marked To App. Click this.
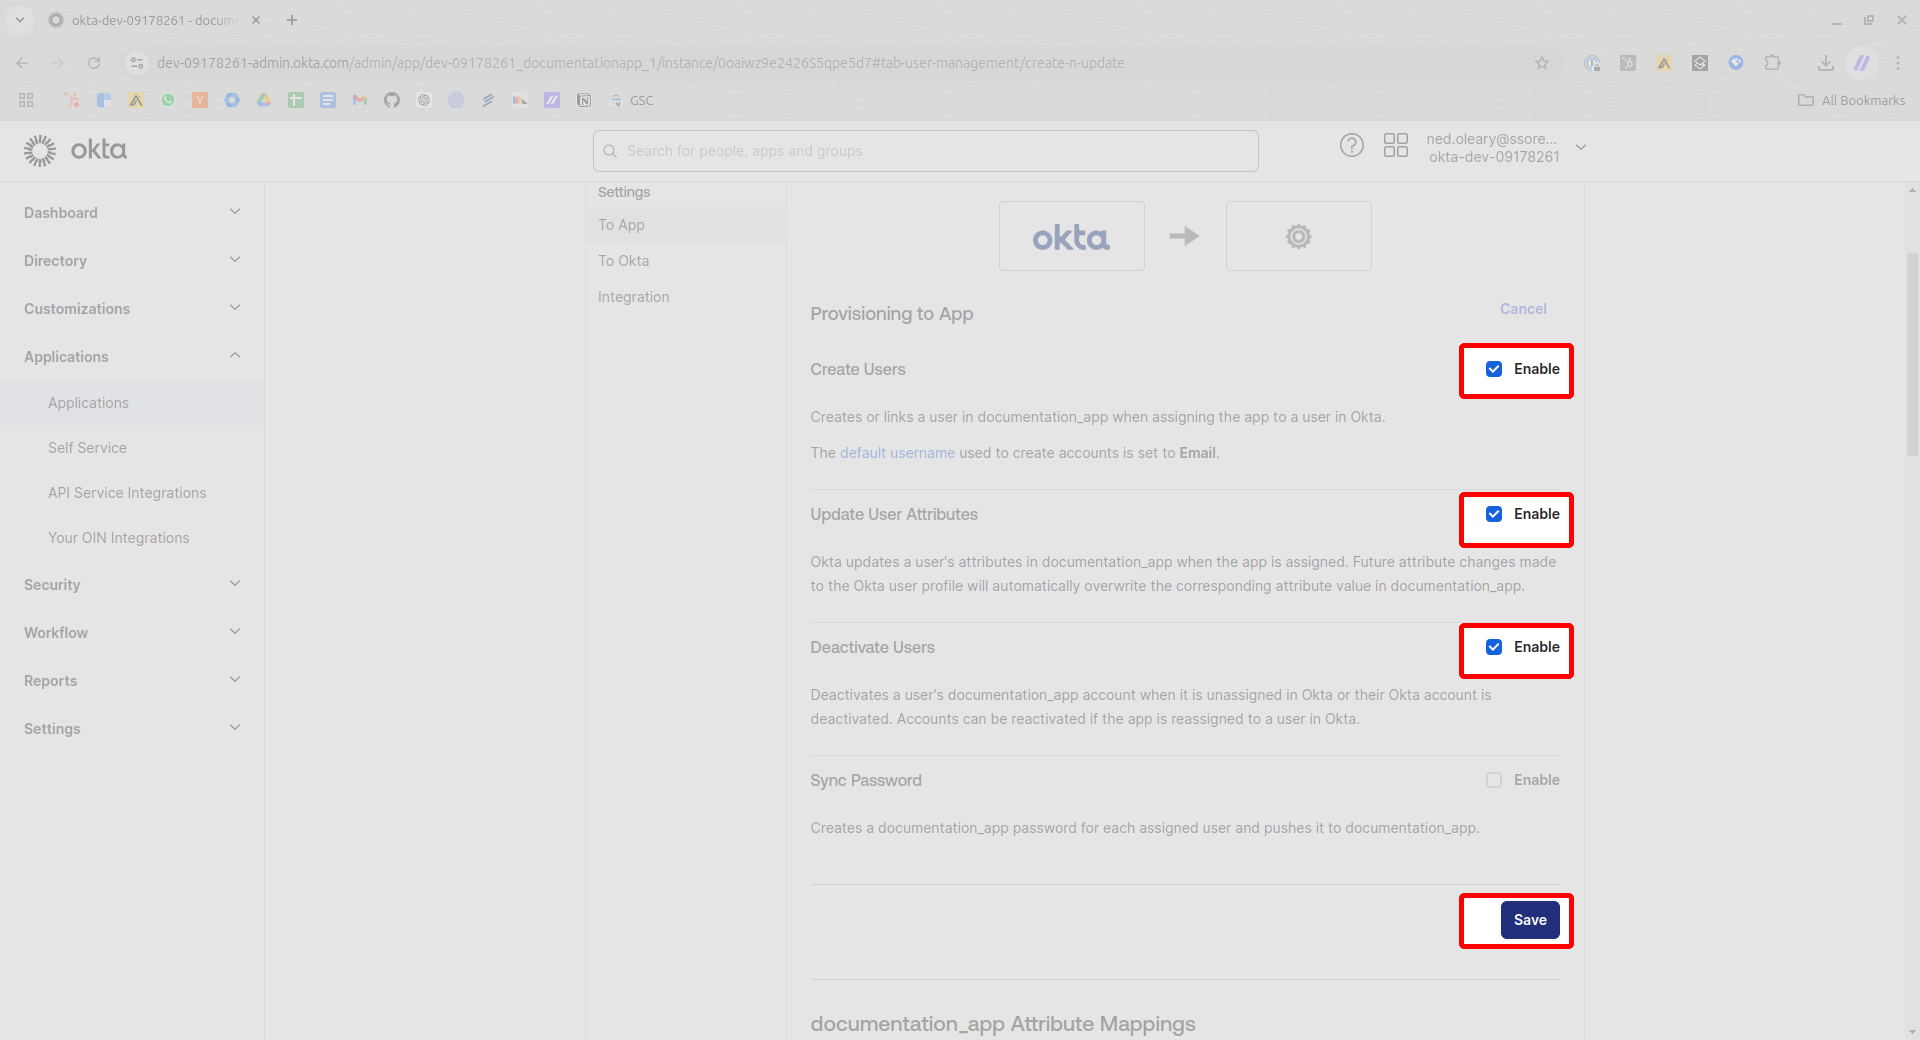
You’ll see four checkboxes. Set them to match the following:
- Create Users
- Update User Attributes
- Deactivate Users
- Sync Password
Then press Save in the lower right.
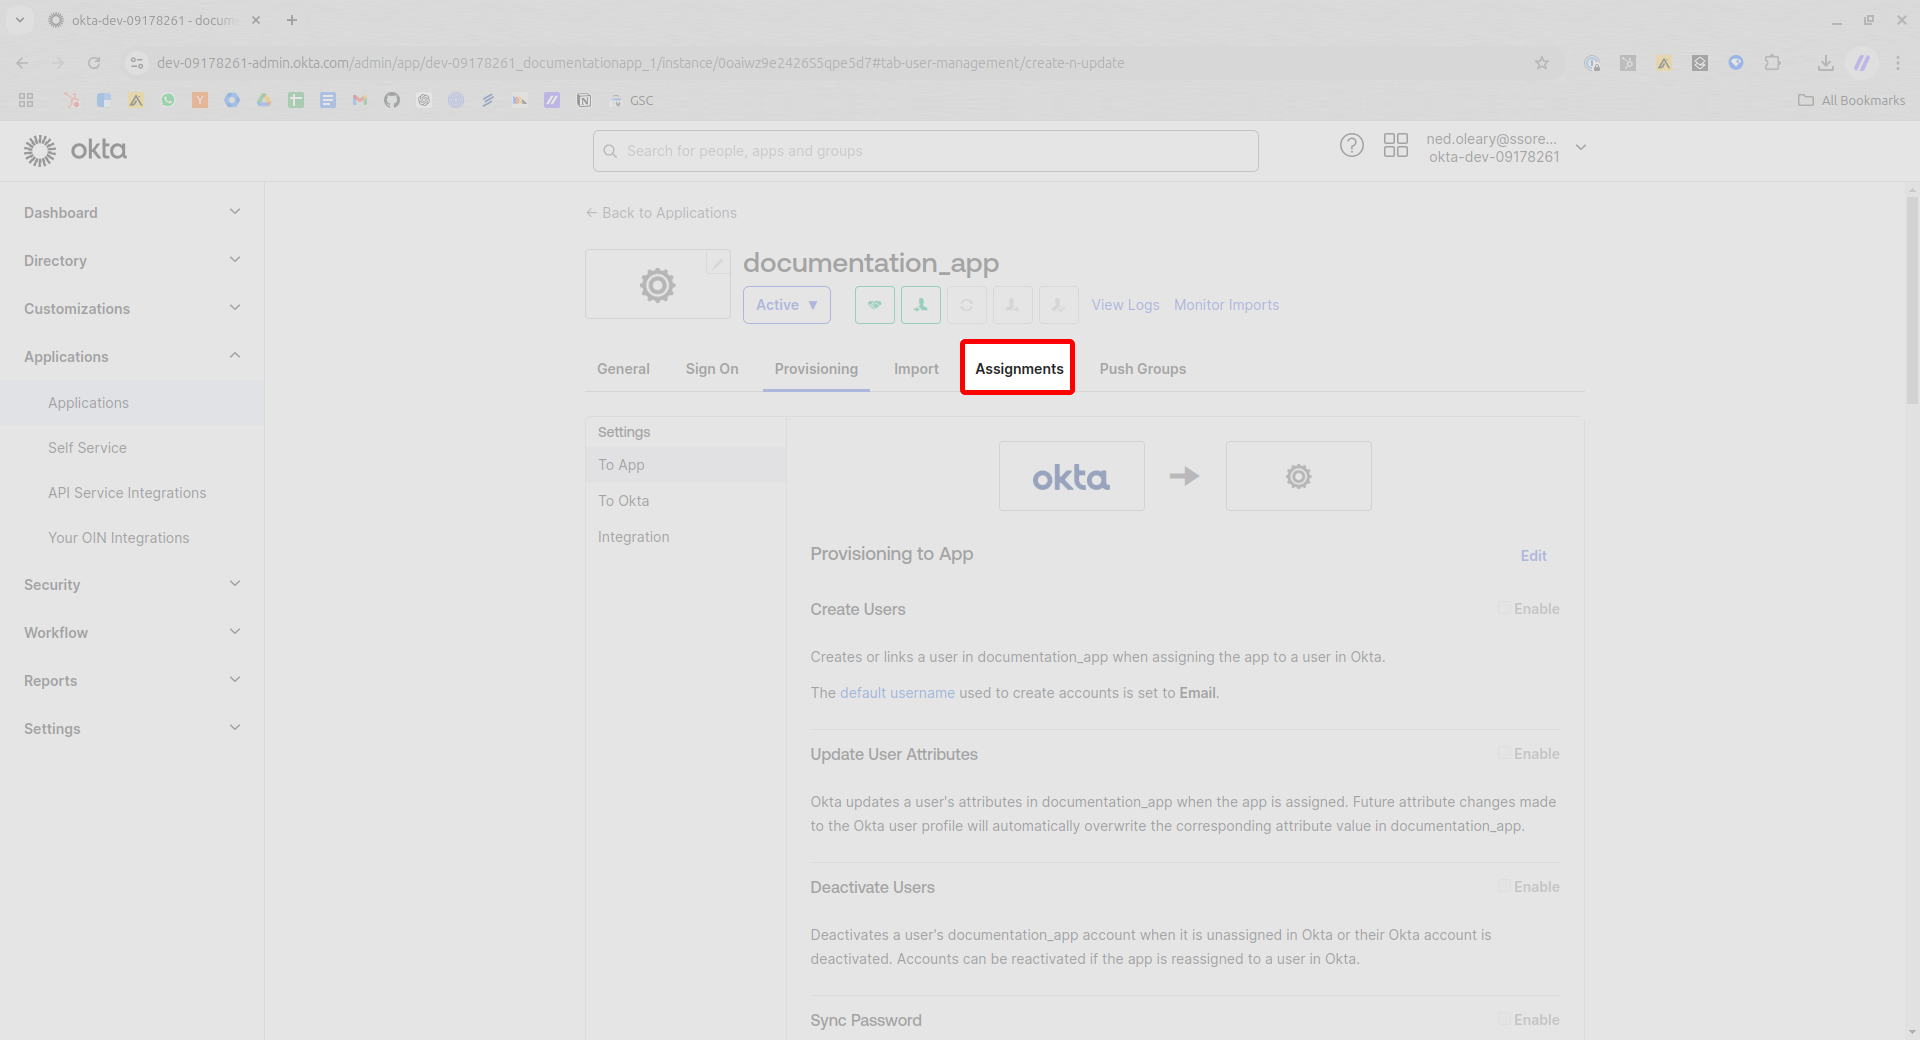
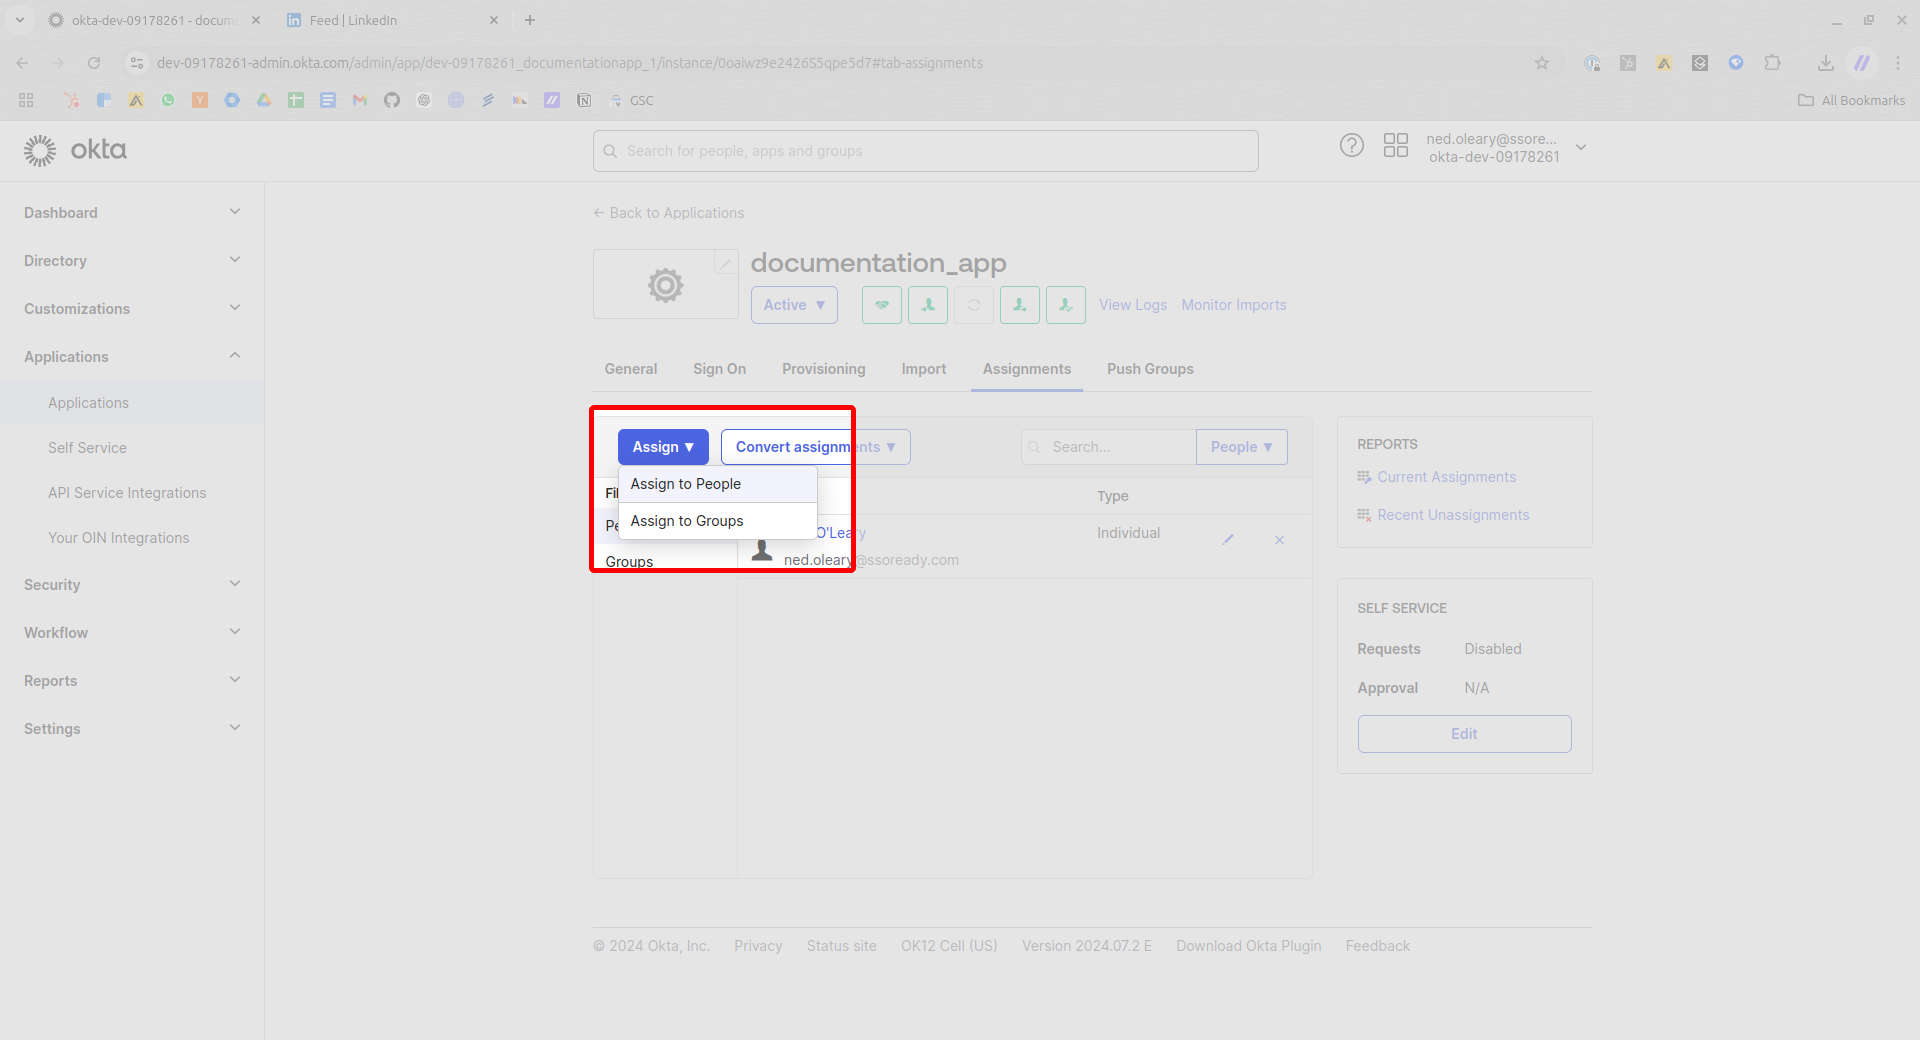
Now navigate to the Assignments tab.
Using the Assign dropdown, choose to assign the relevant People (i.e. users) or Groups. This guide uses People.
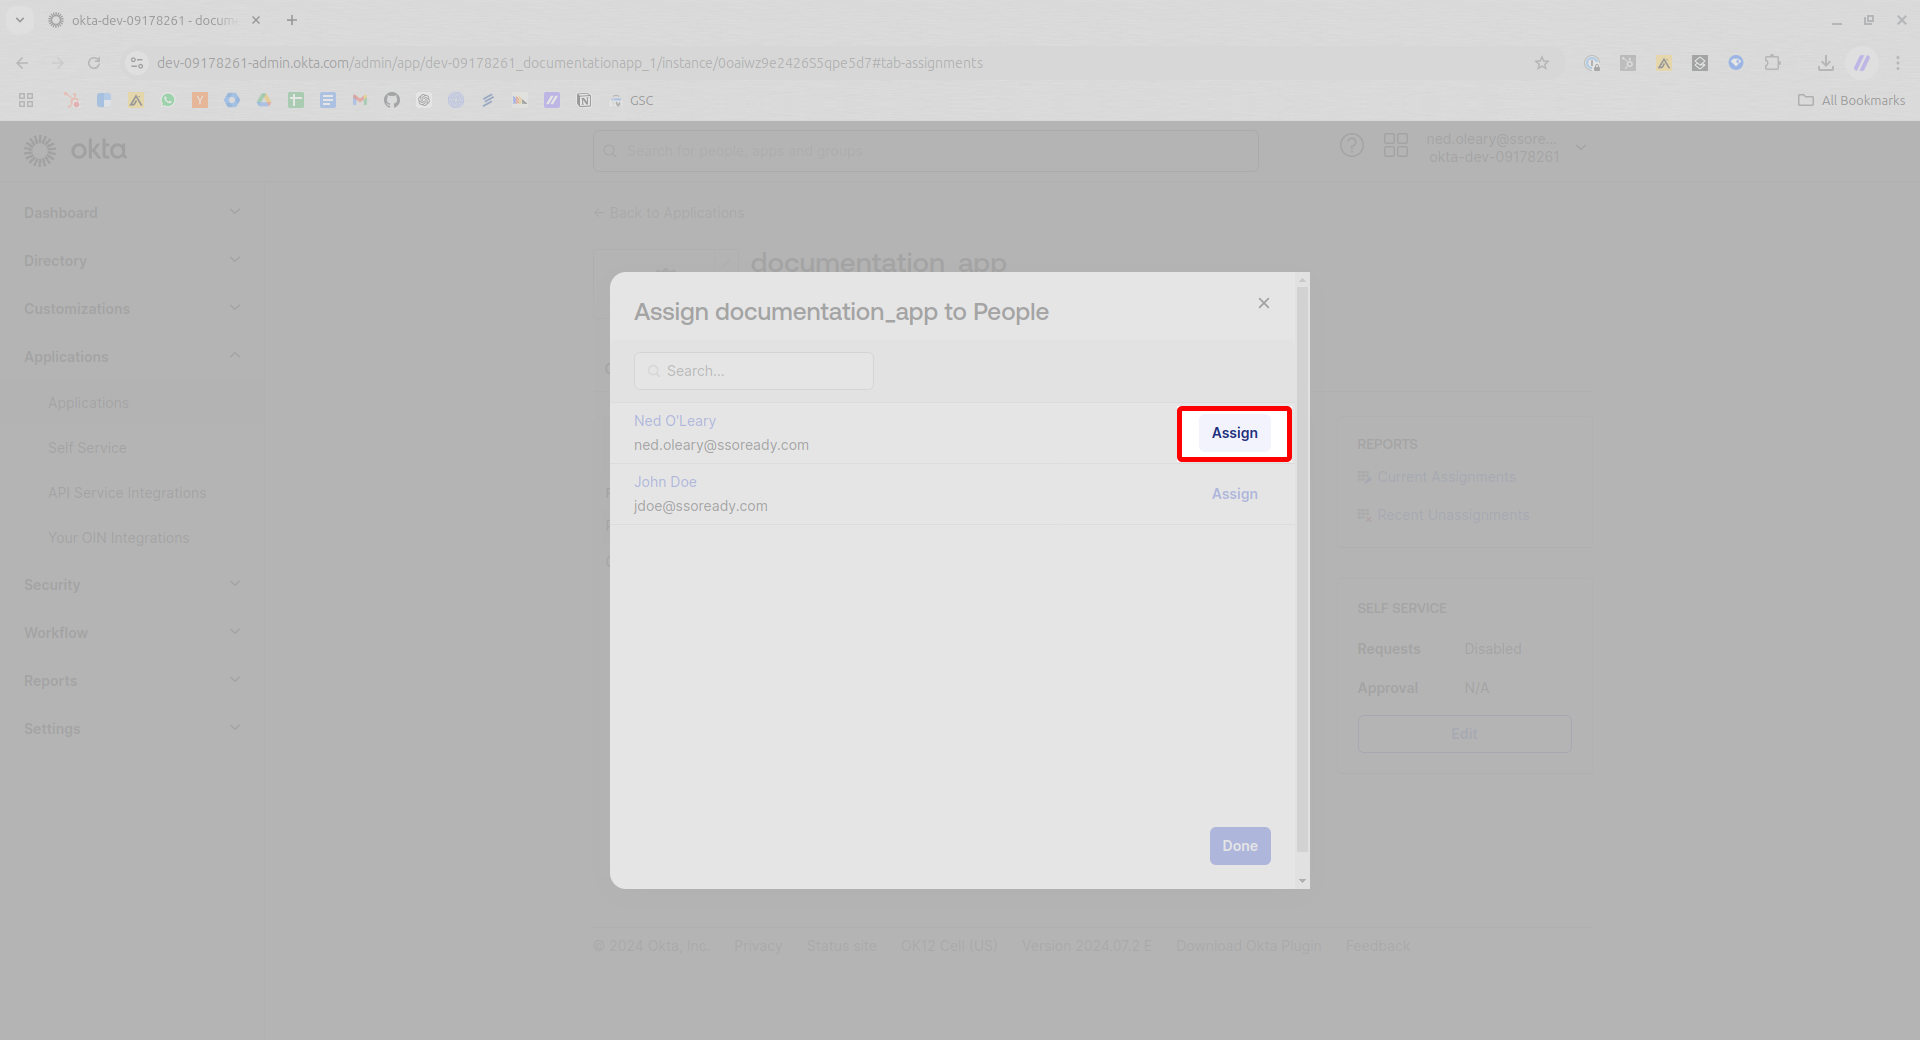
You’ll now see a list of People. For each that you wish to assign to the Application, press the Assign button to the right.
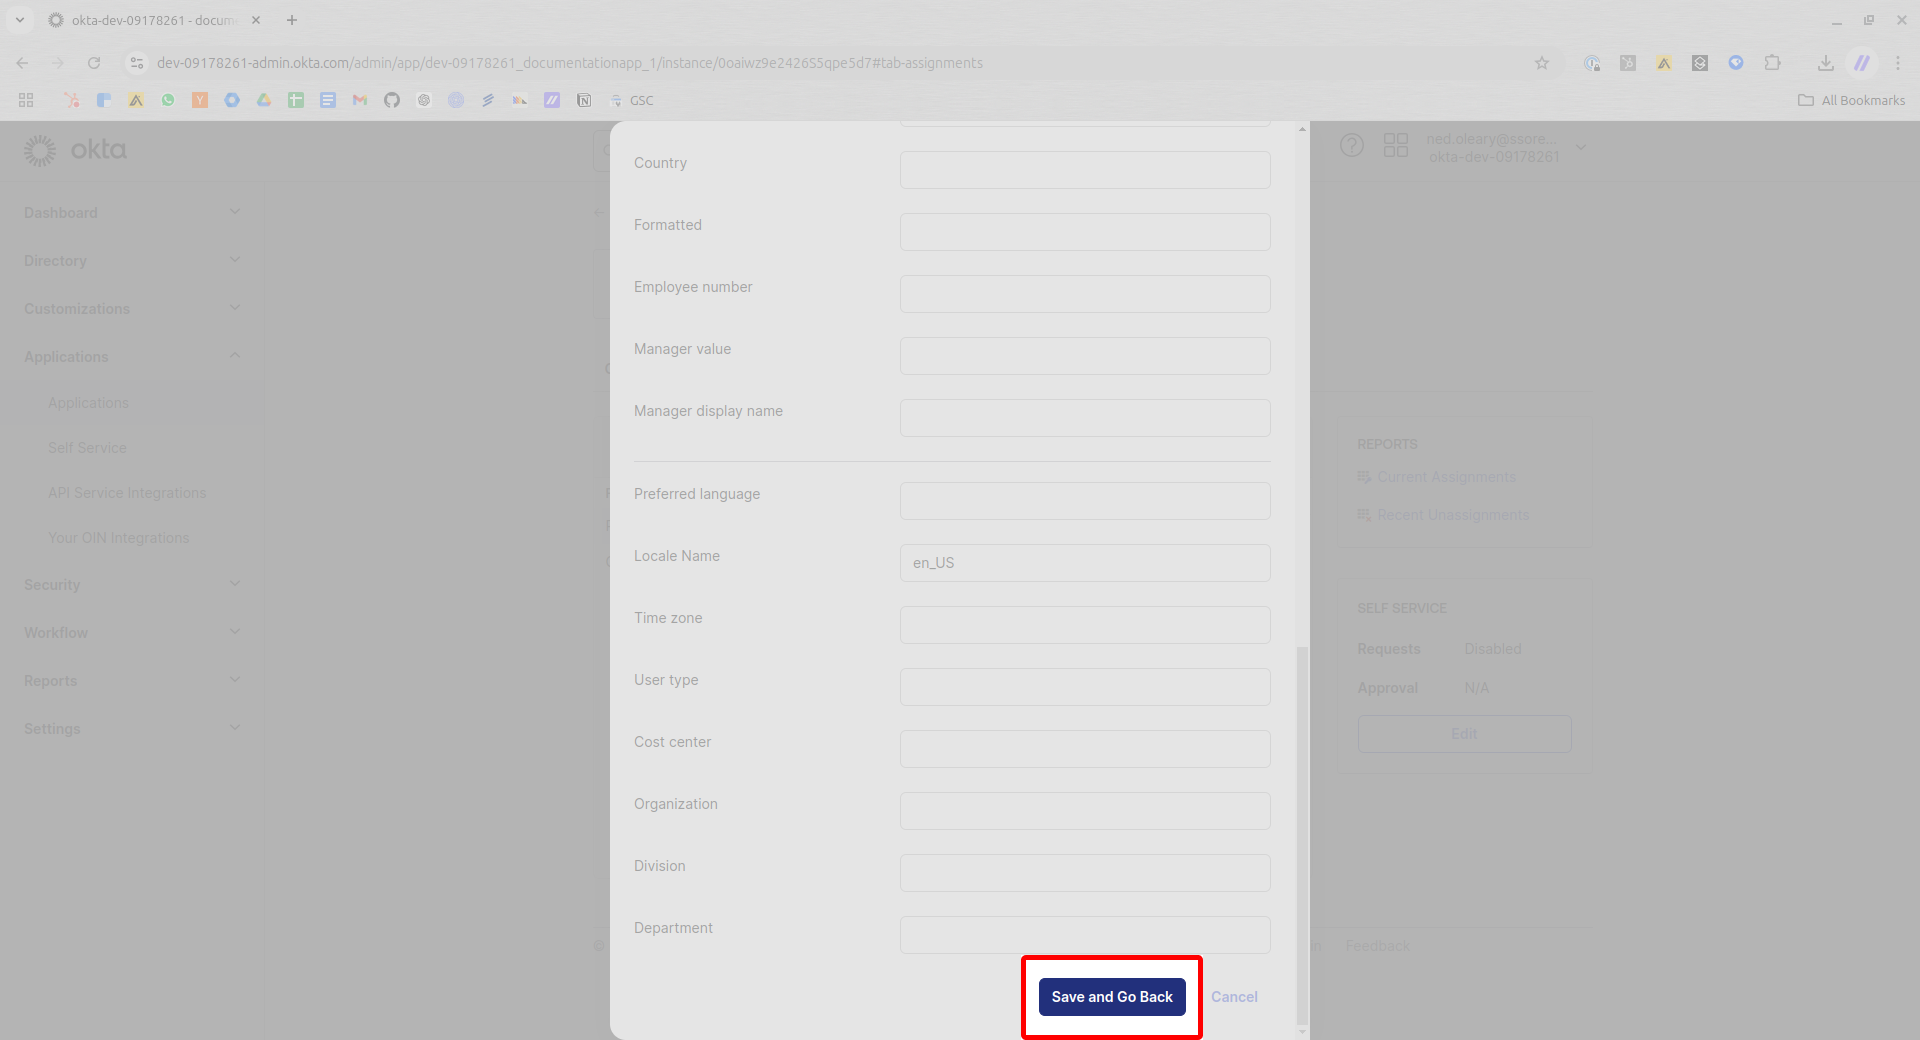
You’ll have the opportunity to edit this person’s attributes, but it’s usually fine just to scroll down and press Save and Go Back.
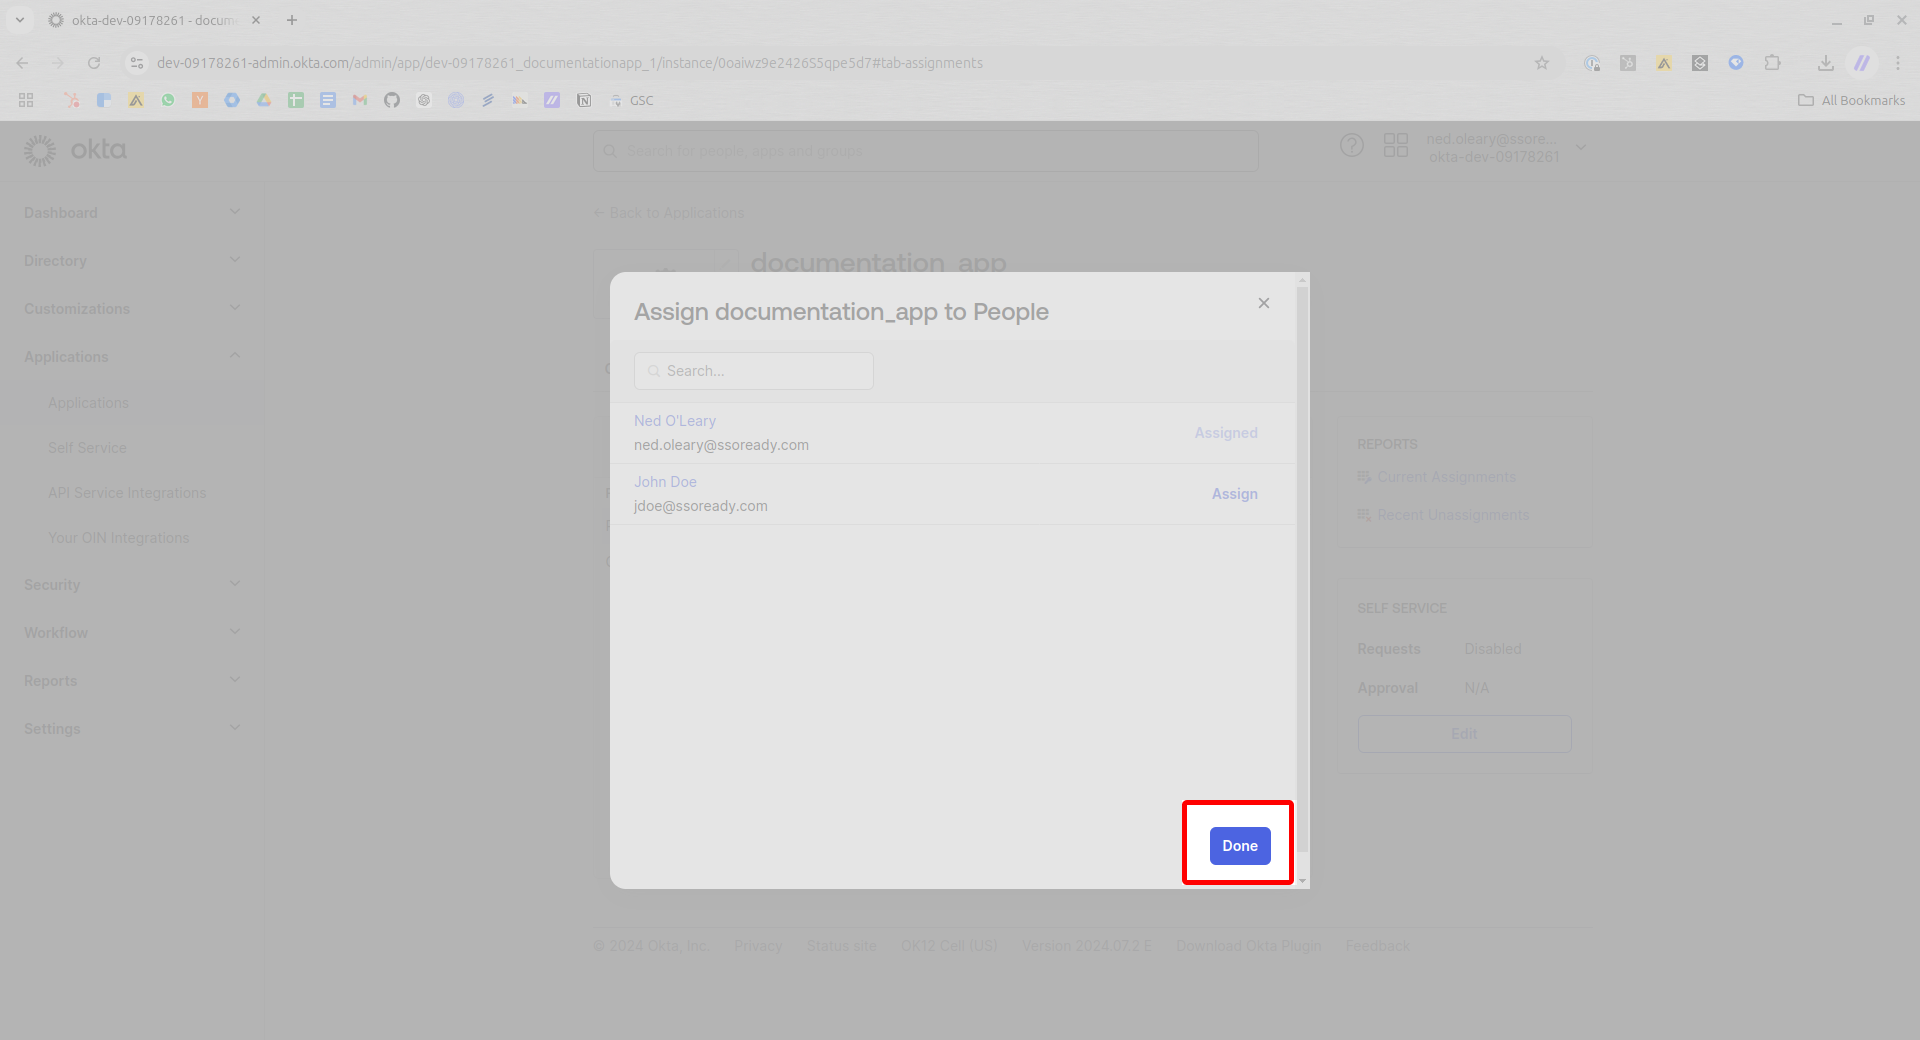
Unless you wish to add other People to the Application, you can now press Done.
Within a few moments, the user will sync in SSOReady. You can see any changes by navigating back to the SCIM Directory’s page in SSOReady.
If you assigned users to the Application before setting up the SCIM Connection, you may need to instruct Okta to force sync. You can read more here.