SAML with Ping Identity
Creating an application in PingOne
PingOne setup starts from your customer’s administrator home page. Exactly how this looks will vary. This example uses a newly provisioned account and therefore shows an onboarding guide; your customers’ admin pages will look different in most cases.
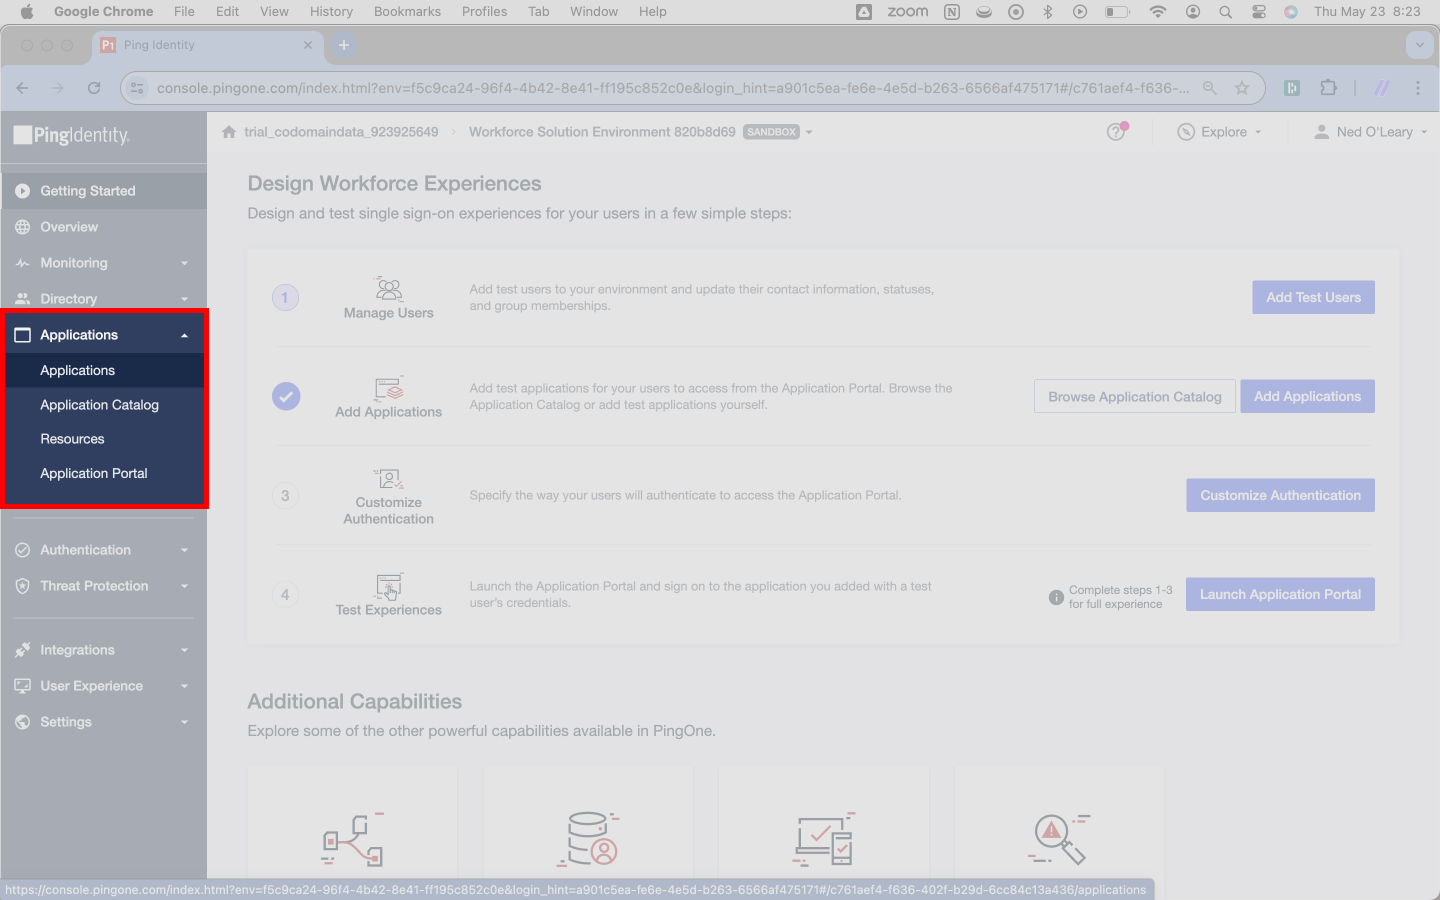
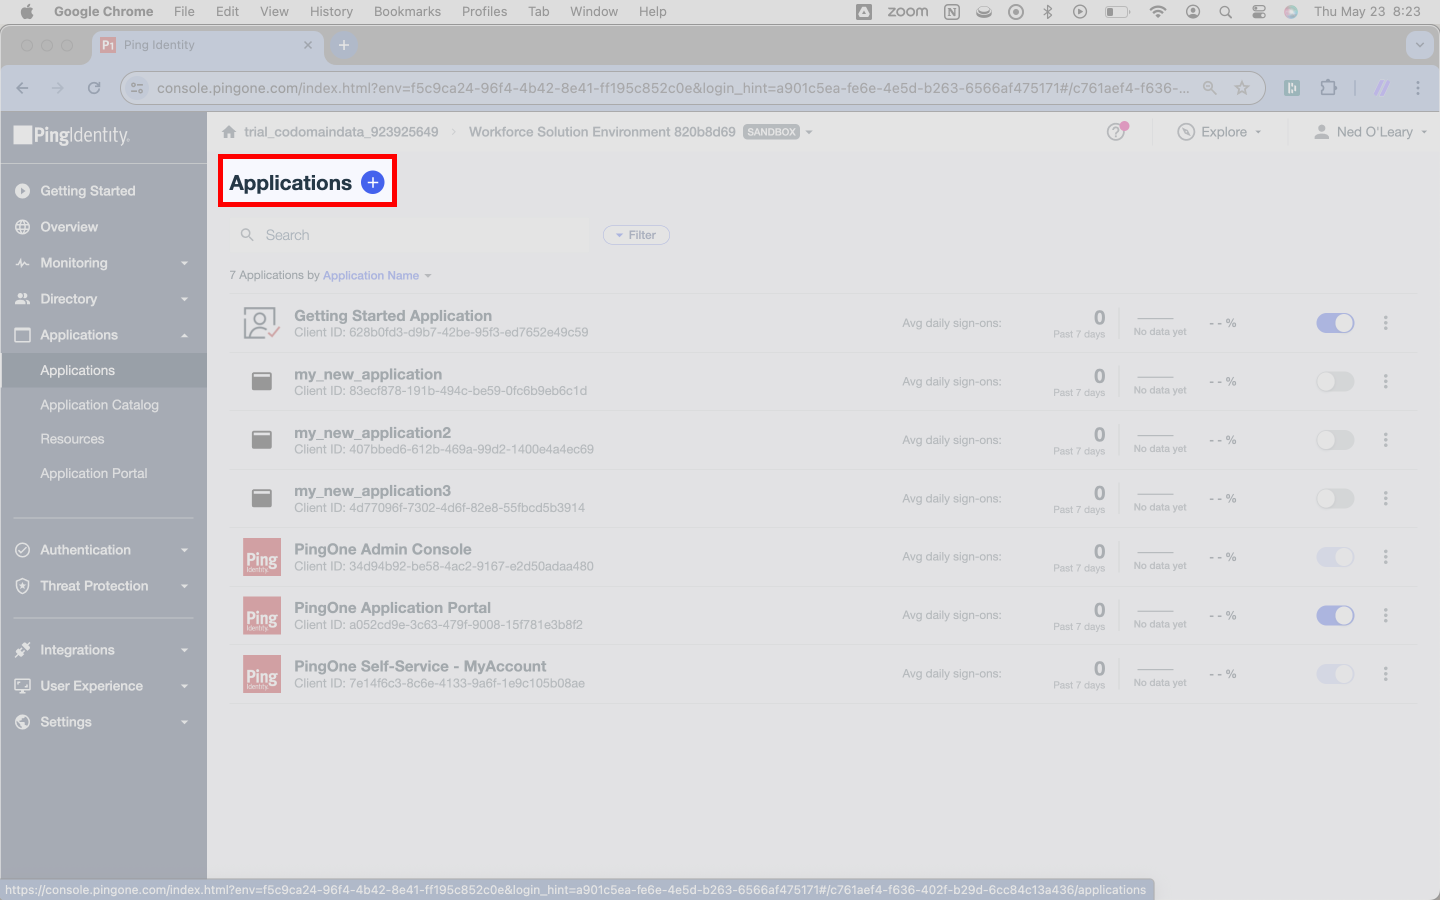
Nonetheless, you’ll always start by hitting Applications > Applications in the left navigation bar. This will take you to a new page.
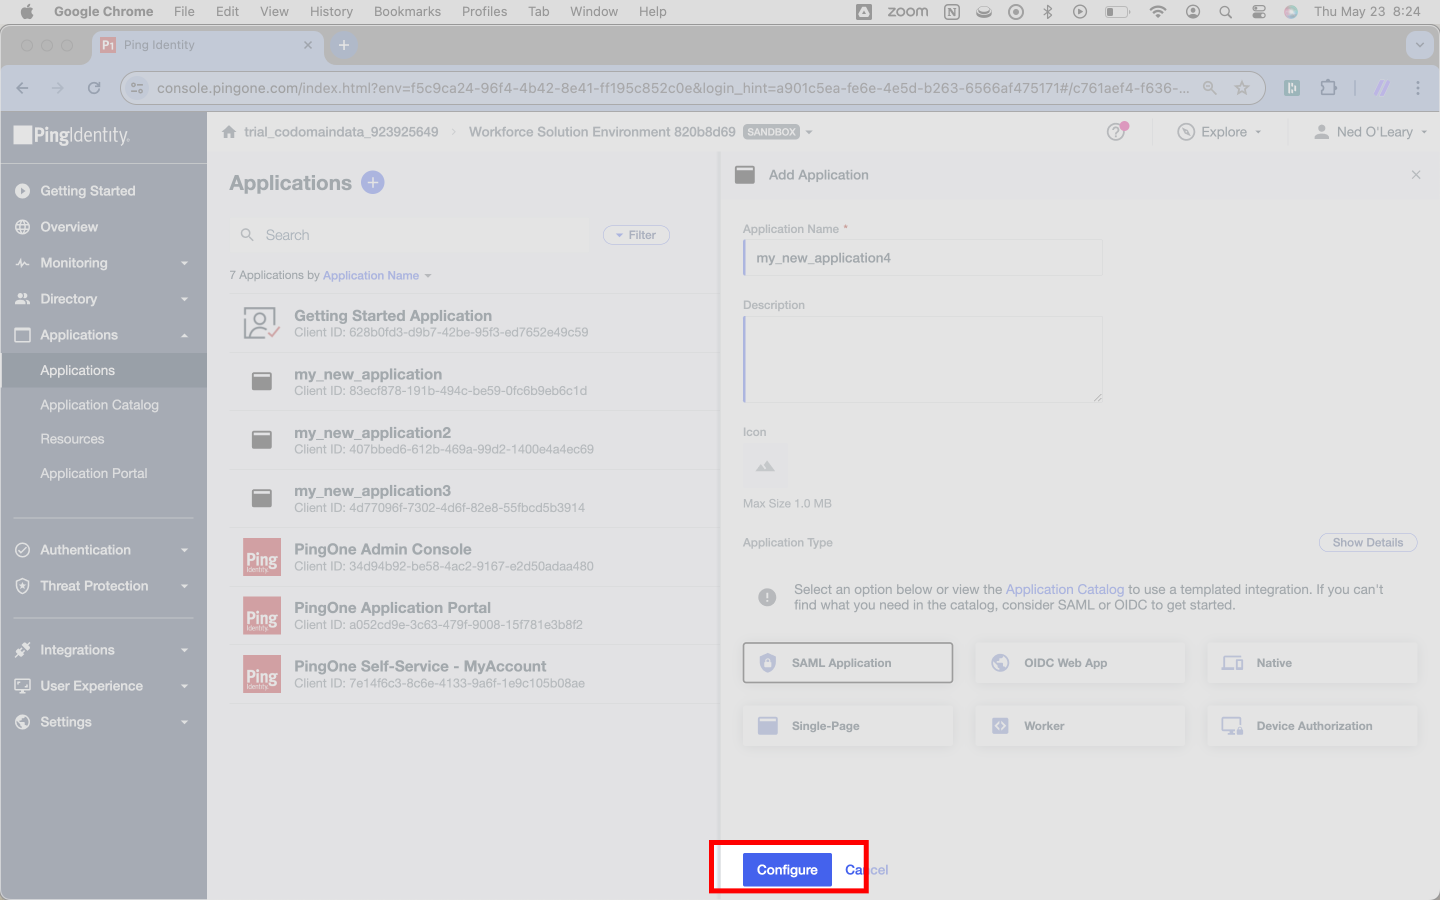
Once you’ve navigated to Ping’s Applications page, you’ll press the circular blue button with a plus icon toward the top left. This will trigger a slideover.
Ping wants you to assign the Application an Application Name. The name has no impact on Ping’s integration with SSOReady, but Ping will use the Application Name as your product’s display name. Write your product’s name as the Application Name.
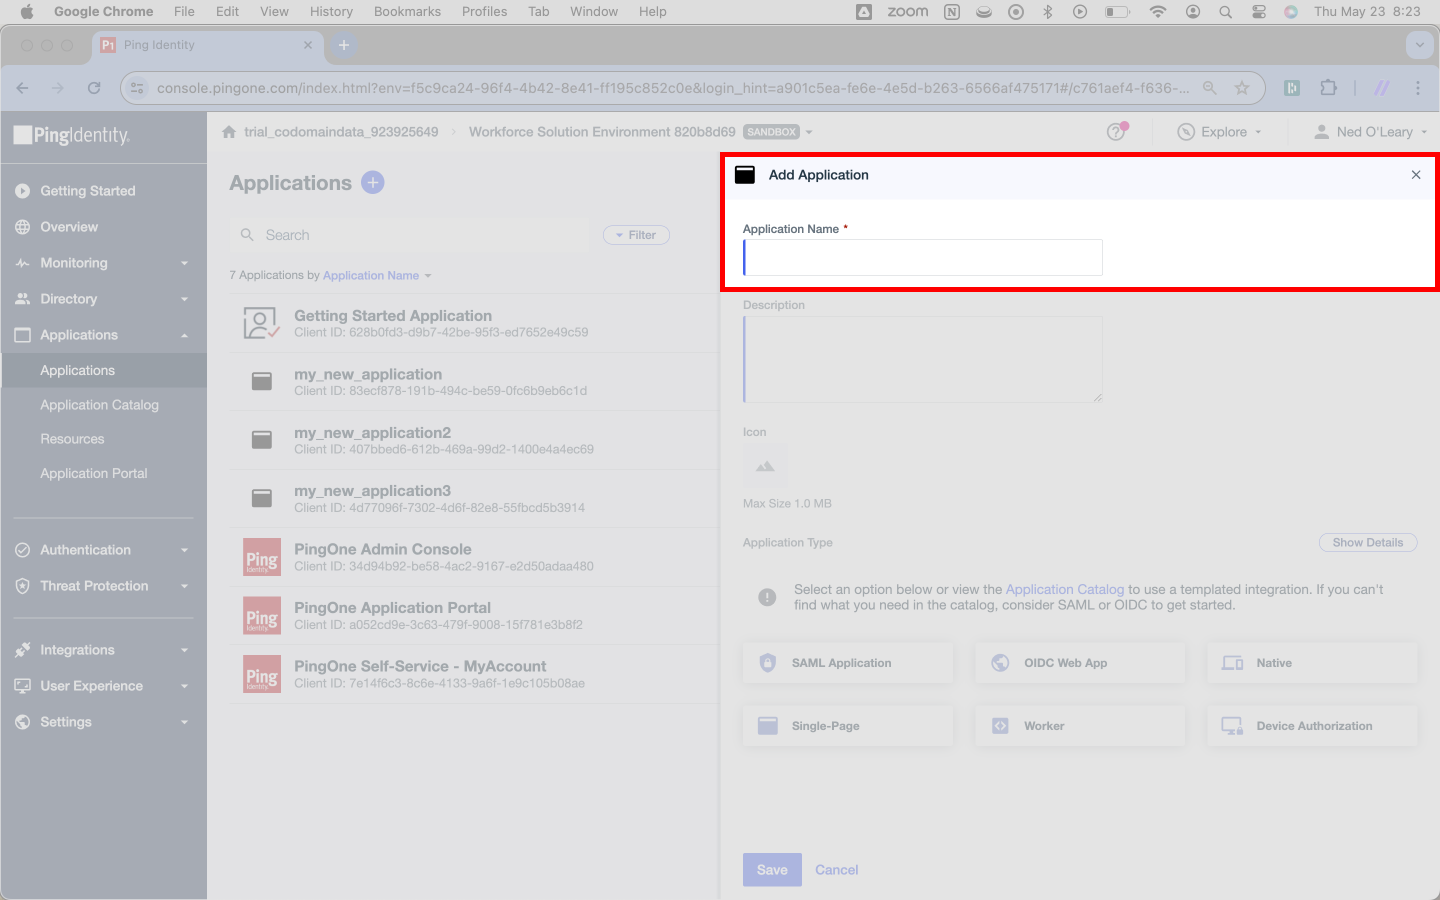
Then you need to tell Ping that our Application uses SAML. Click the card that reads SAML Application. You may notice that this changes the text on the blue button below from Save to Configure.
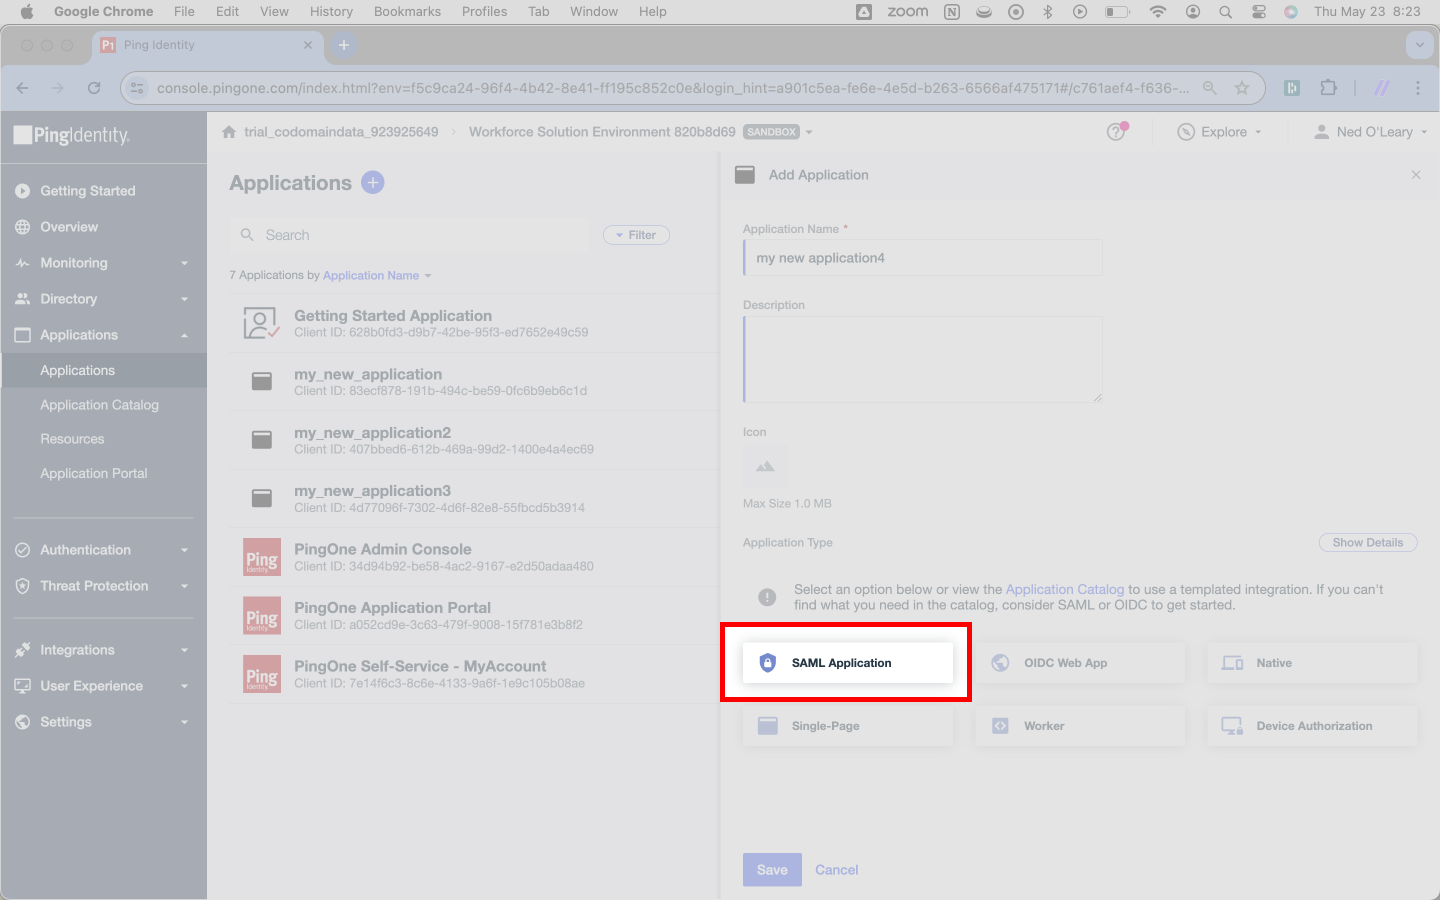
Here, select Configure. This finalizes creation of the SAML application and progresses you to the next step.
Next, you’ll have to enter some details about SSOReady into Ping.
Configuring a SAML Connection | Entering SSOReady data in Ping Identity
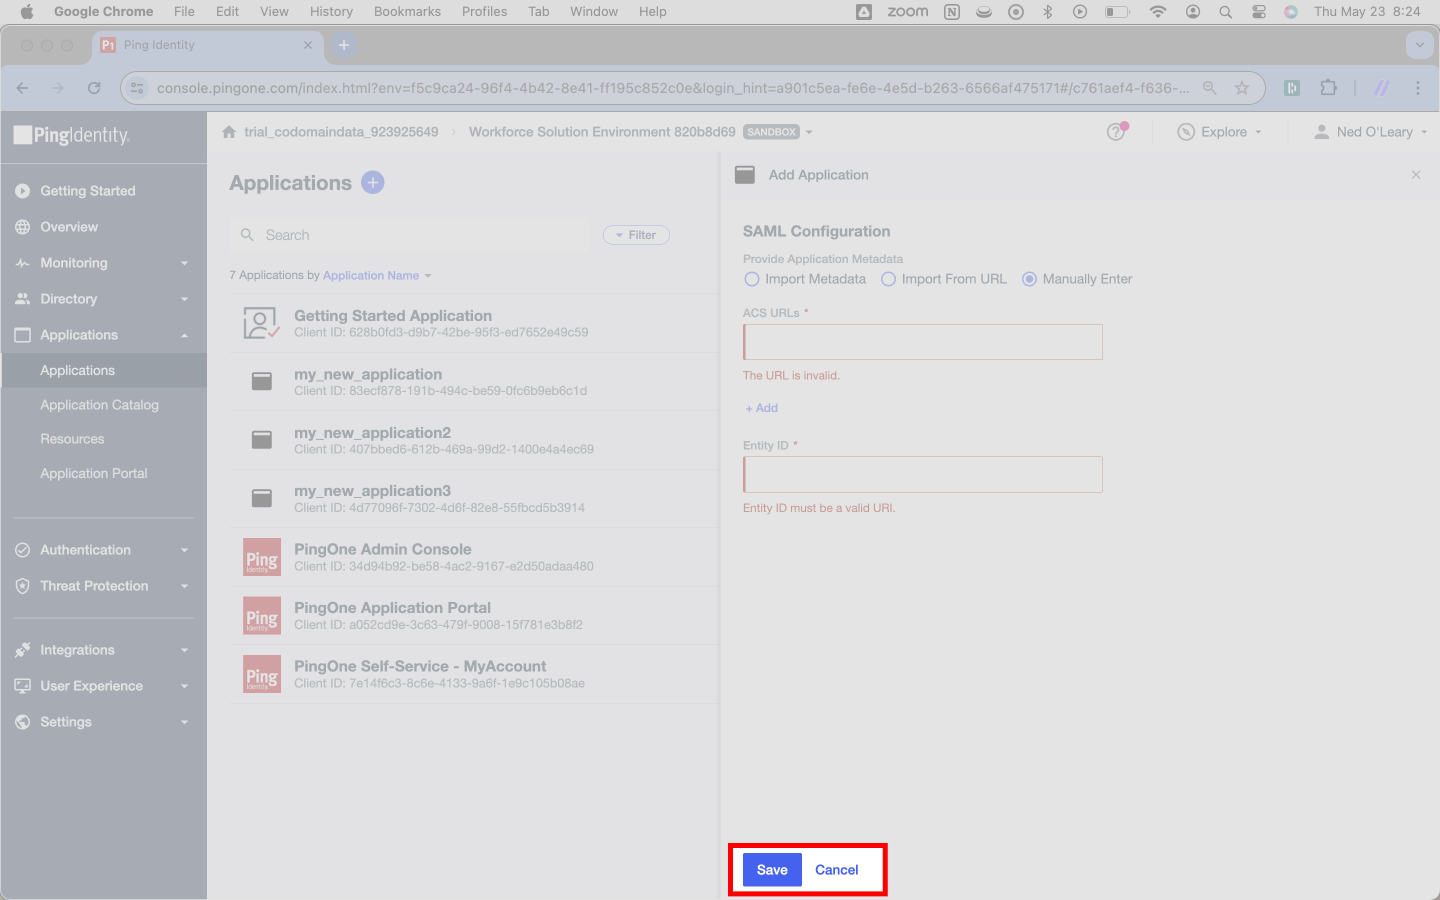
You’ll now wee a page with a SAML Configuration header. It will present three radio button options; of these, select Manually Enter. Doing so will trigger two input forms below the radio buttons.
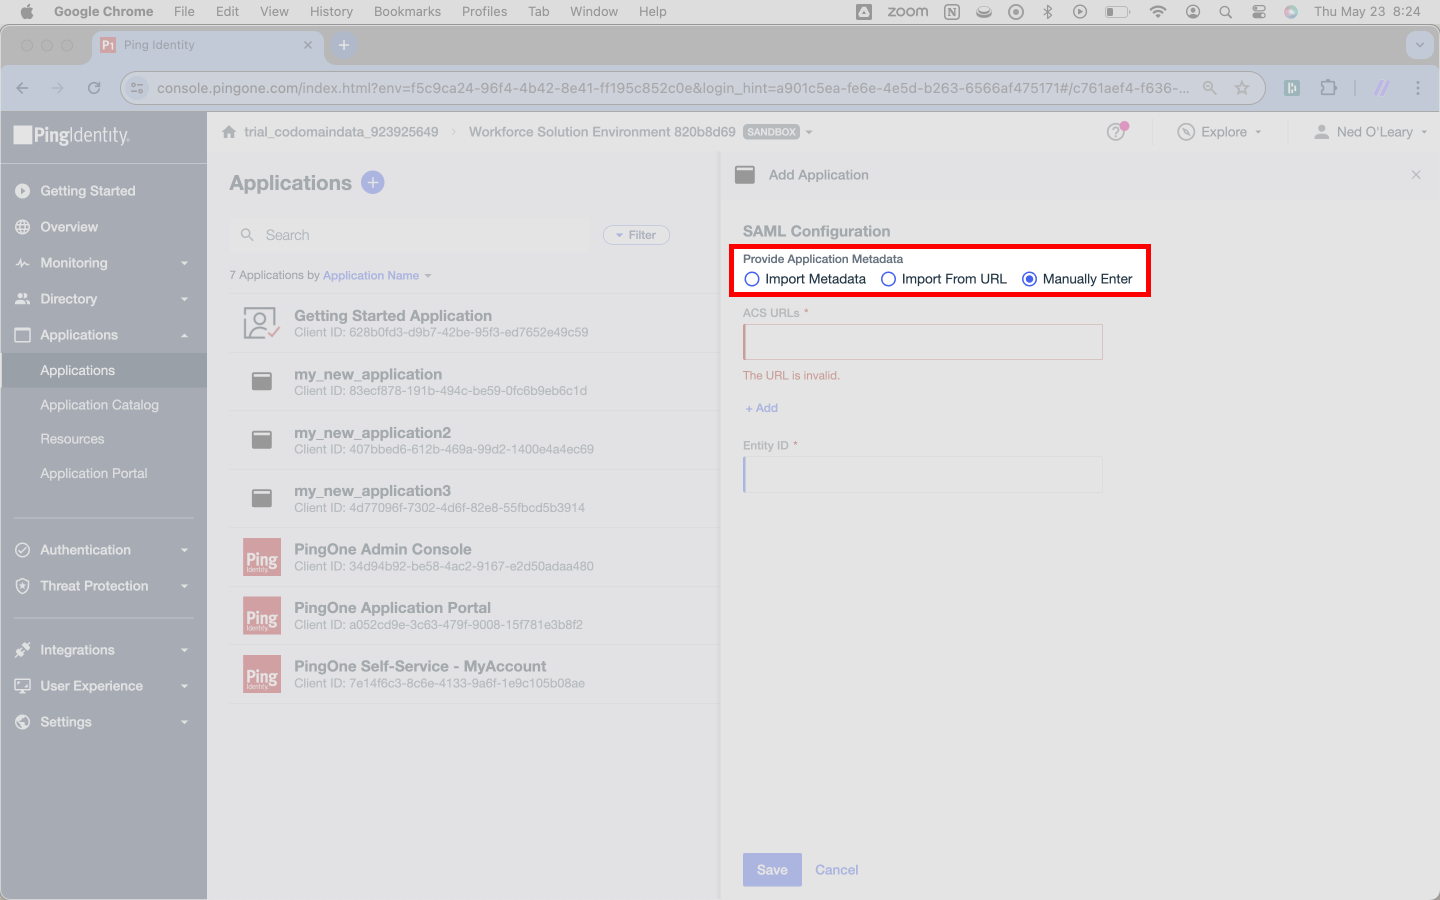
Ping Identity requires two pieces of information about the SAML Connection.
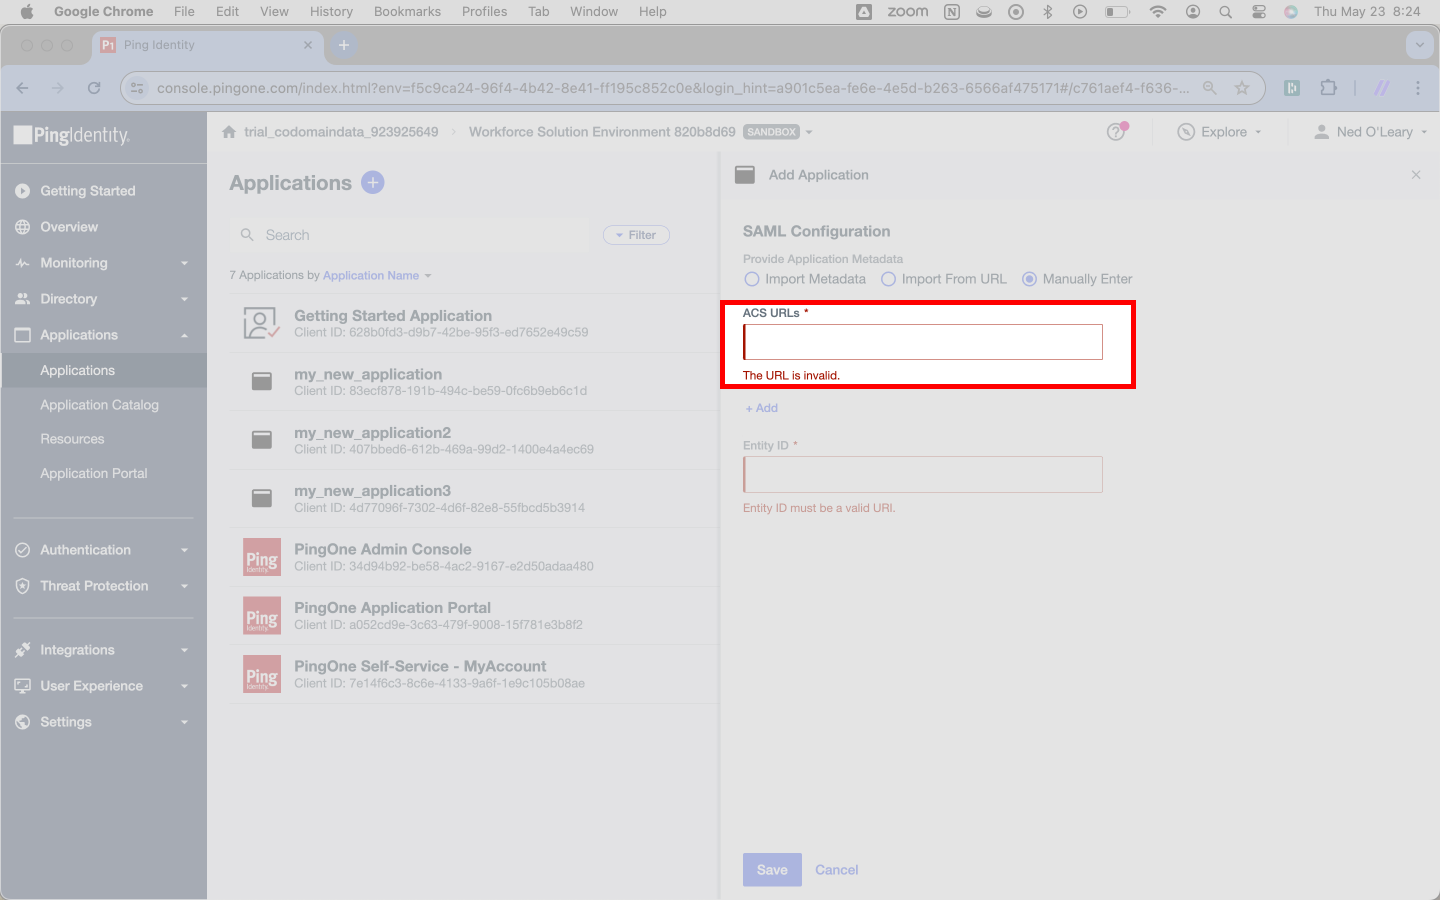
Ping first asks for ACS URLs. SSOReady provides exactly one of these. You’ll find it on the detail page for your SAML Connection in the SSOReady web application. SSOReady has labeled it Assertion Consumer Service (ACS) URL. It always ends in /acs.
Copy the URL from SSOReady and paste it into Ping here.
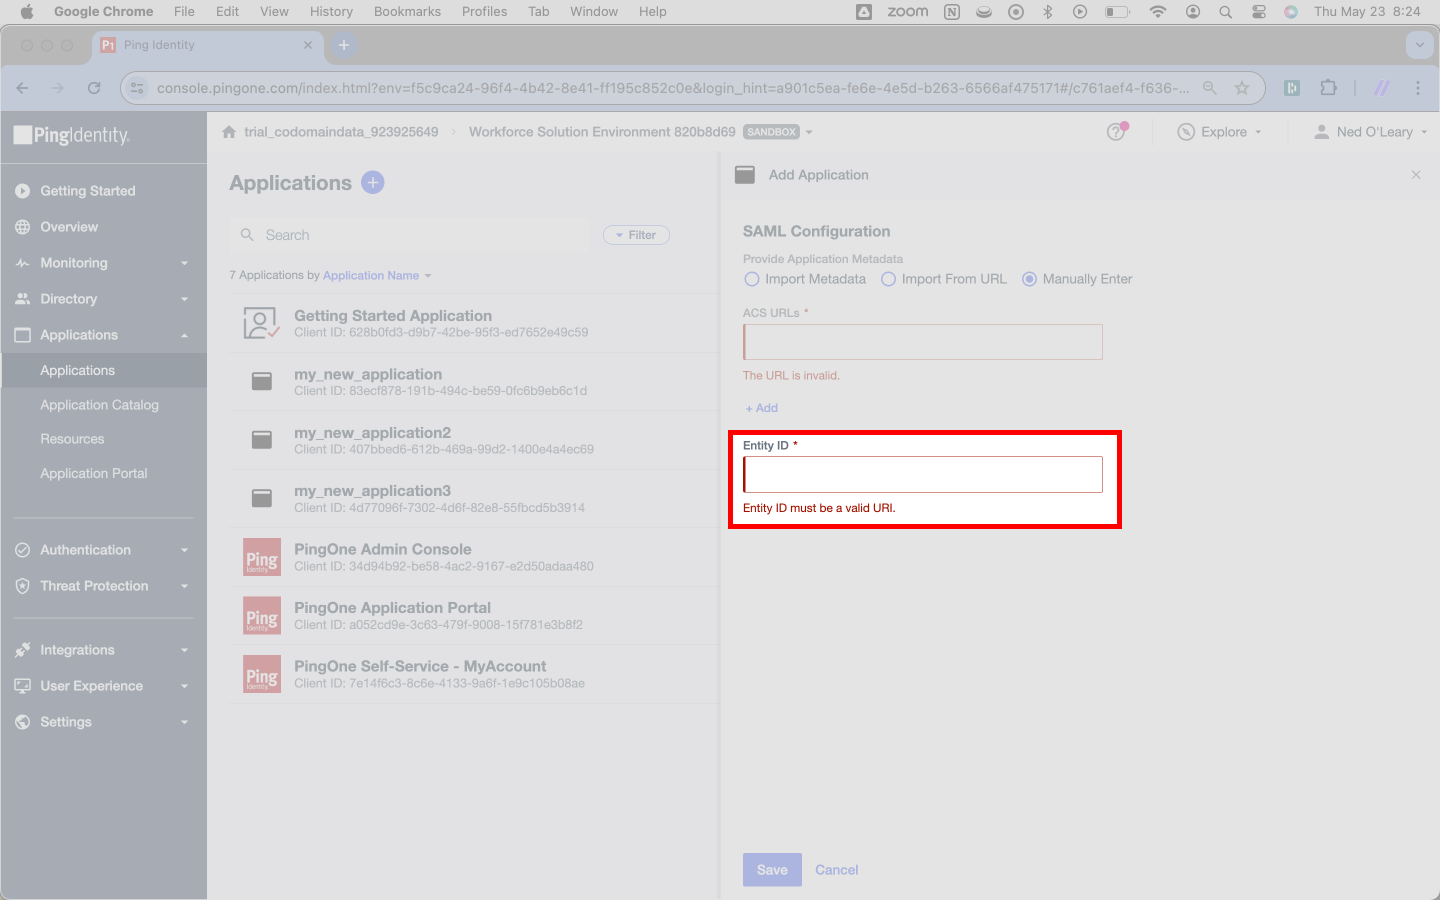
You’ll do something similar again for a field Ping calls Entity ID. SSOReady calls this an SP Entity ID. You can find it adjacent to the Assertion Consumer Service (ACS) URL in the SSOReady web application. One might notice it matches the Assertion Consumer Service (URL) exactly, except it lacks the /acs suffix.
Hit Save toward the bottom of the page.
Configuring a SAML Connection | Entering Ping Identity data into SSOReady
Now you’ll need to enter information about Ping into SSOReady.
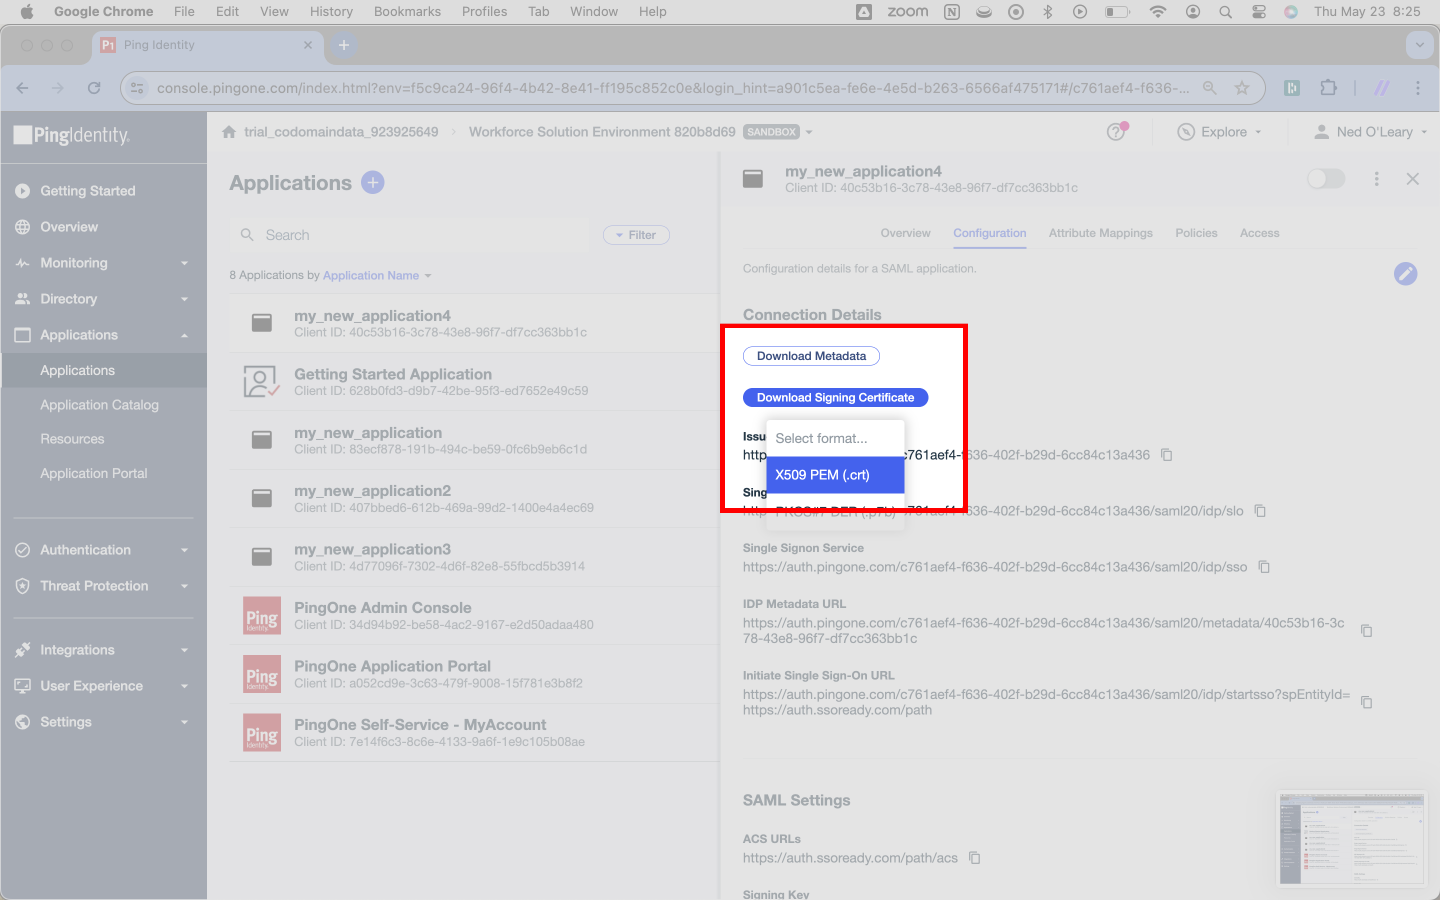
To start, make sure you’re on the Configure tab. In a moment, you’ll pull three pieces of information from this tab.

SSOReady requires a Certificate from Ping. You’ll find the appropriate uploader on the SAML Connection detail page in your SSOReady web application.
To get the file from Ping, click the Download Signing Certificate button. Select X509 PEM (.crt) from the menu.
You’ll see a .crt file begin to download. The file may have a long and non-descriptive name; that is normal.
Upload the file to SSOReady.
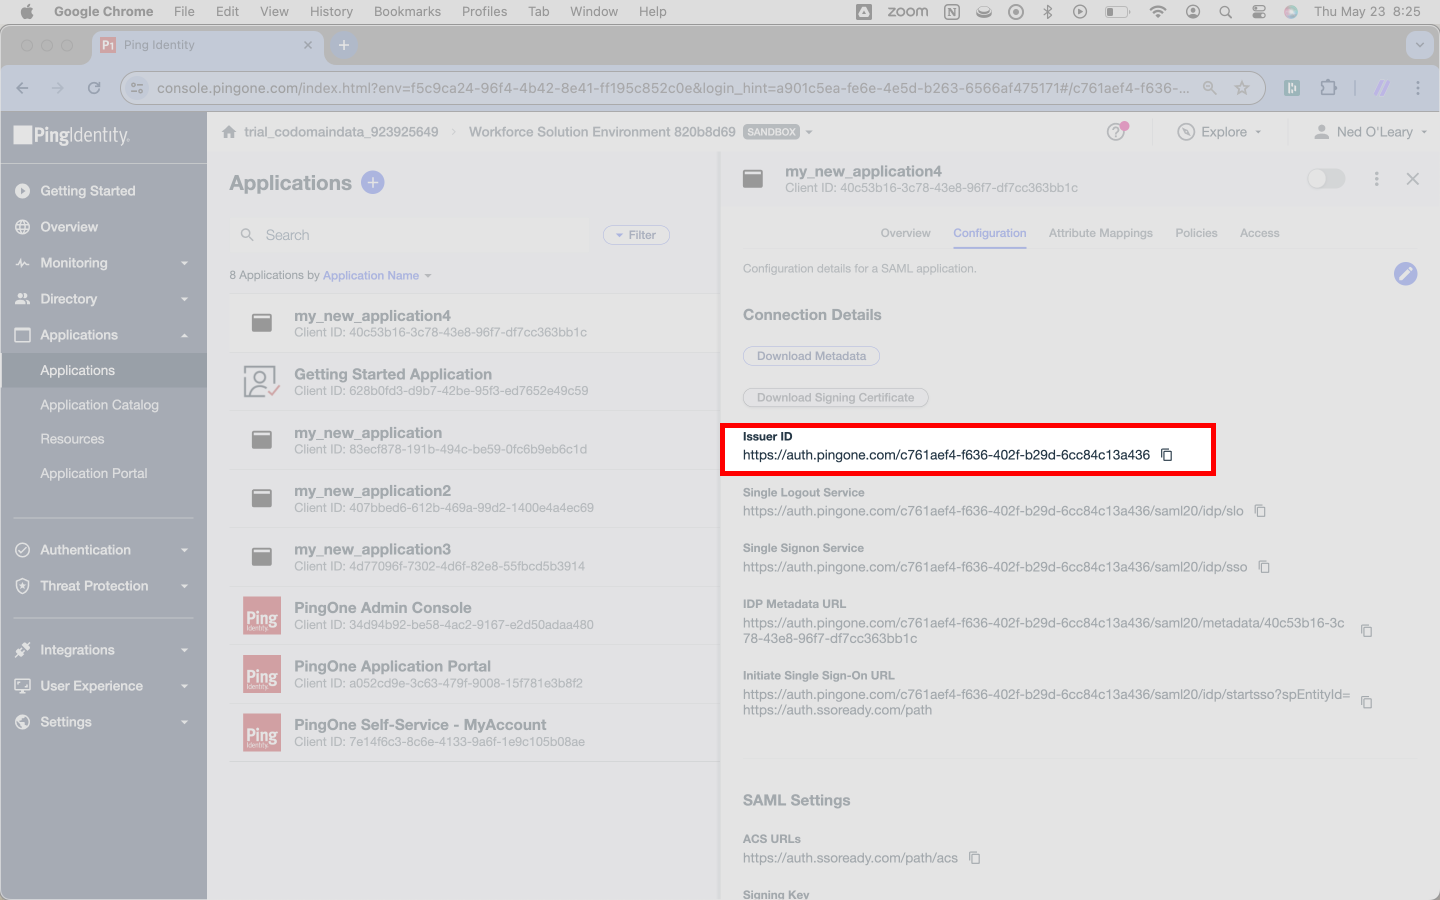
After you’ve taken care of the Certificate, you’ll need a field that SSOReady calls an IDP Entity ID. It’s an input field on the same card as the Certificate uploader.
Ping calls this information an Issuer ID and places it directly under Download Signing Certificate from our previous step.
Copy this URL from Ping and paste it into SSOReady as the IDP Entity ID.
Finally, look for a field that Ping calls the Single Signon Service. SSOReady calls this a Redirect URL.
Copy the Single Sign On Service URL and paste it into SSOReady as the Redirect URL.
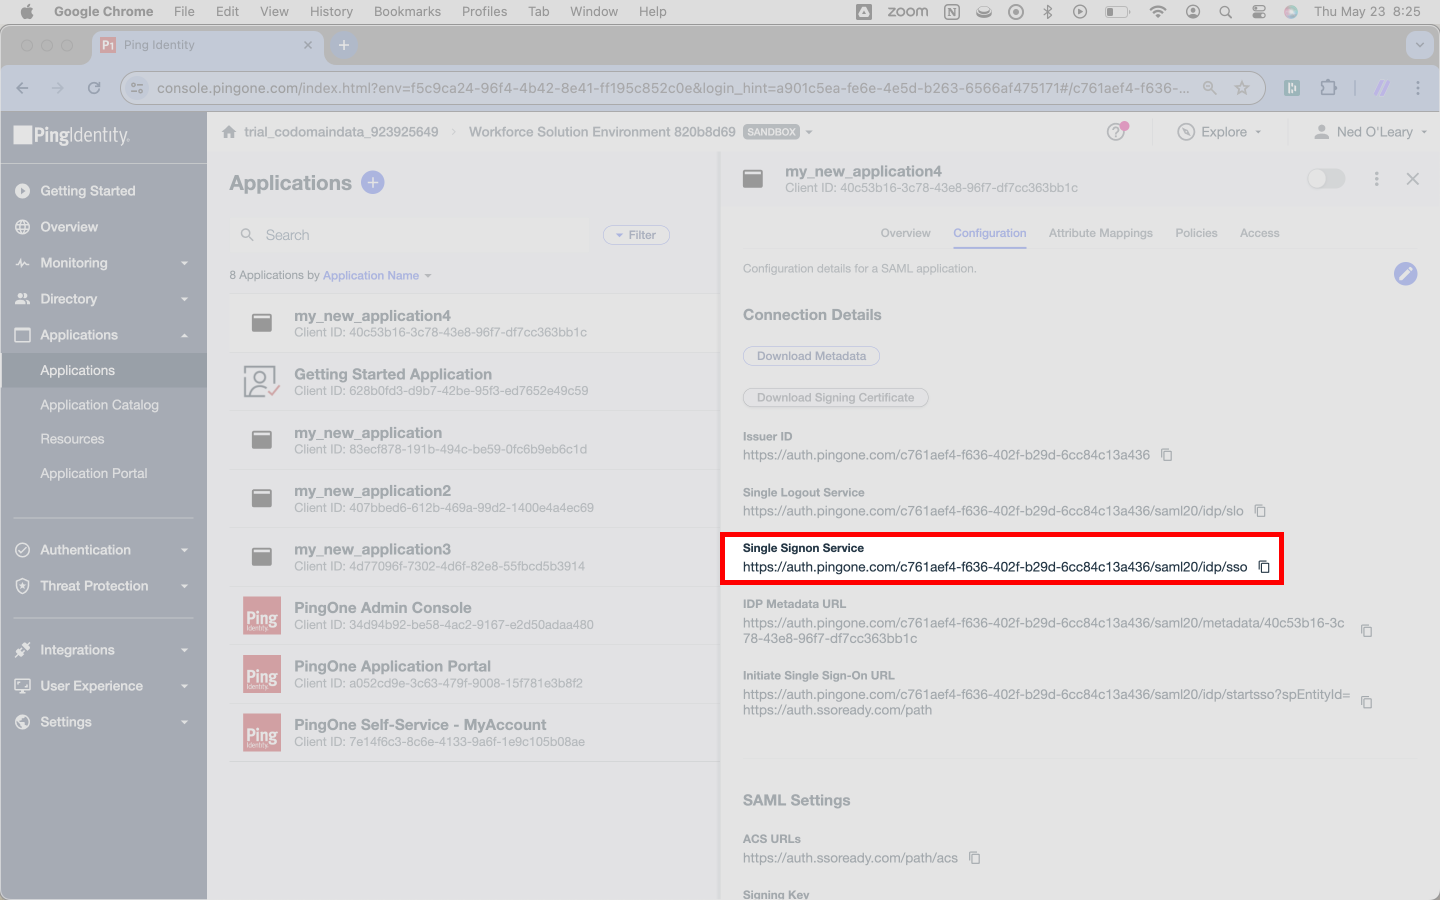
Once you’ve copied over the Single Signon Service URL, you’re done swapping information between SSOReady and Ping Identity.
Now navigate to the Attribute Mappings tab to adjust one final setting in Ping.
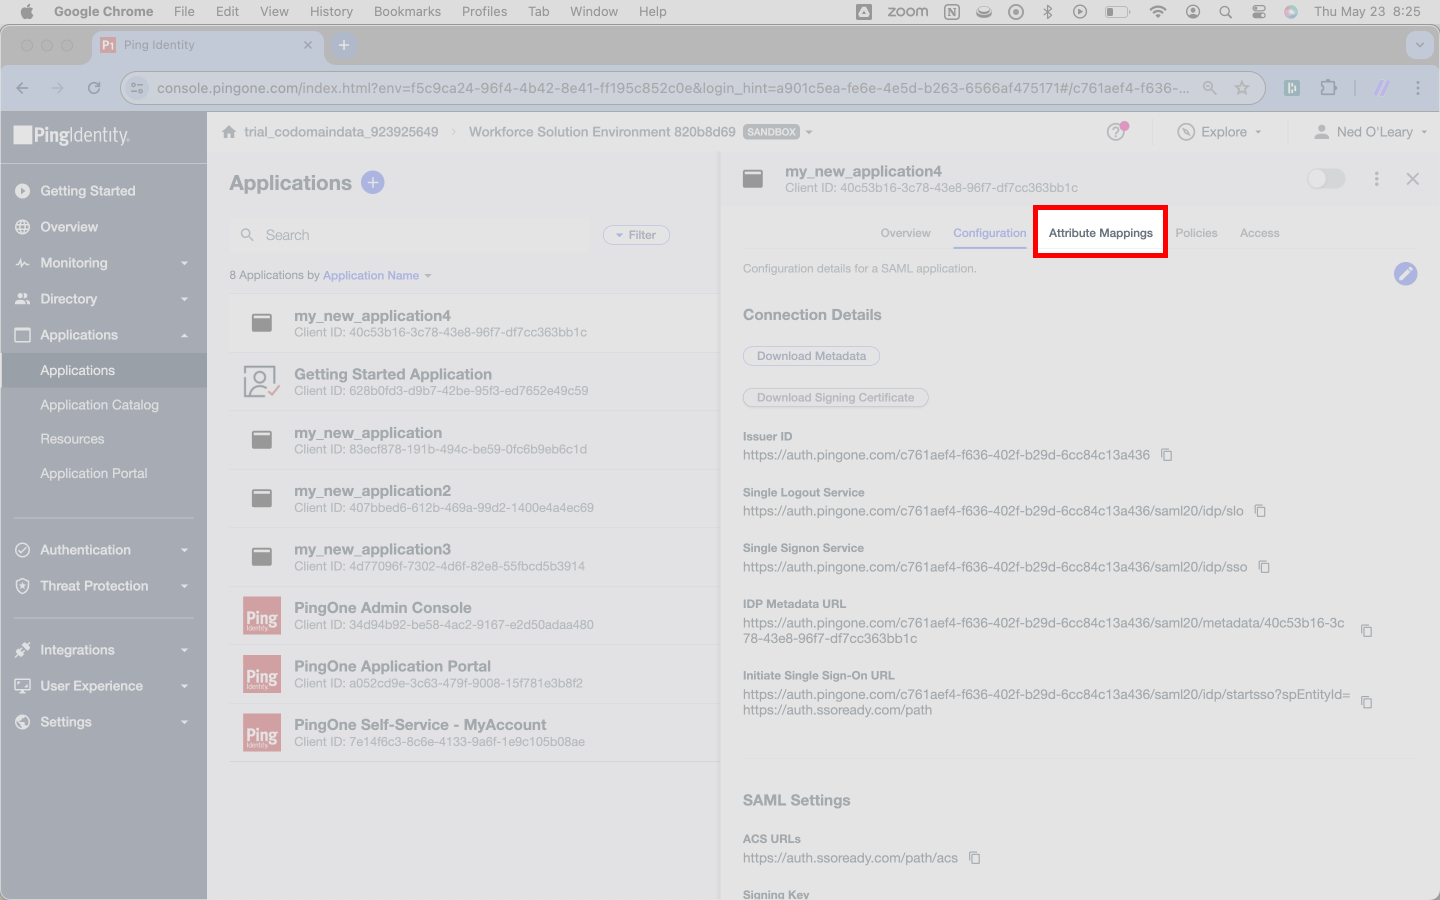
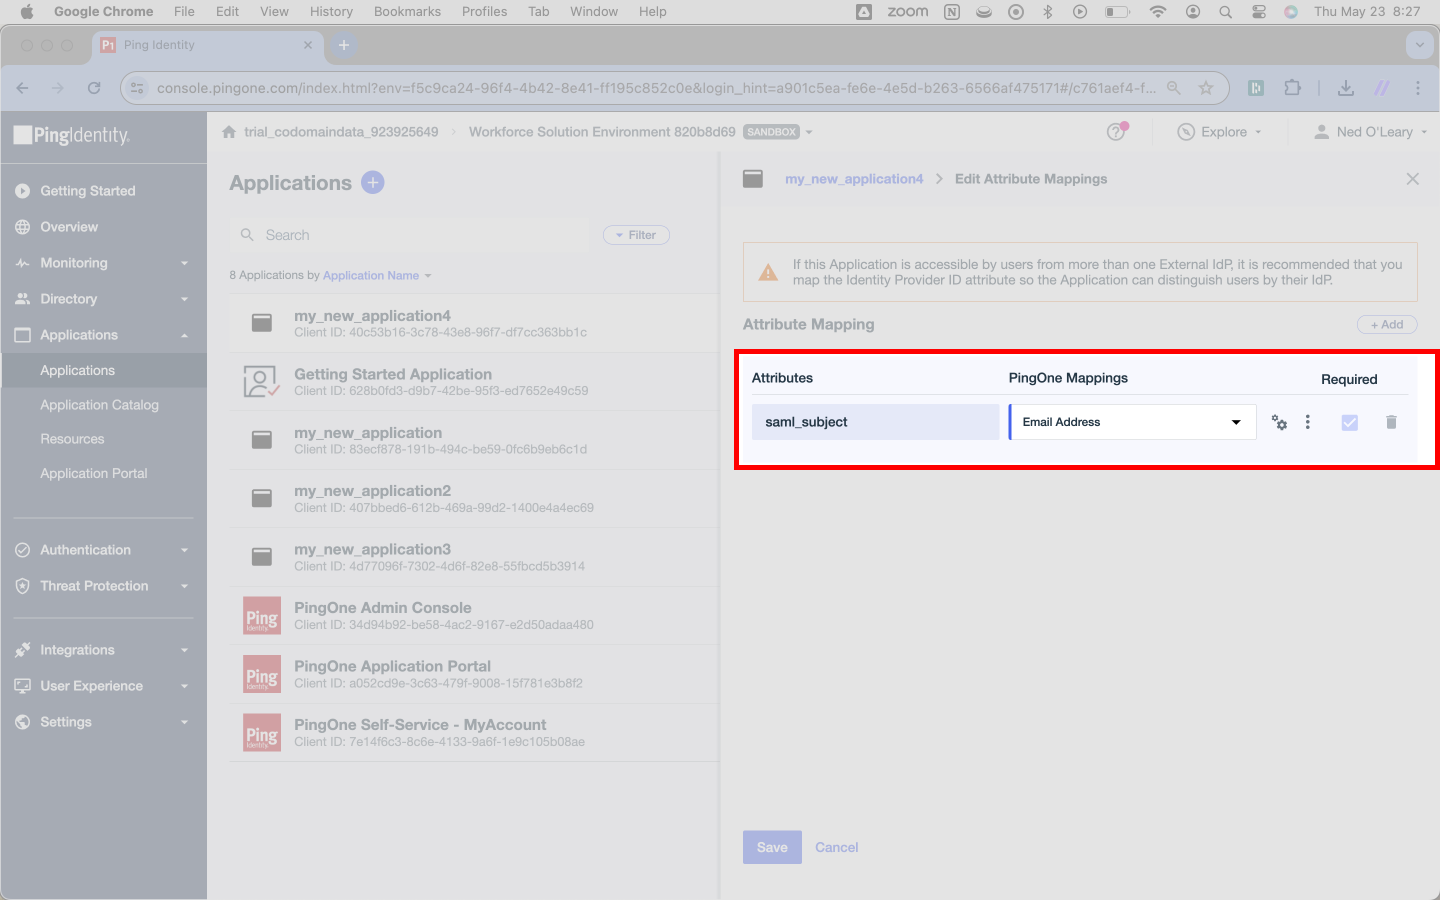
Configuring a SAML Connection | Adjusting Ping attribute mappings
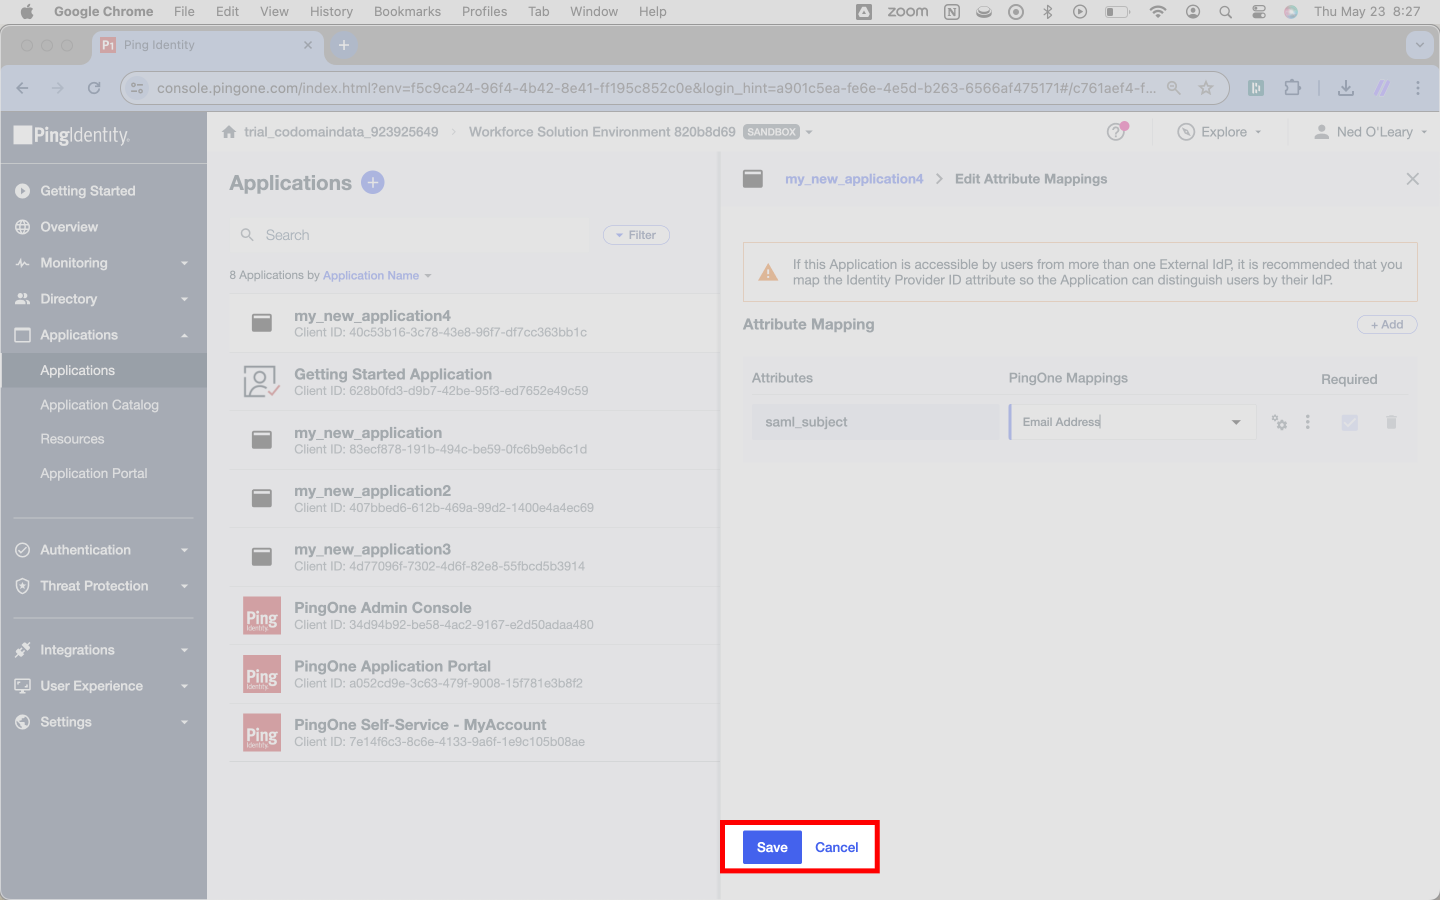
Here, you’ll see three headers: Attributes, PingOne Mappings, and Required. Where you see saml_subject under Attributes, change the corresponding PingOne Mappings field. This will trigger a dropdown selector. Make sure you’ve set this field to Email Address.
Hit Save at the bottom of the page.
In the top right, hange the toggle from off to on.
You’re all done!
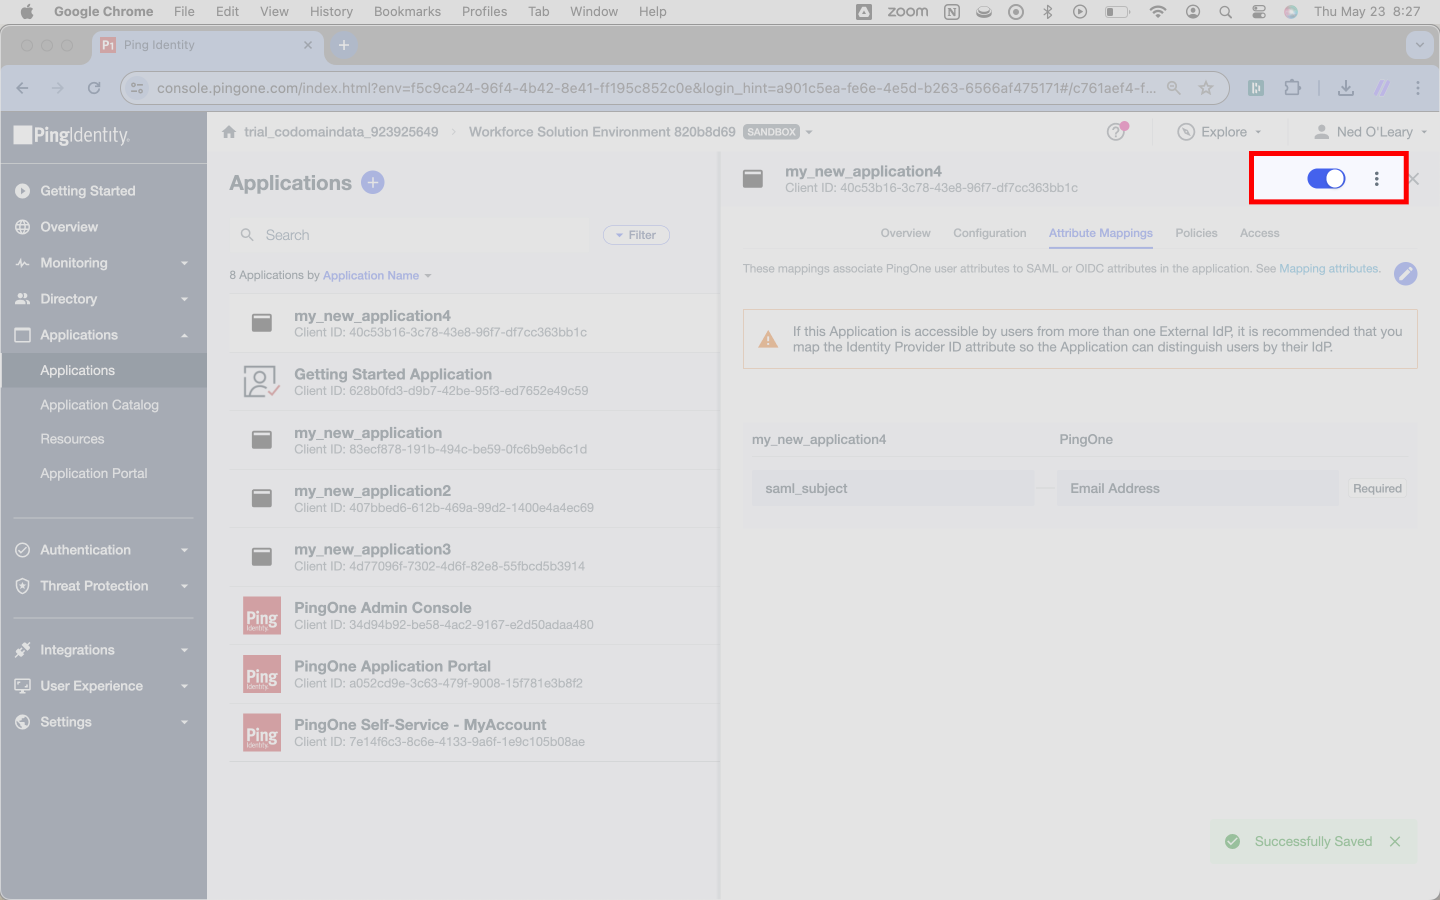
Please do bear in mind, however, that your customer’s Ping admin will still need to assign users to this application before they can sign in. This requires no action from you as a service provider.