SAML with Google Identity
Some companies will use Google Identity for SAML single sign-on. Please note that SAML single sign-on via Google Identity differs from “Sign in with Google,” which uses the OAuth protocol. If you want to offer your customers “Sign in with Google” functionality, you may wish to consult Google’s documentation or use another authentication vendor.
As a first step, you’ll need a Google Workspace administrator to create an App.
Creating a custom SAML app in Google Identity
Starting from the Google Workspace admin page, i.e. admin.google.com, navigate to Apps > Web and mobile apps in the left navigation bar. This link will send you to a new page.
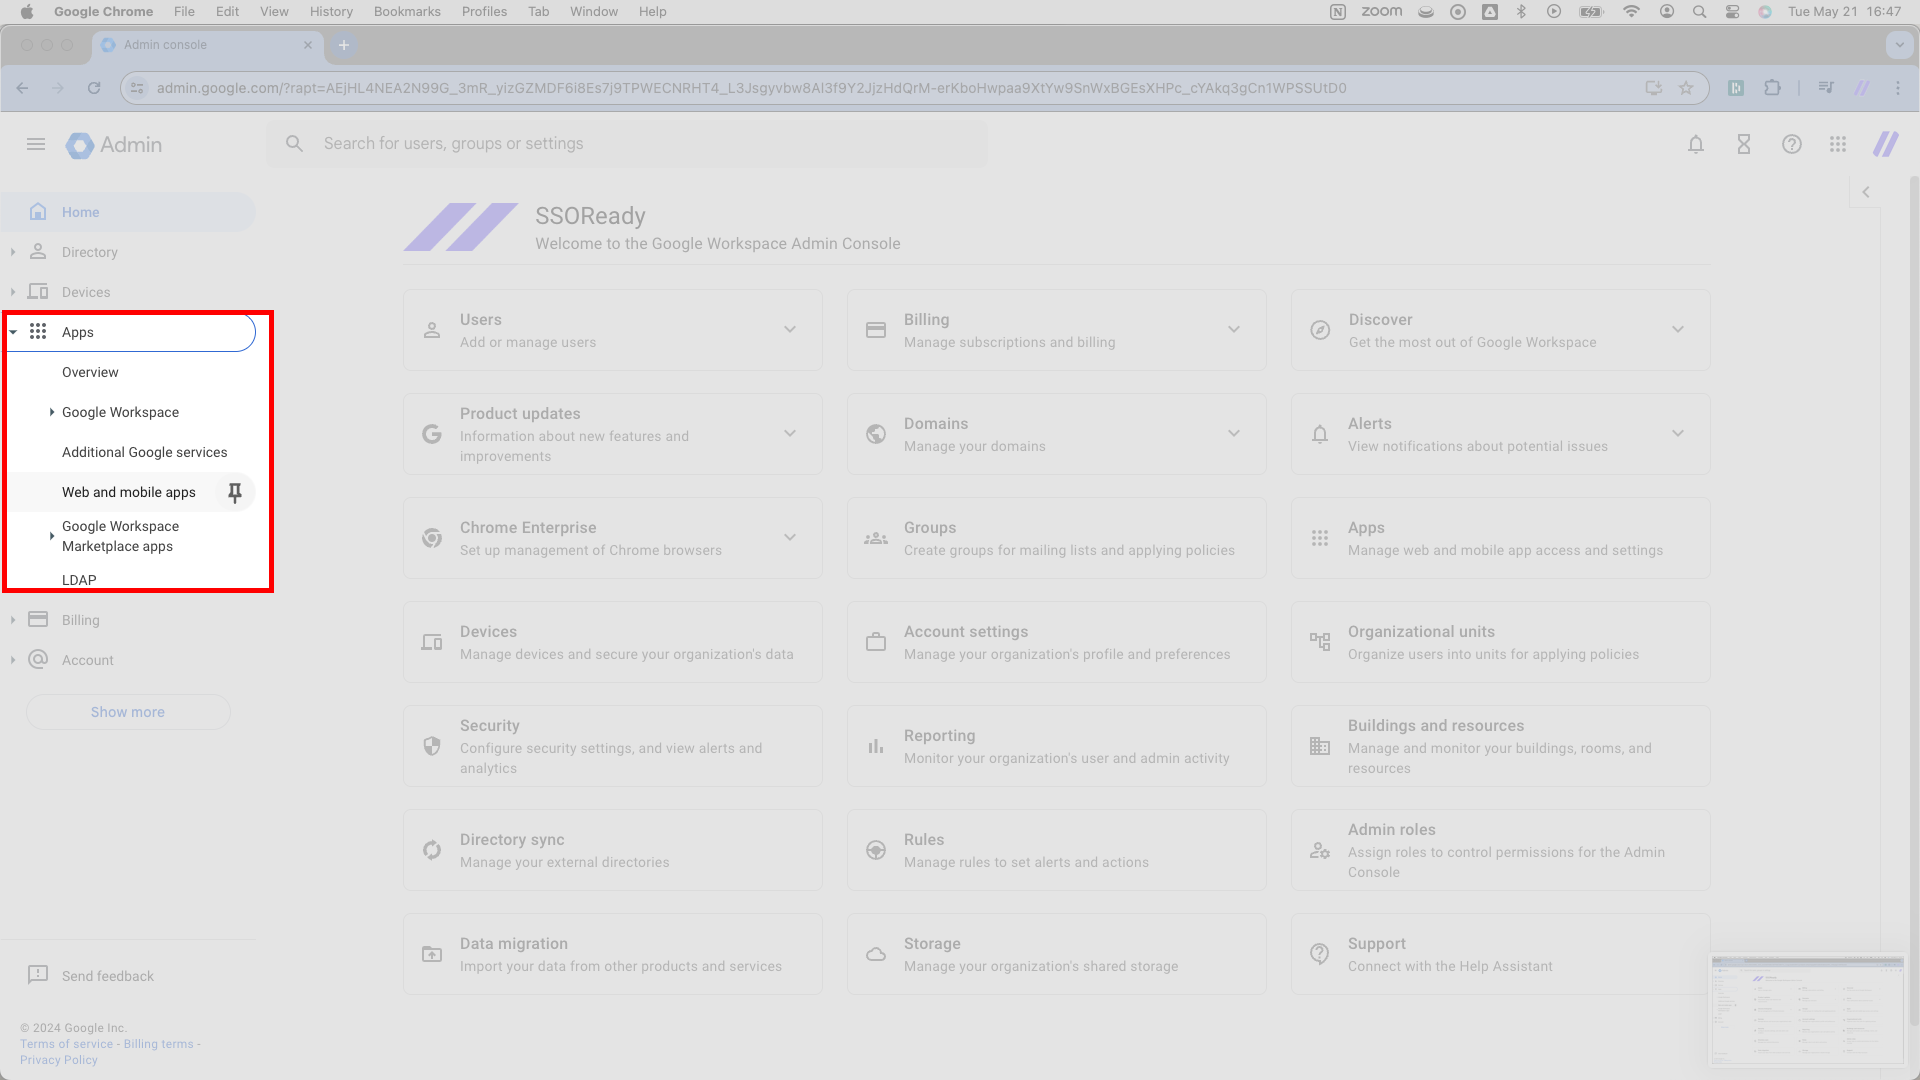
You’ll land on a page with the header Apps > Web and mobile apps. Right under the header, you’ll see a few tabs. Click Add app > Add custom SAML app. This link will send you to another new page.
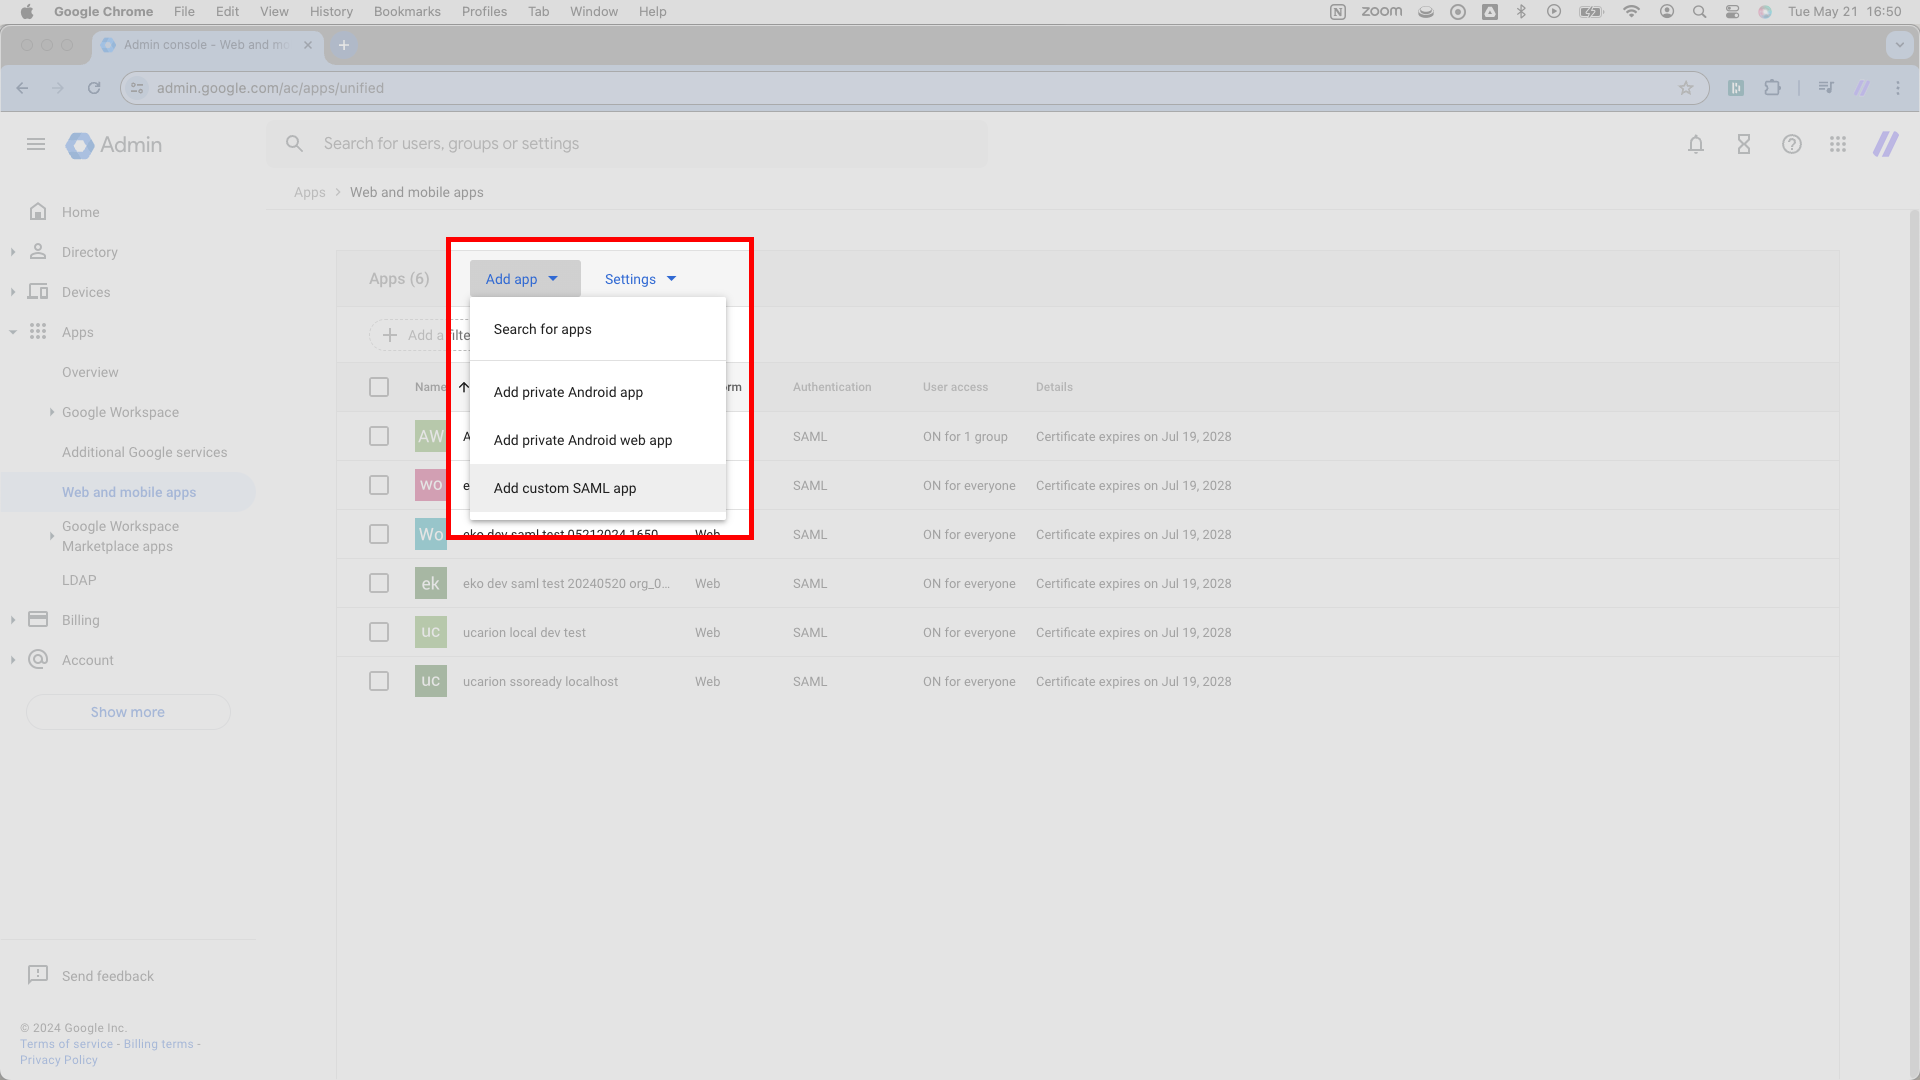
You’ll see a page with a large blue header reading Add custom SAML app. This page requires you to assign the application an App name. The App name matters solely for display purposes, so you’ll typically want the App name to match your product’s name.
After typing the App name, hit the blue CONTINUE button in the lower right.
Configure SAML Connection | Enter Google details in SSOReady
Clicking CONTINUE in the previous step will direct you to a new page, again with the same blue header.
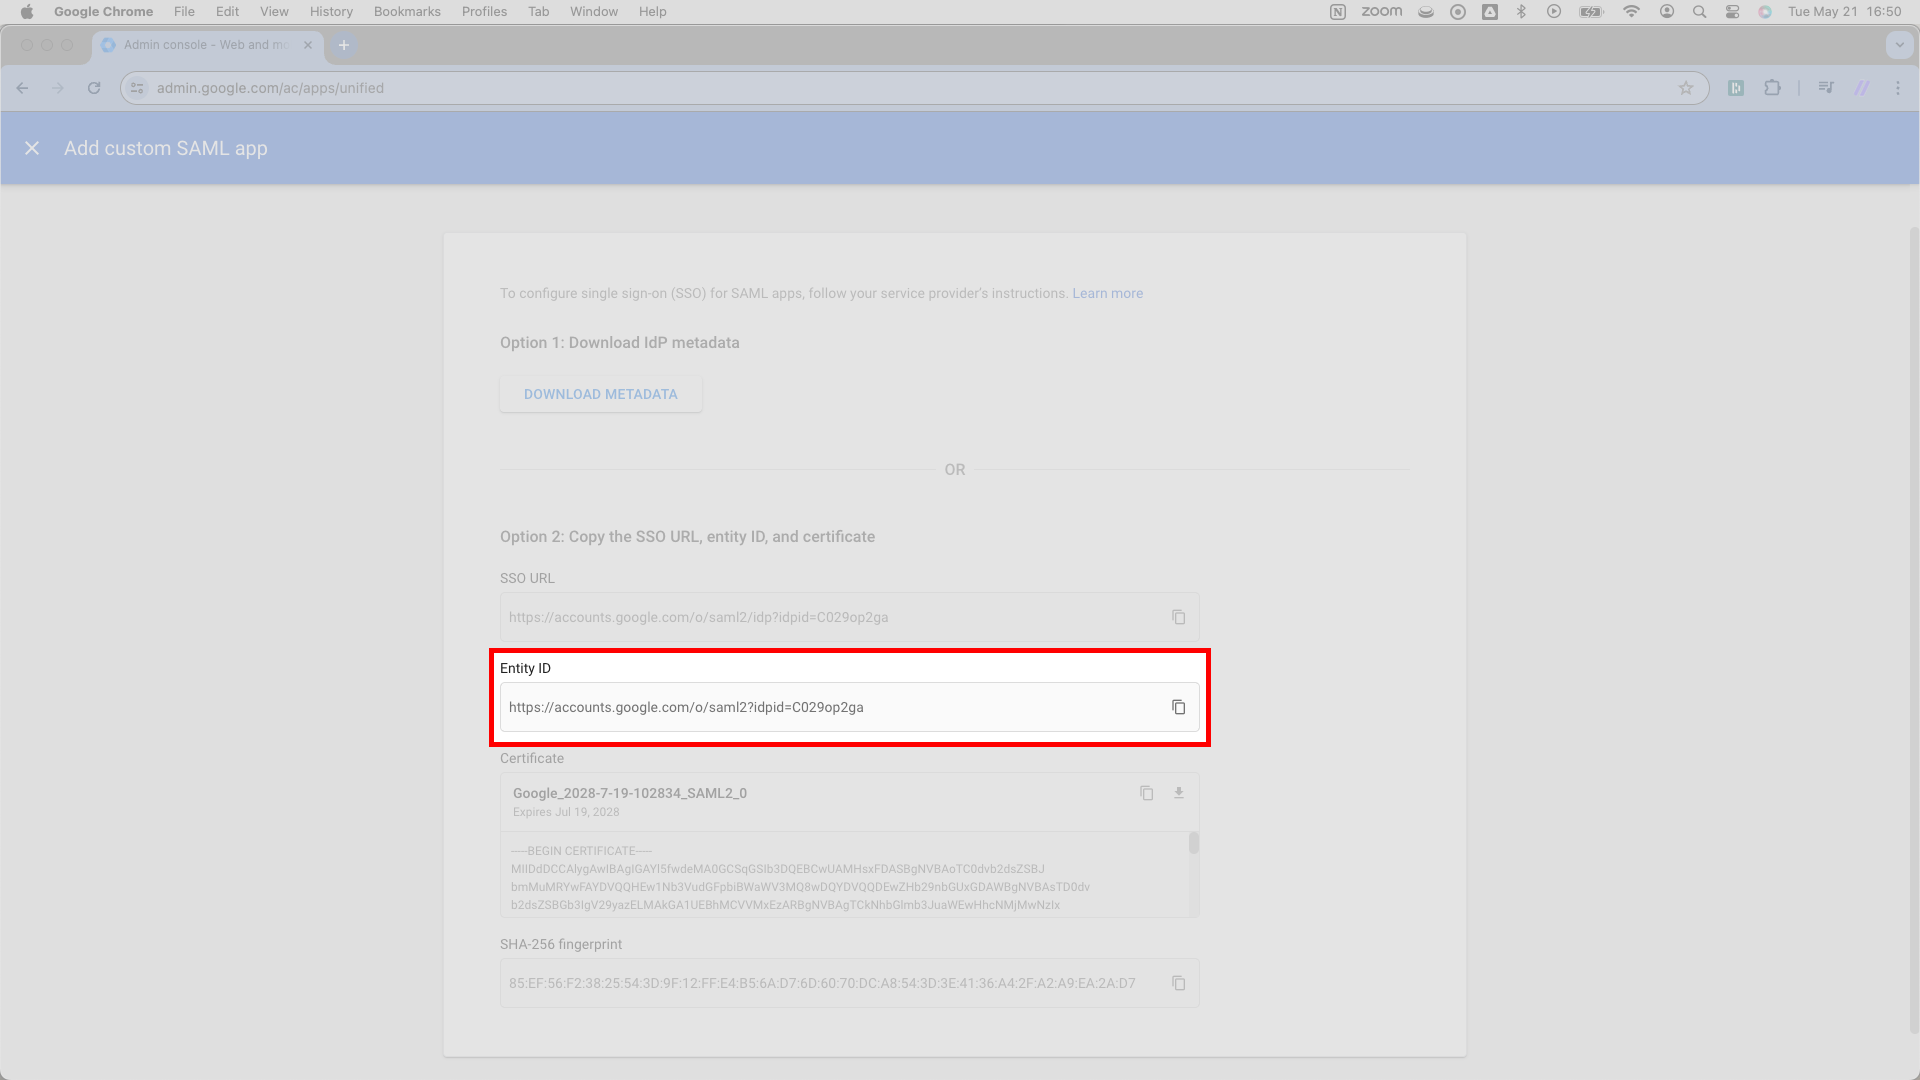
Here, you’ll find a few important details about the new Google Identity app that SSOReady needs to know about. Copy each of these from Google into SSOReady.
First, scroll down to the field marked SSO URL. SSOReady calls this the Redirect URL on the Identity Provider Configuration card for your SAML Connection. Copy this URL from Google and paste it into the SSOReady web application.
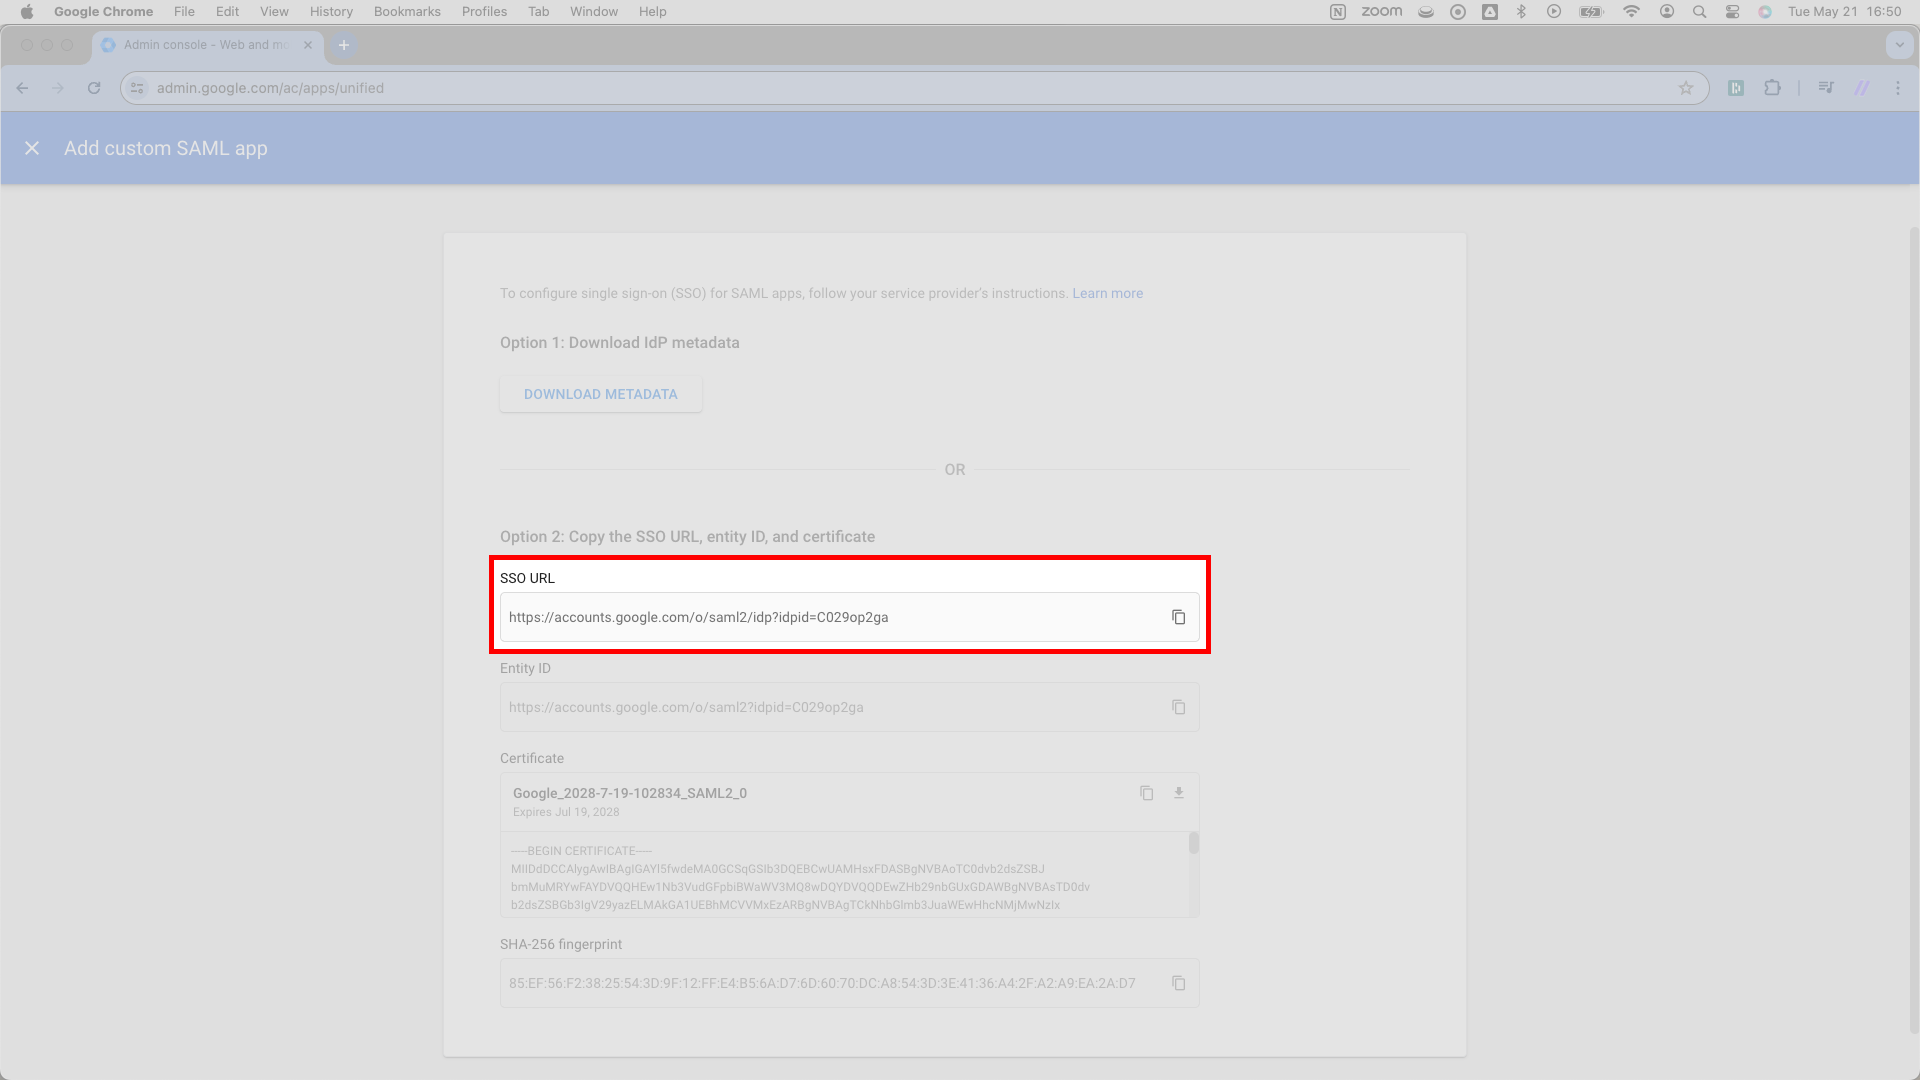
From here, direct you attention to Google’s Entity ID field. It sits directly under the SSO URL from the previous step.
Copy this Entity ID URL and paste it into SSOReady as the IDP Entity ID. You’ll find the input field for the IDP Entity ID adjacent to the Redirect URL input field from the previous step.
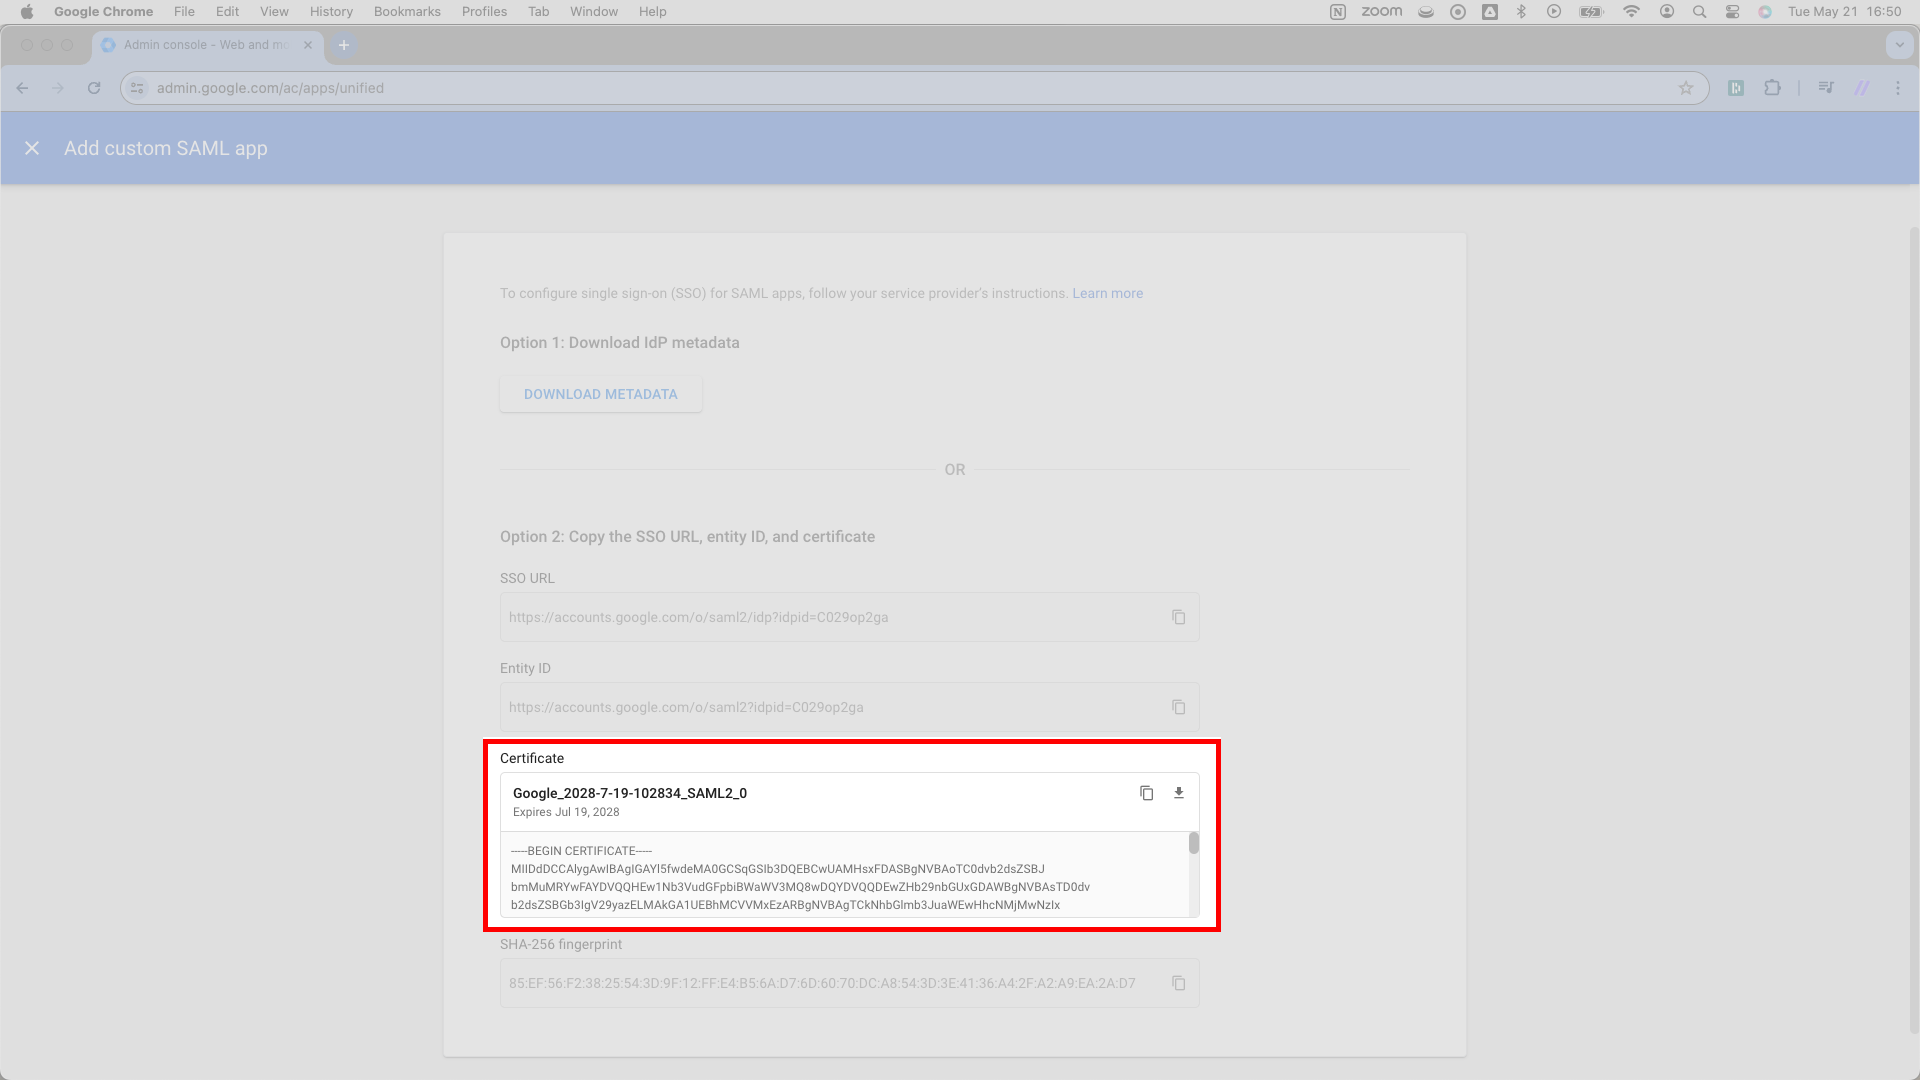
You need just one more detail from Google.
Navigate to the next field marked Certificate. Then, toward the top right corner of this Certificate field, you’ll see a download icon. Press the download icon; doing so downloads a .pem file. Its name will match the header you see here, something starting with Google and ending in SAML2_0.
Upload this .pem file to SSOReady as the Certificate in SSOReady’s web application.
Once you’re done with this step, SSOReady has all the information it needs. Now you simply need to supply Google with the relevant information about SSOReady.
A blue CONTINUE button sits toward the bottom right of the page. It may not be visible until you scroll down. Press this CONTINUE button.
Configure SAML Connection | Enter SSOReady details in Google
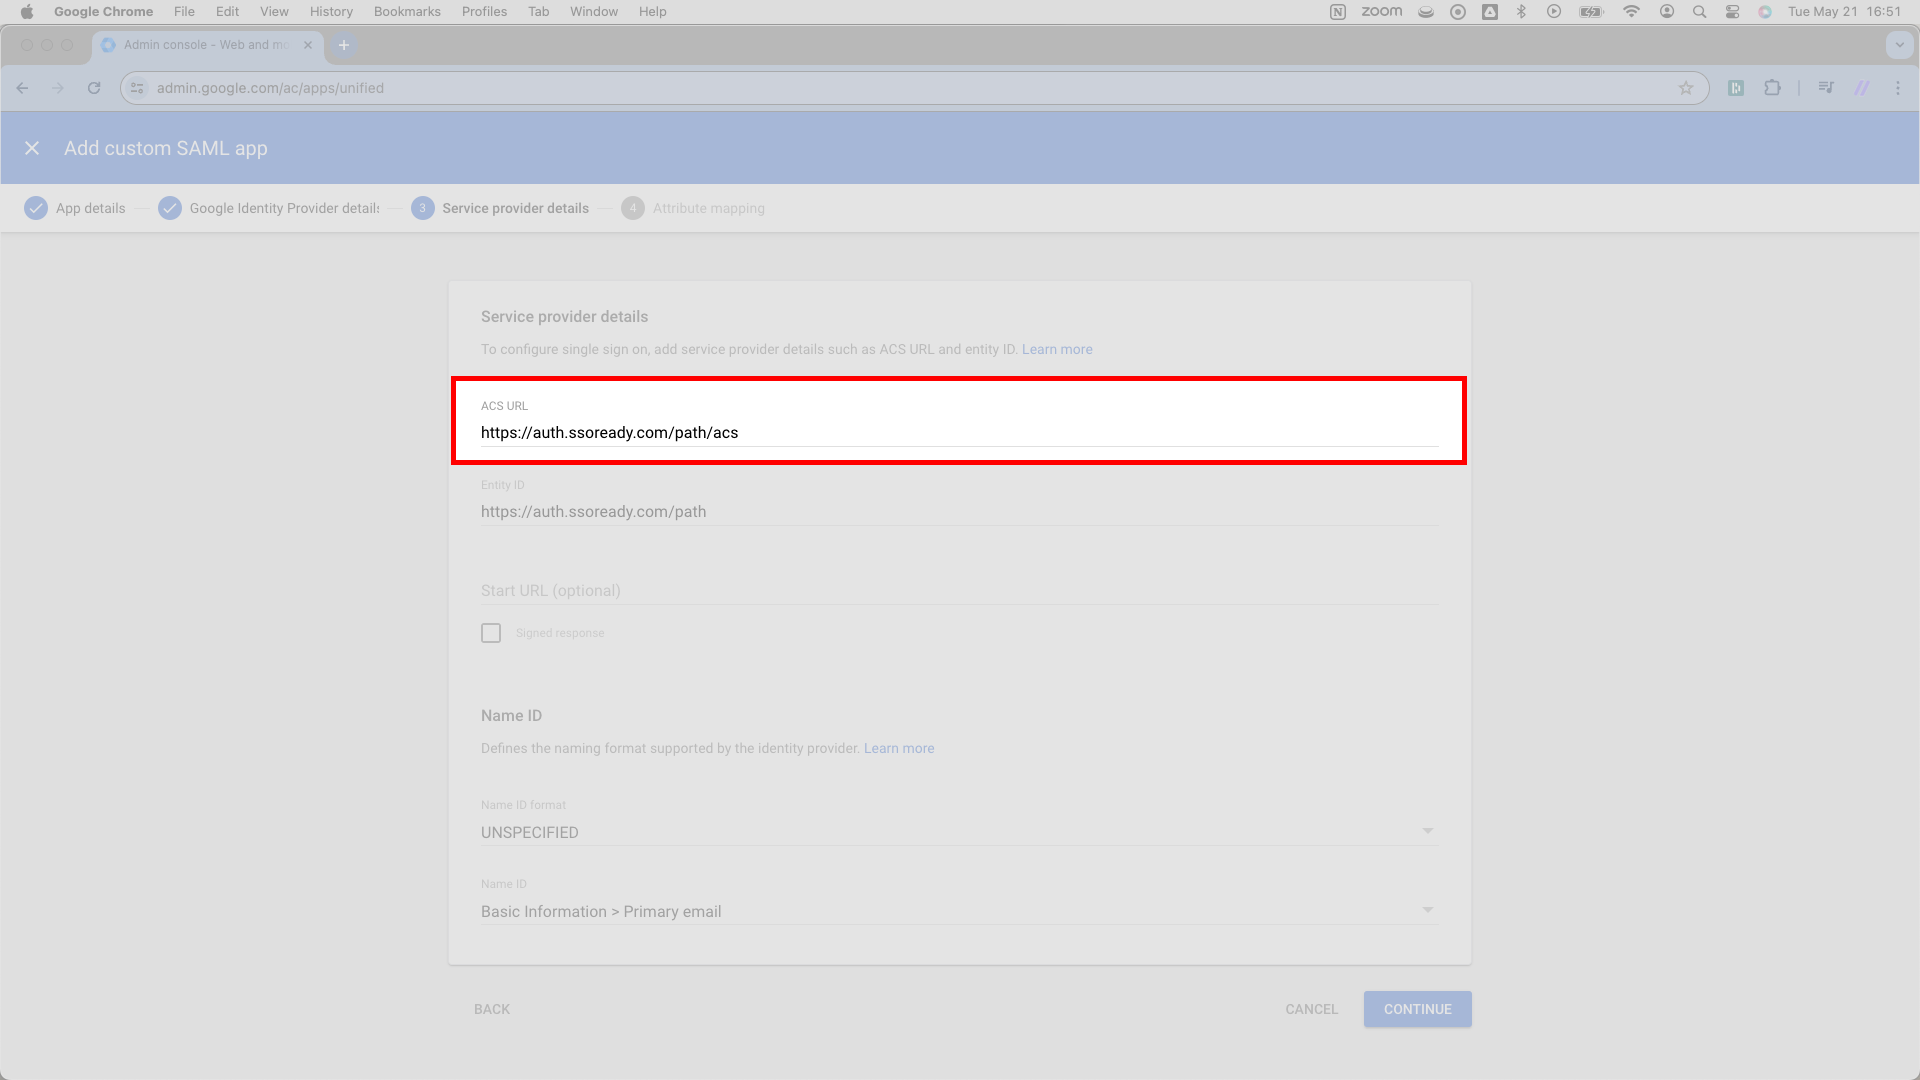
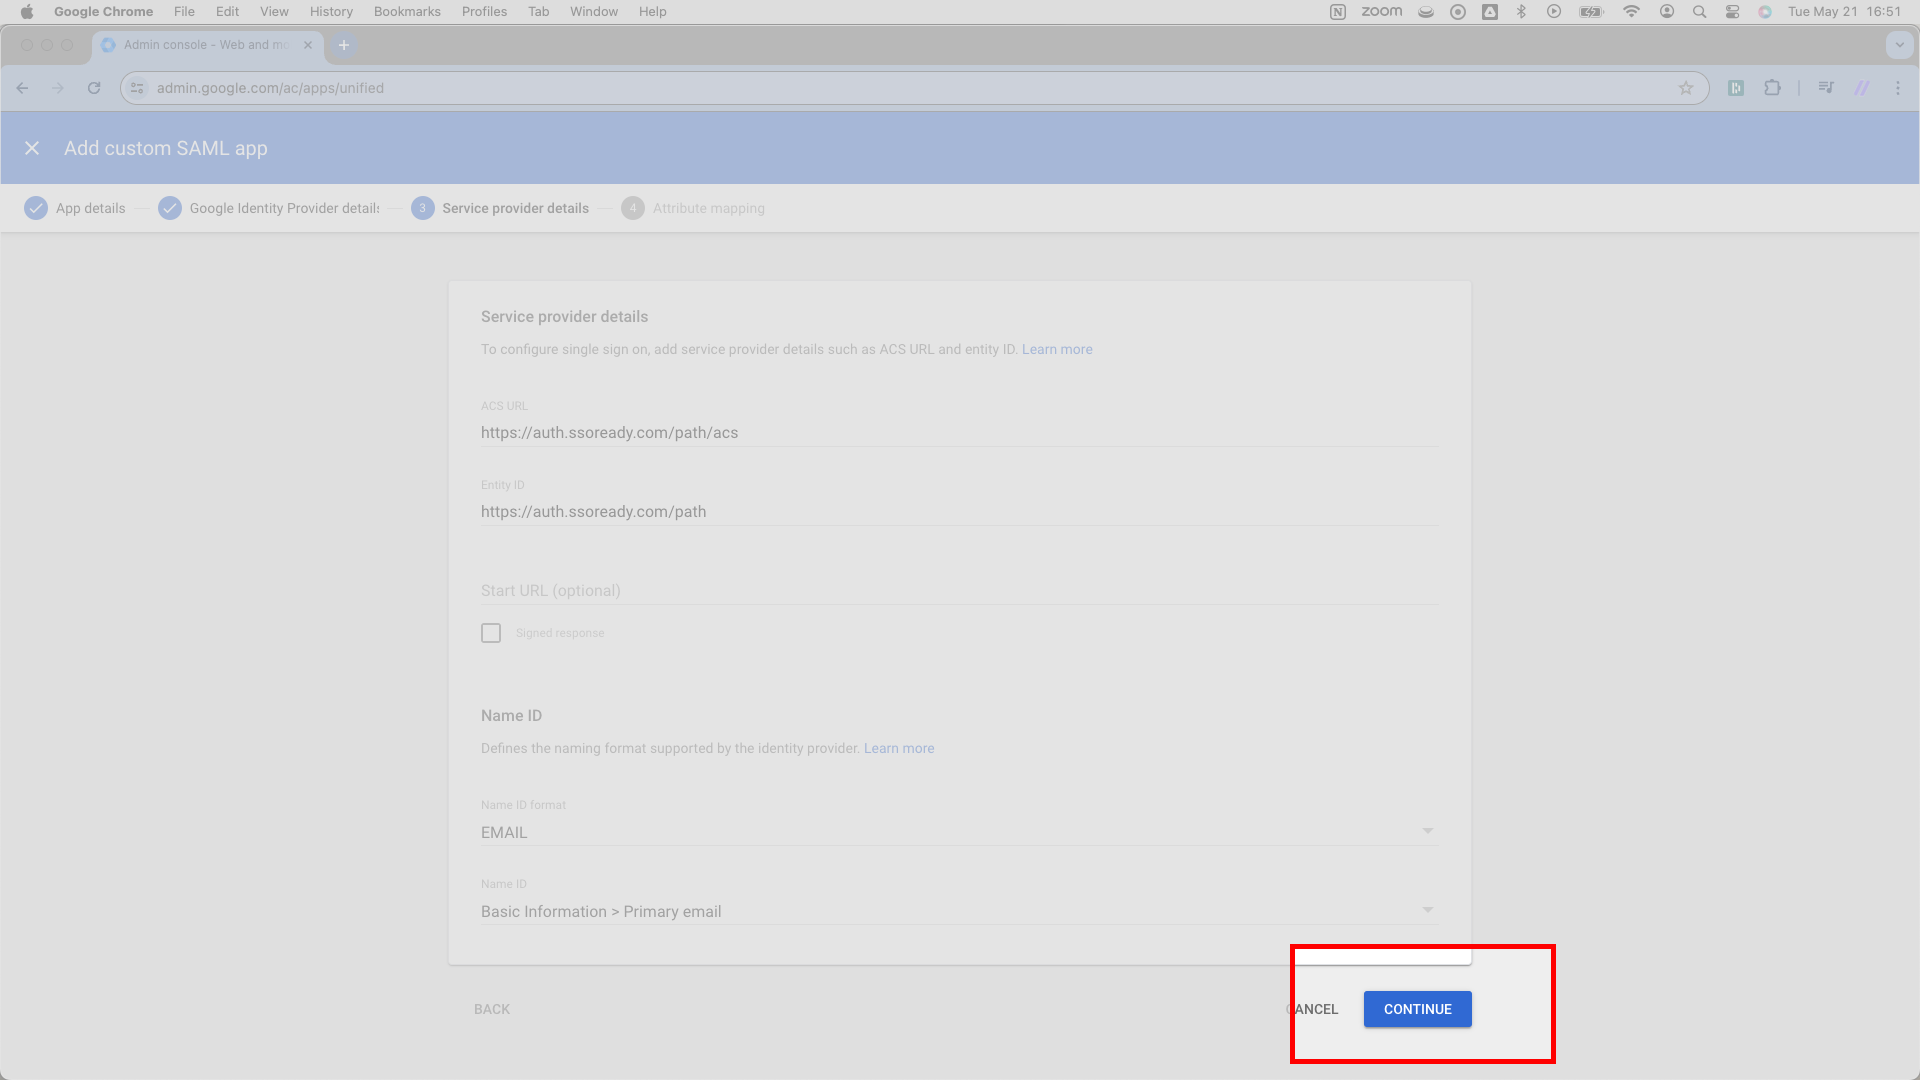
Once SSOReady knows about the Google app you’ve created, you need to tell Google about SSOReady. Google needs two pieces of information.
First, Google asks for an ACS URL. SSOReady calls this an Assertion Consumer Service (ACS) URL. You’ll find it on the Service Provider Configuration card for your SAML Connection. It ends in /acs.
Copy this Assertion Consumer Service (ACS) URL and paste it into Google’s ACS URL input field.
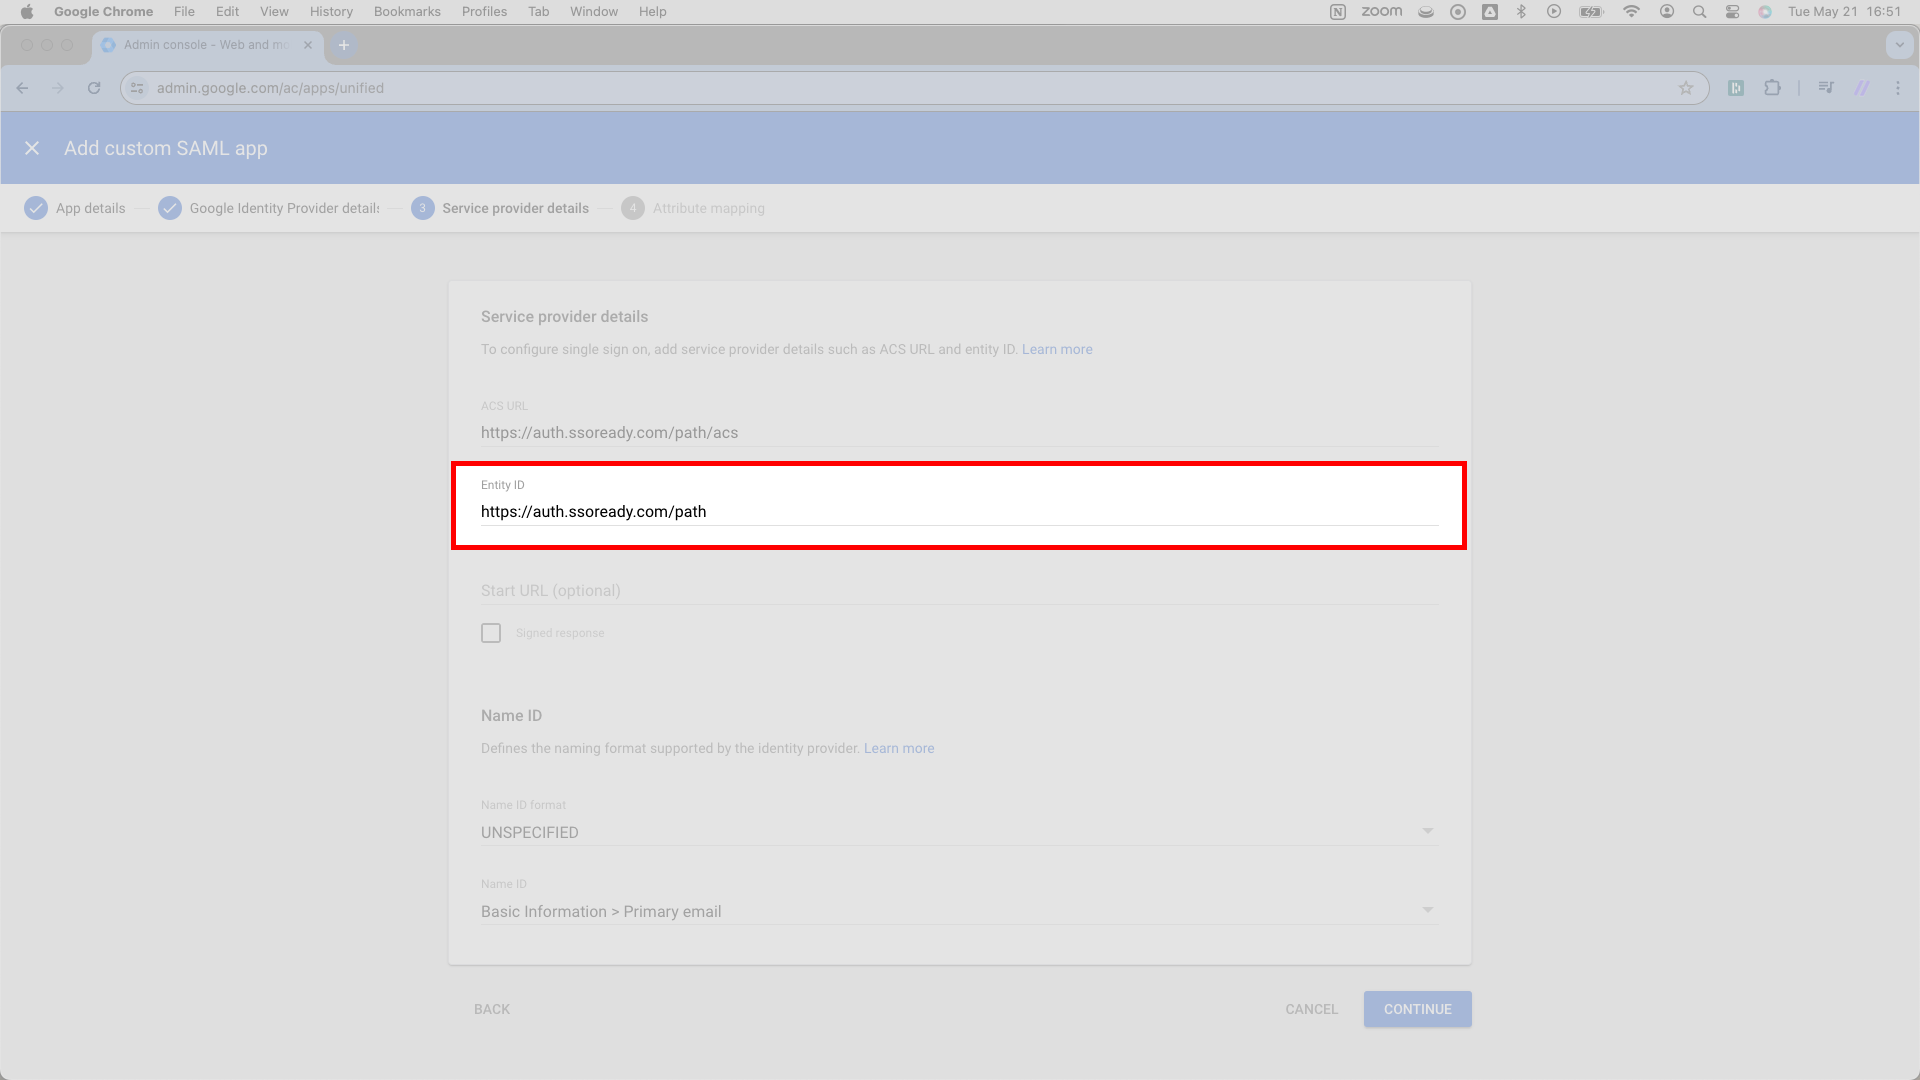
You’ll follow a similar pattern for an additional set of fields.
Directly below its ACS URL field, Google asks for an Entity ID. SSOReady calls this the SP Entity ID. You’ll find this URL right next to the Assertion Consumer Service (ACS) URL in SSOReady’s web application. As it turns out, the SP Entity ID looks exactly like the Assertion Consumer Service (ACS) URL, only it lacks the /acs ending.
Copy the SP Entity ID from SSOReady and enter it as the Entity ID in Google.
Click the blue CONTINUE button in the lower right corner.
Once you’ve completed this step, we’re done! You now have your product hooked up to your customer’s Google Identity instance.
Please note that your users can not successfully log in until your customer’s Google Identity administrator assigns them to the application. This, however, requires no input from you.