SAML with JumpCloud
Creating a JumpCloud application
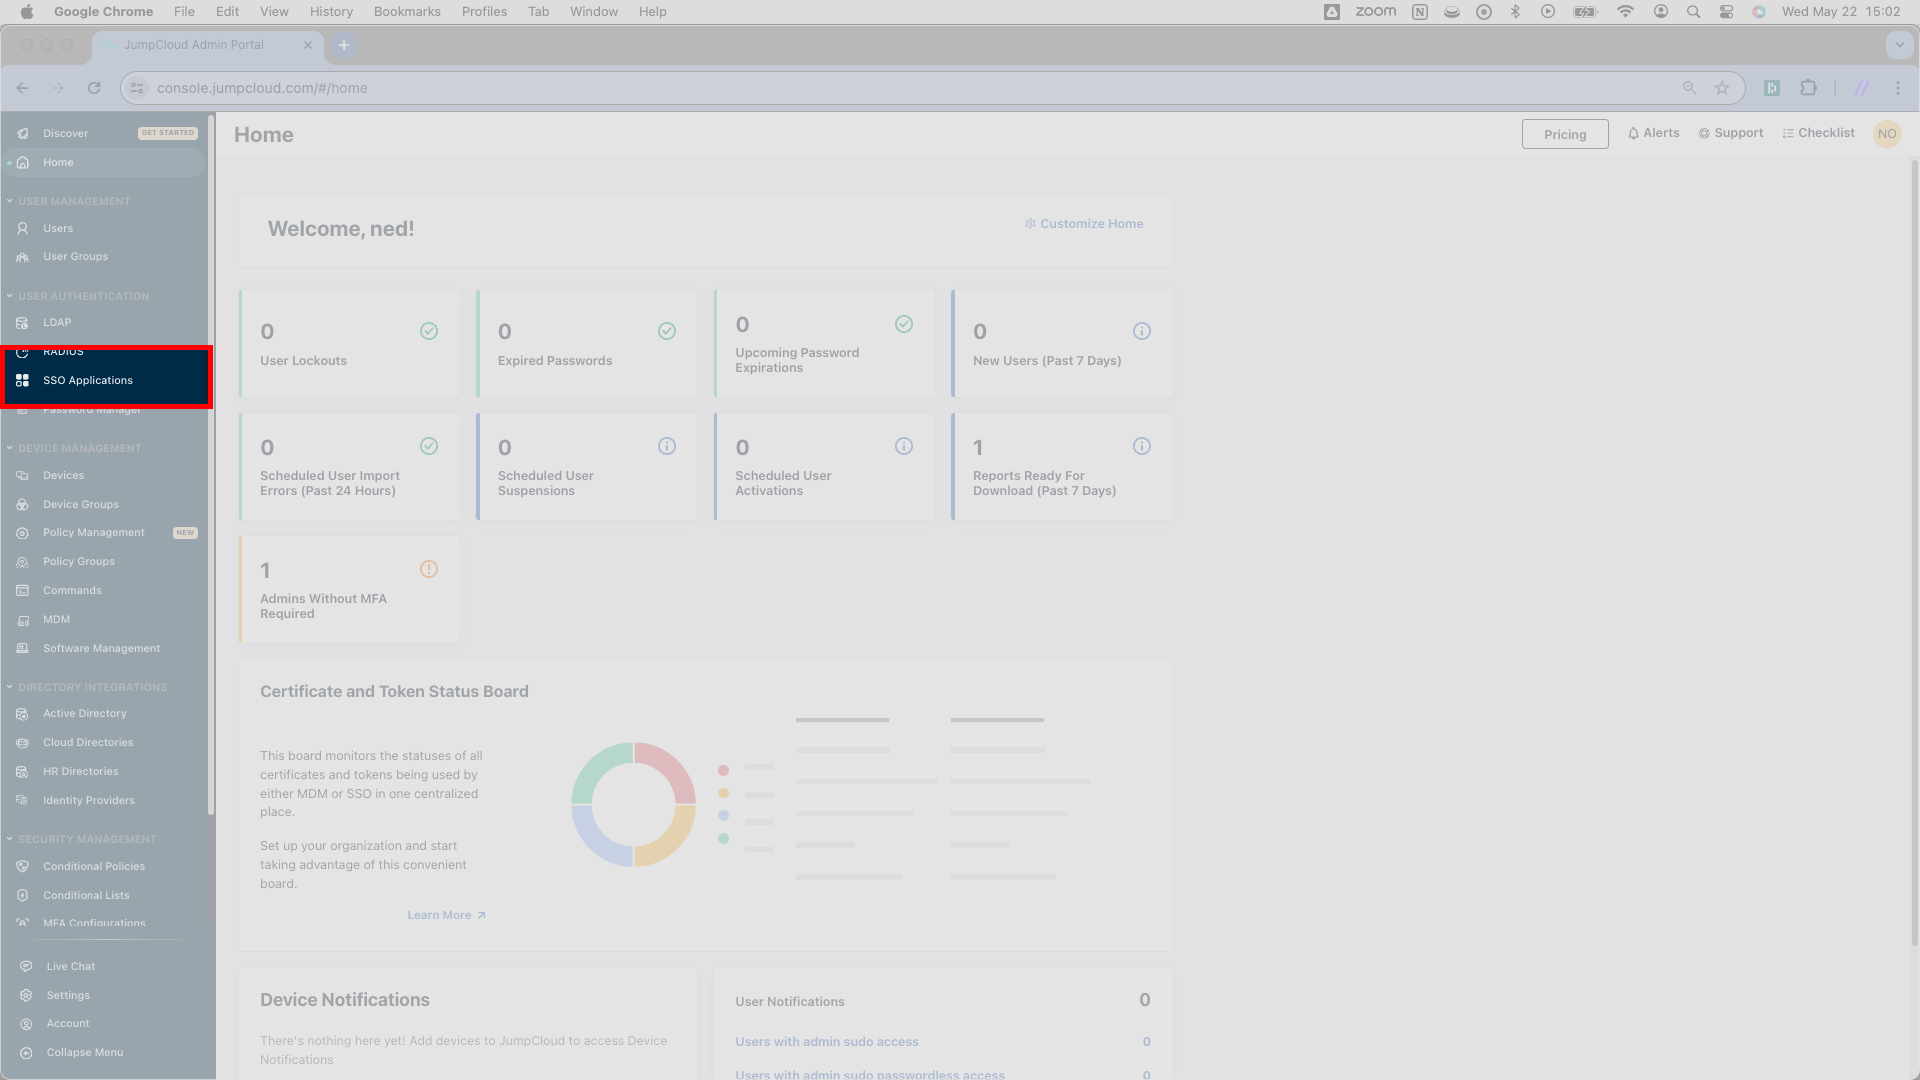
Start the JumpCloud set-up by creating an Application. From JumpCloud’s admin console, click SSO Applications in the left navigation pane. This will take you to a new page — the precise page you see depends on how many existing connections the JumpCloud instance has.
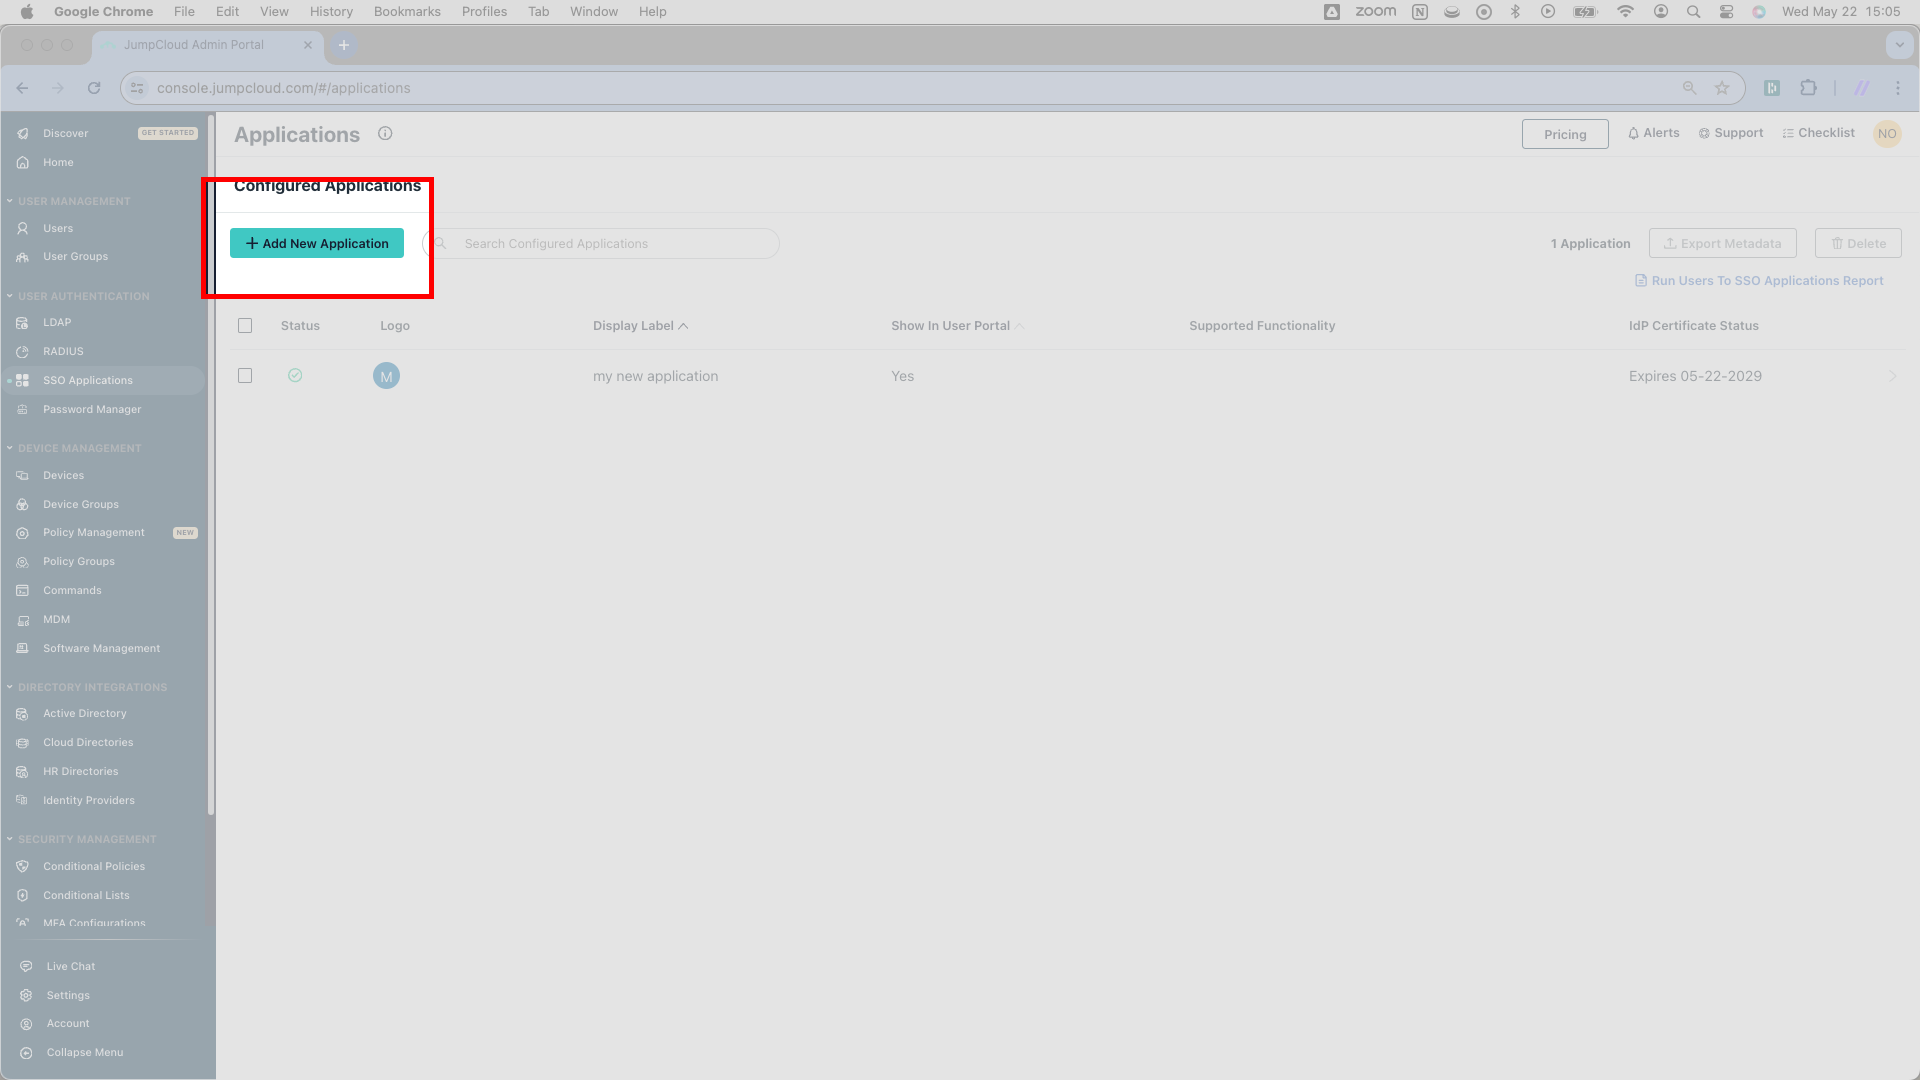
After clicking SSO Applications, you’ll see a Configured Applications page listing any configured SSO apps. On this page, click the green Add New Application button toward the top left; it will route you to another new page.
If your customer has no pre-existing SSO applications in JumpCloud, this page will show only a Get Started button. In this case, just click Get Started.
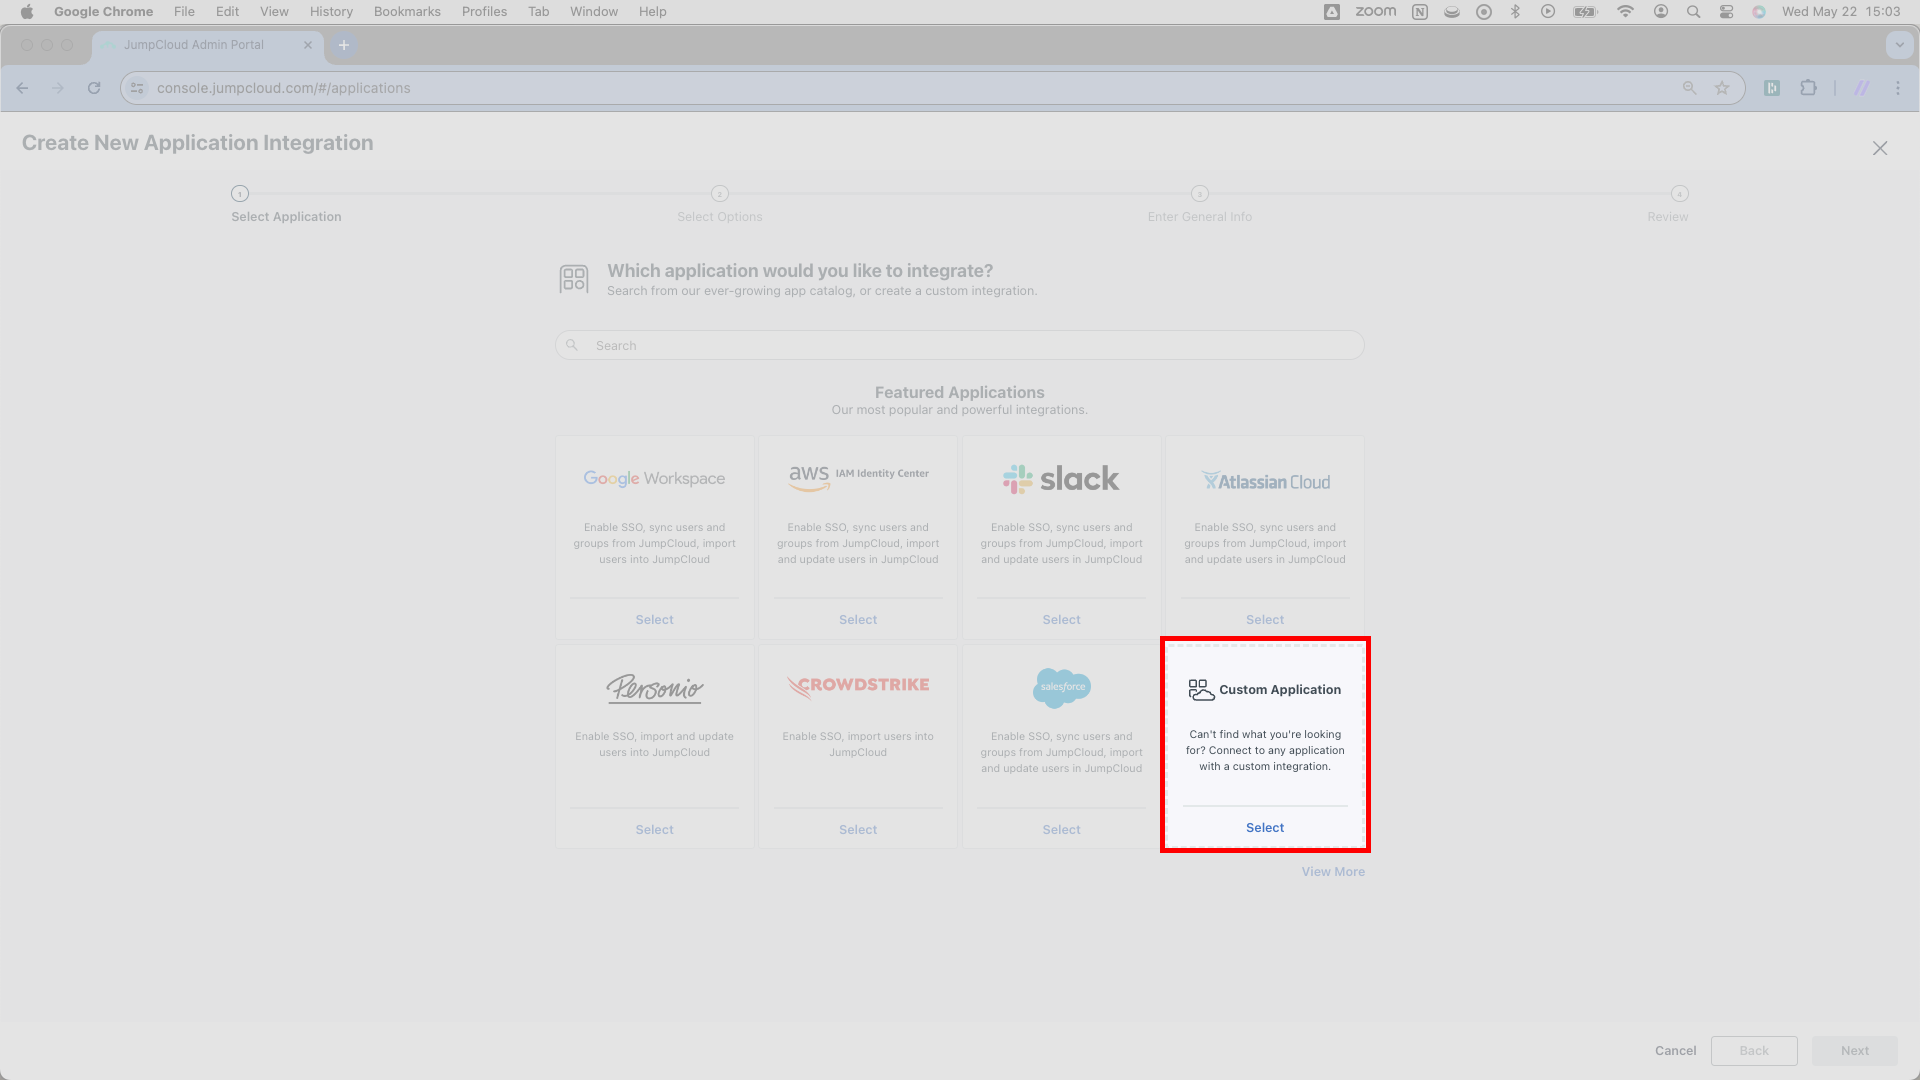
By this point, you will have arrived at a page reading Create New Application Integration in the top left with several cards featuring the logos of common SaaS applications. Look for the Custom Application card in the lower right and click where it says Select. This will send you to a new page.
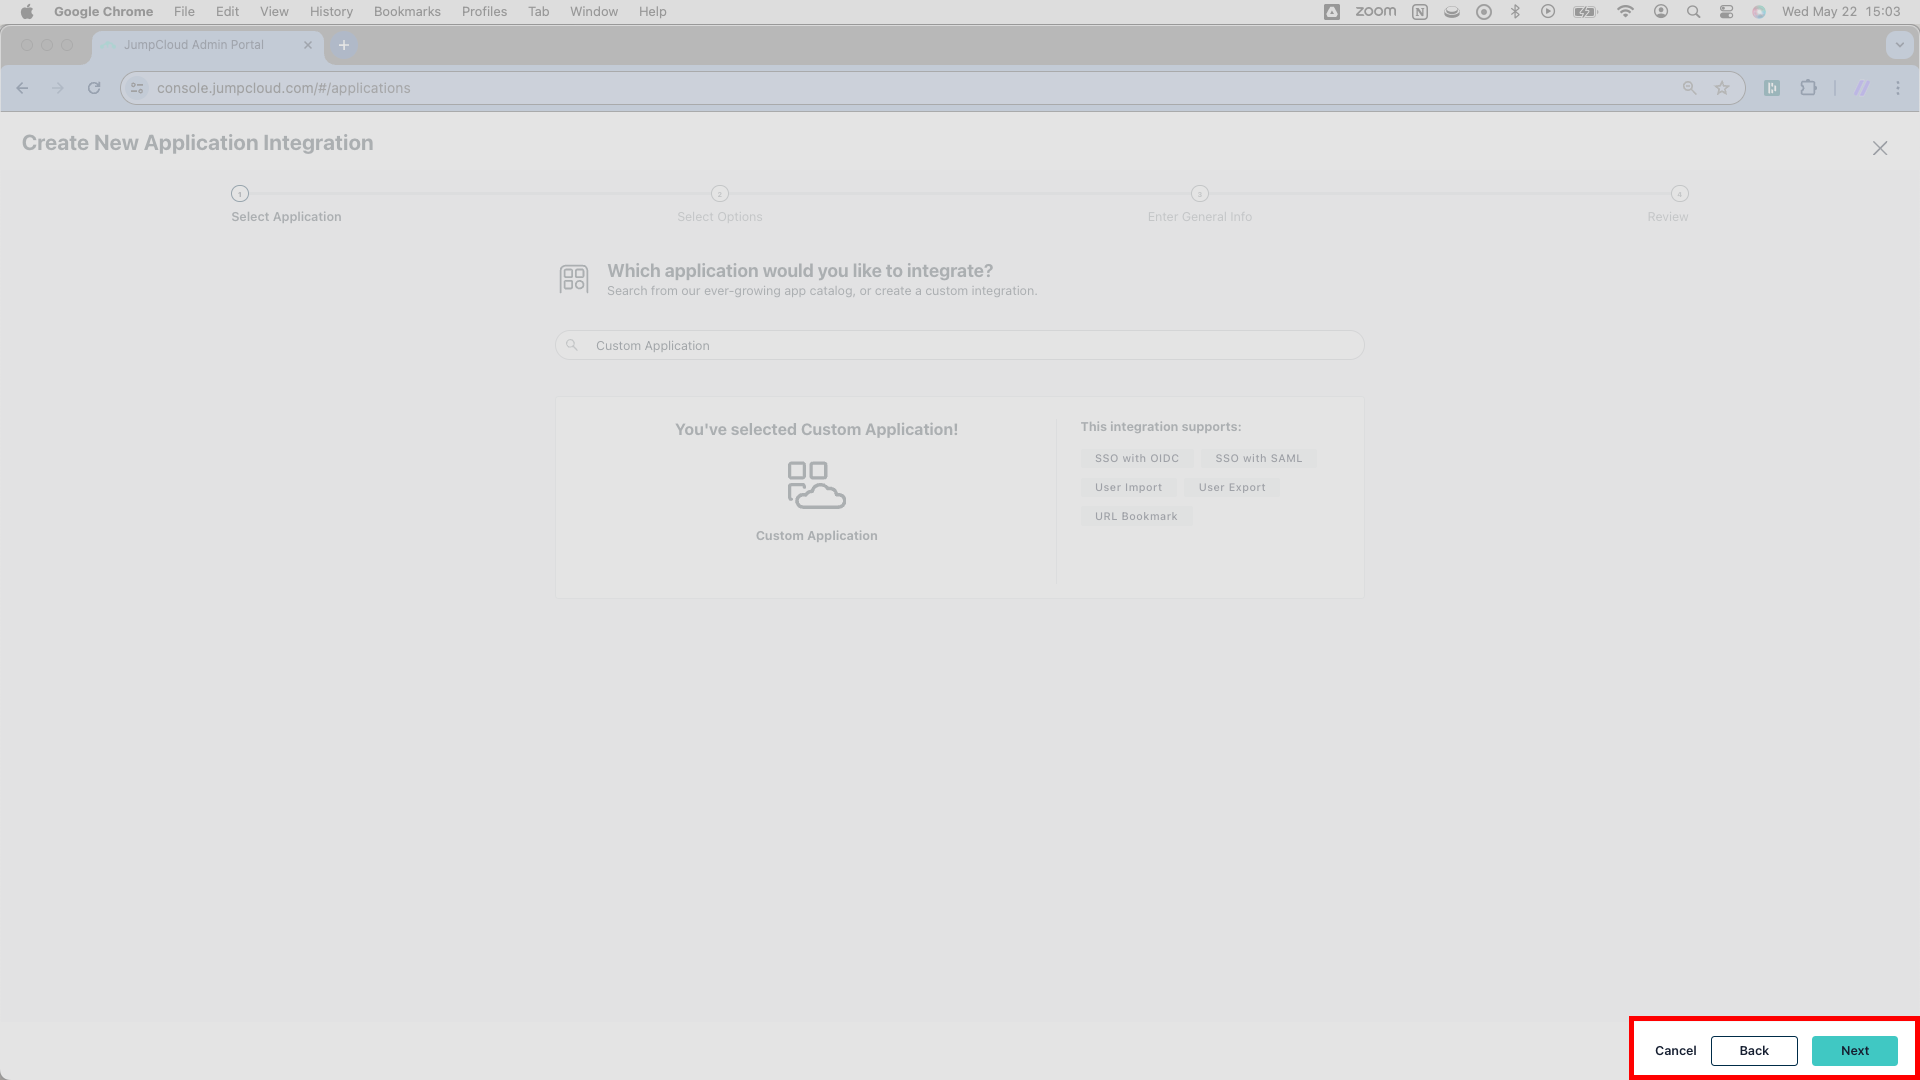
Upon arriving on this next page, click Next in the lower right to move on and see the next page.
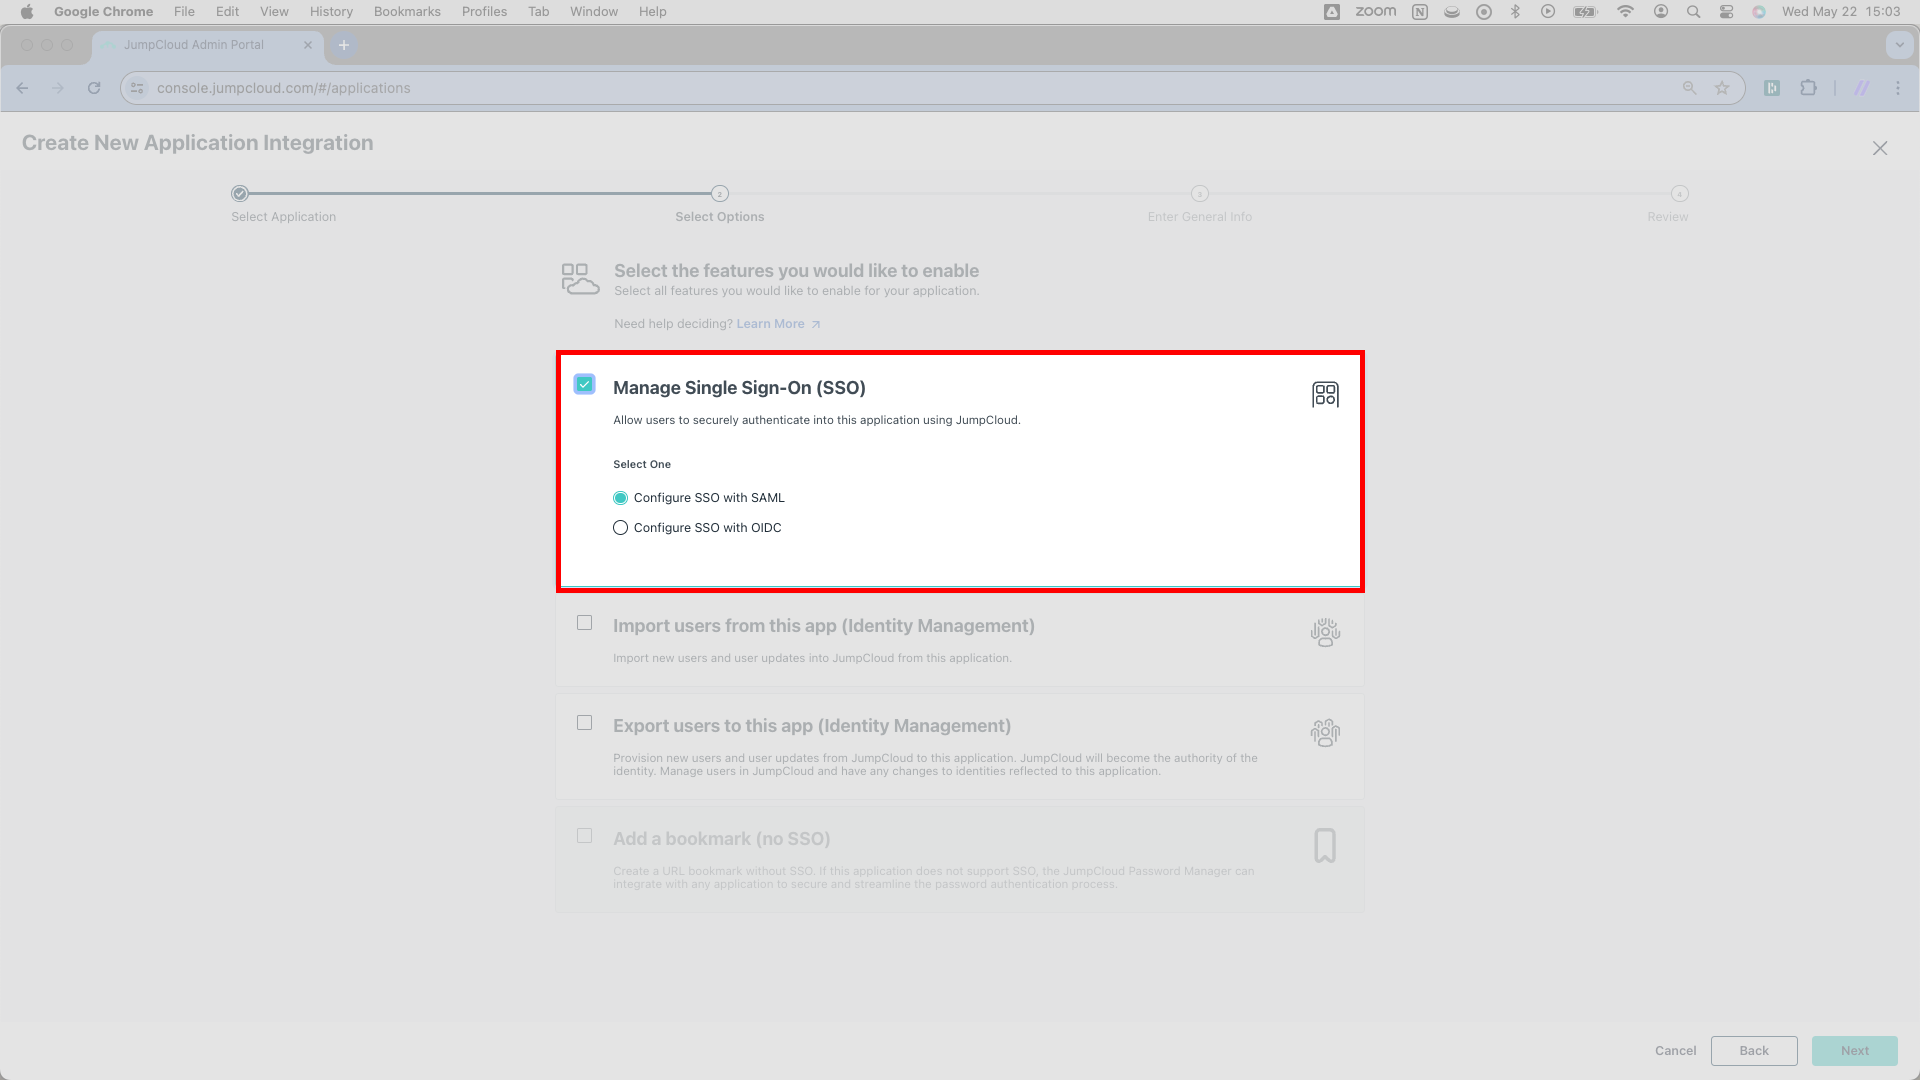
Here, you’ll see a few checkboxes. Select the first checkbox, labeled Manage Single Sign-On (SSO). Checking this box will trigger two radio buttons to expand. Select the first option from the radio buttons: Configure SSO with SAML.
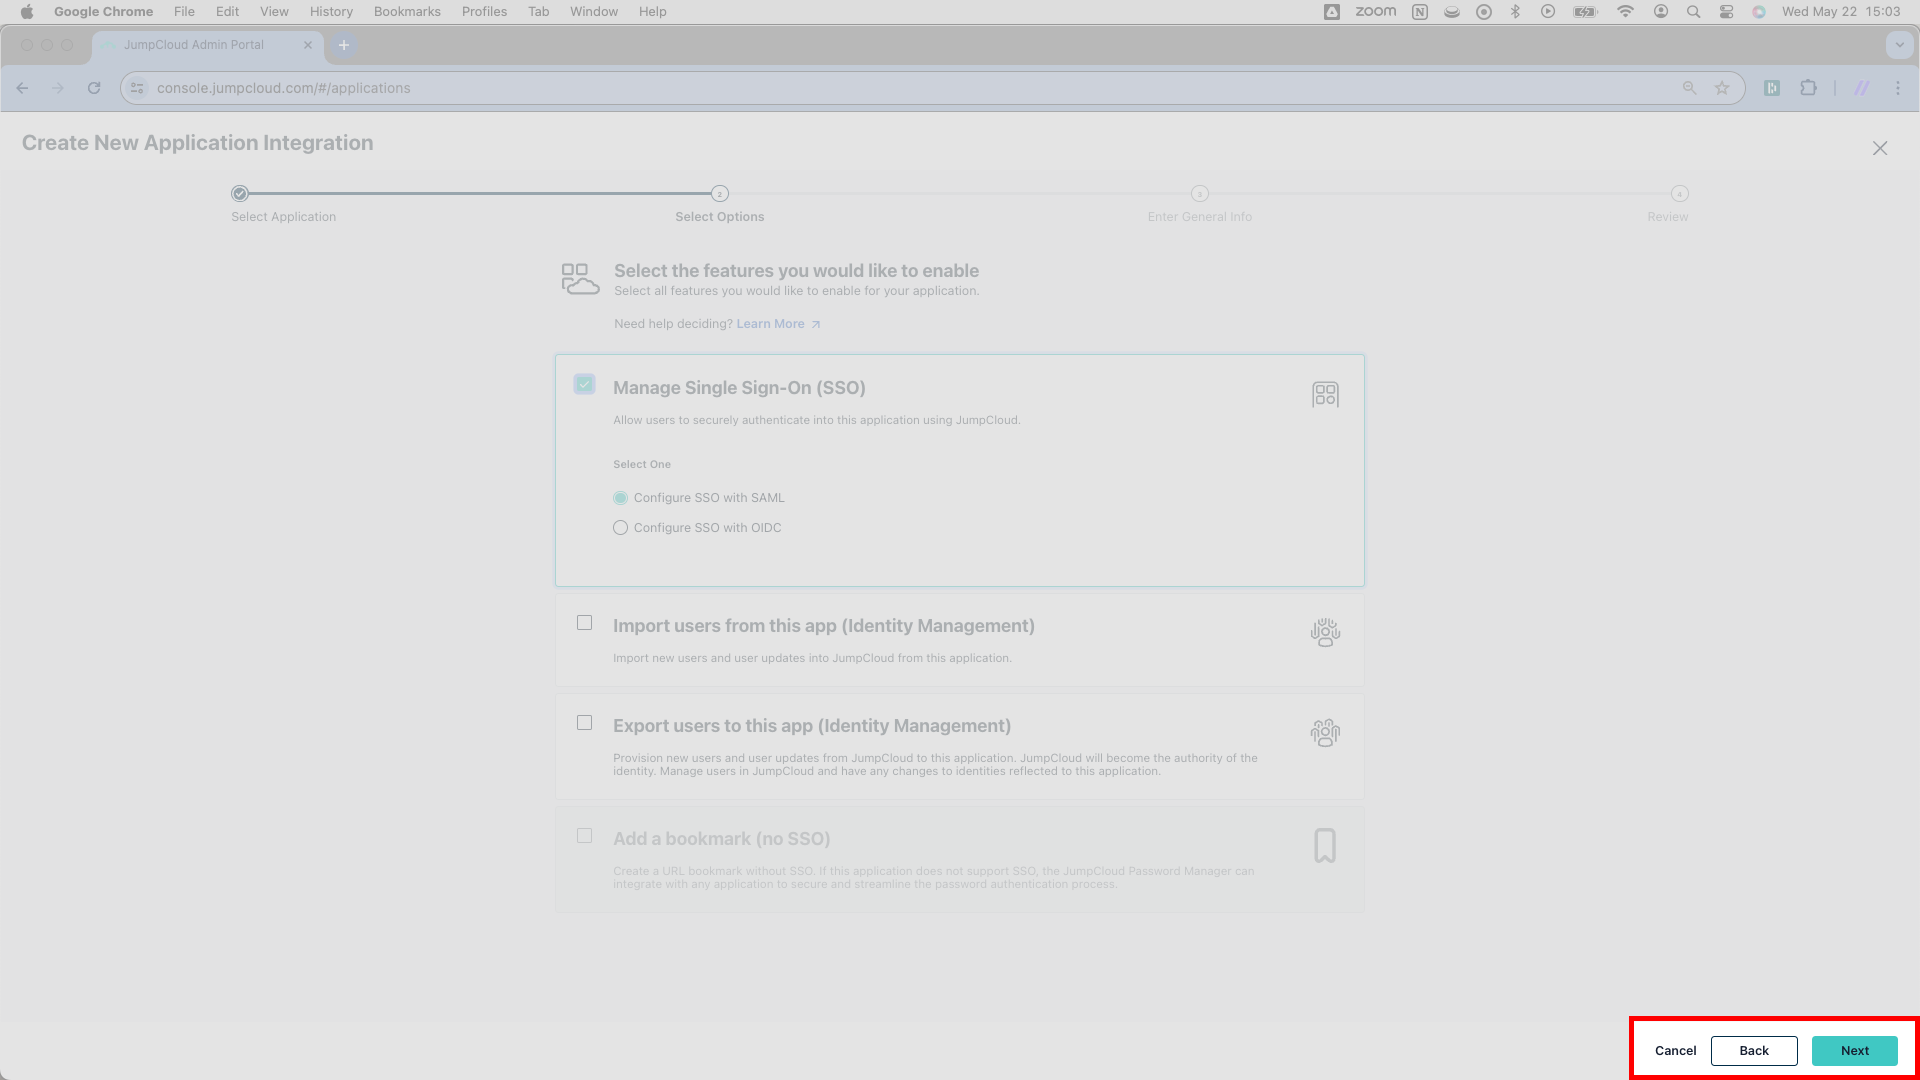
Click Next in the lower right corner.
JumpCloud wants you to assign a Display Label. Fill this field with the name of your product.
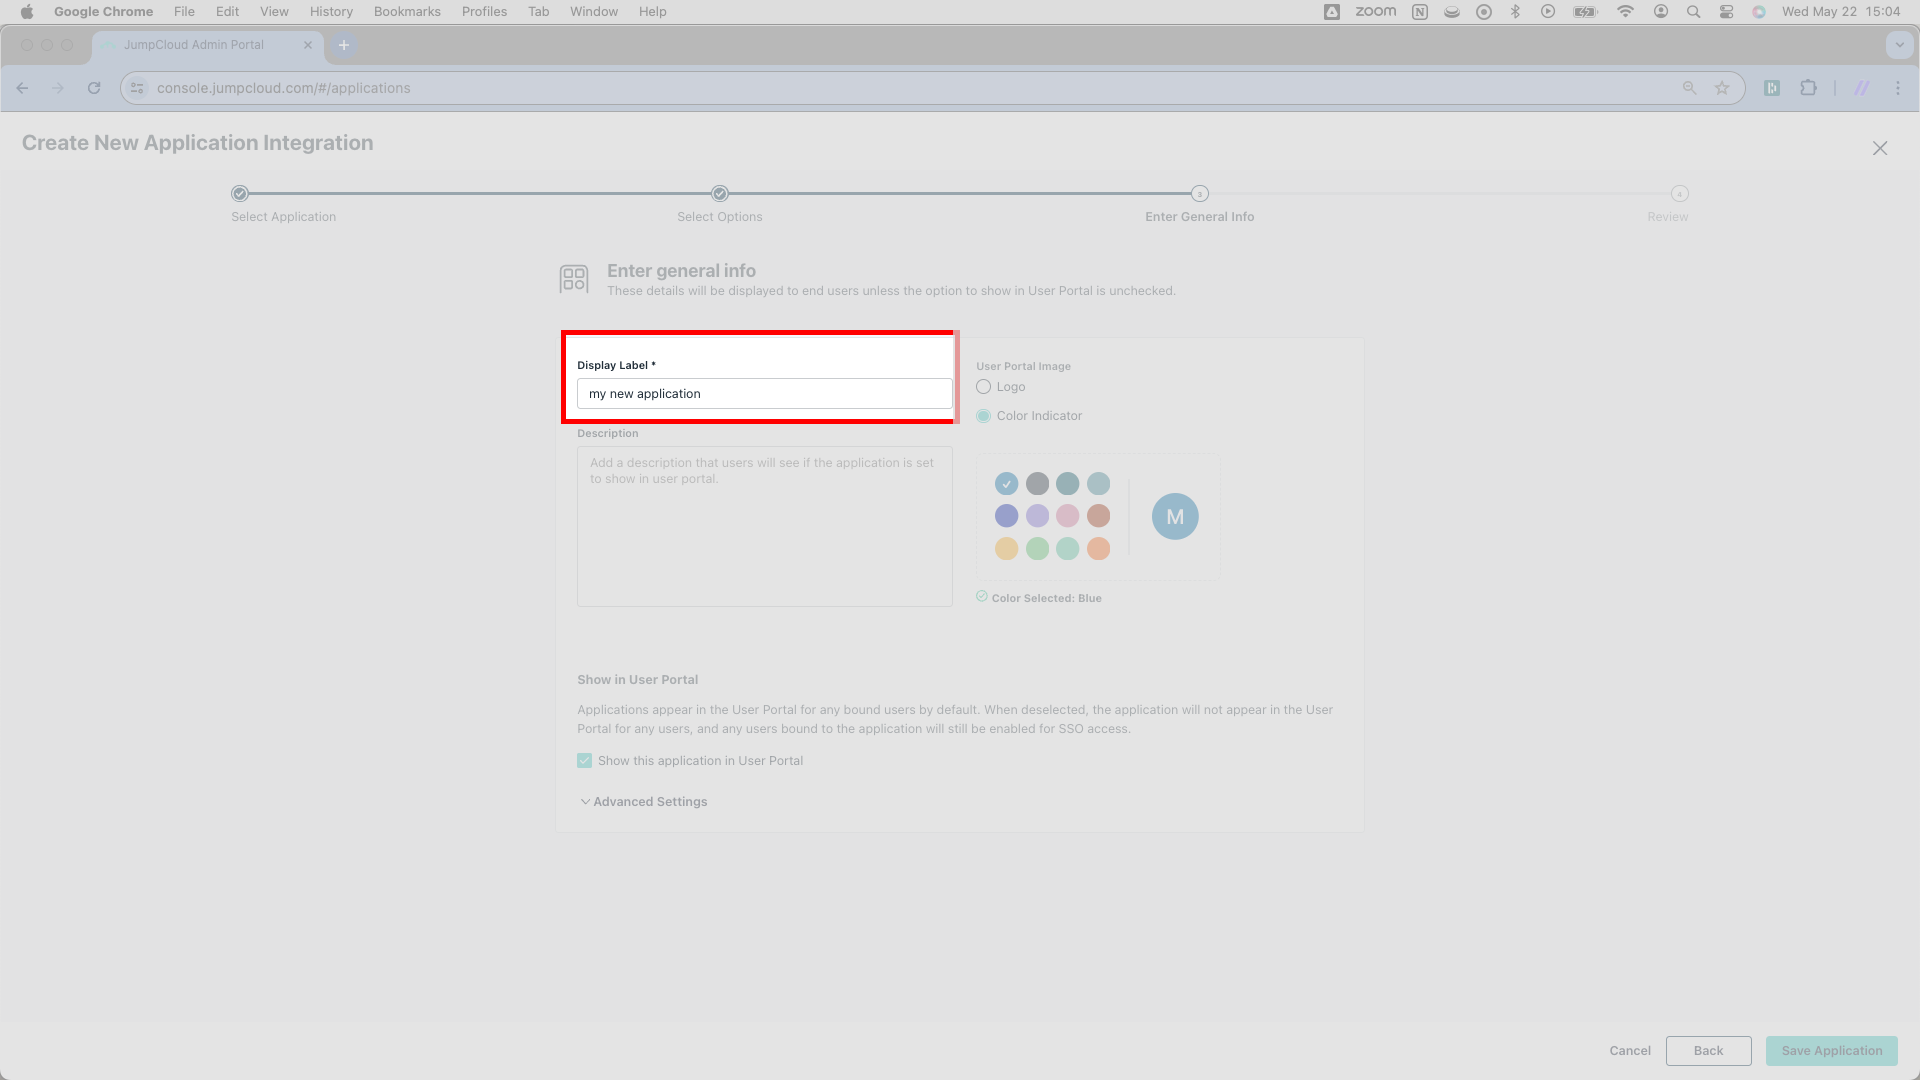
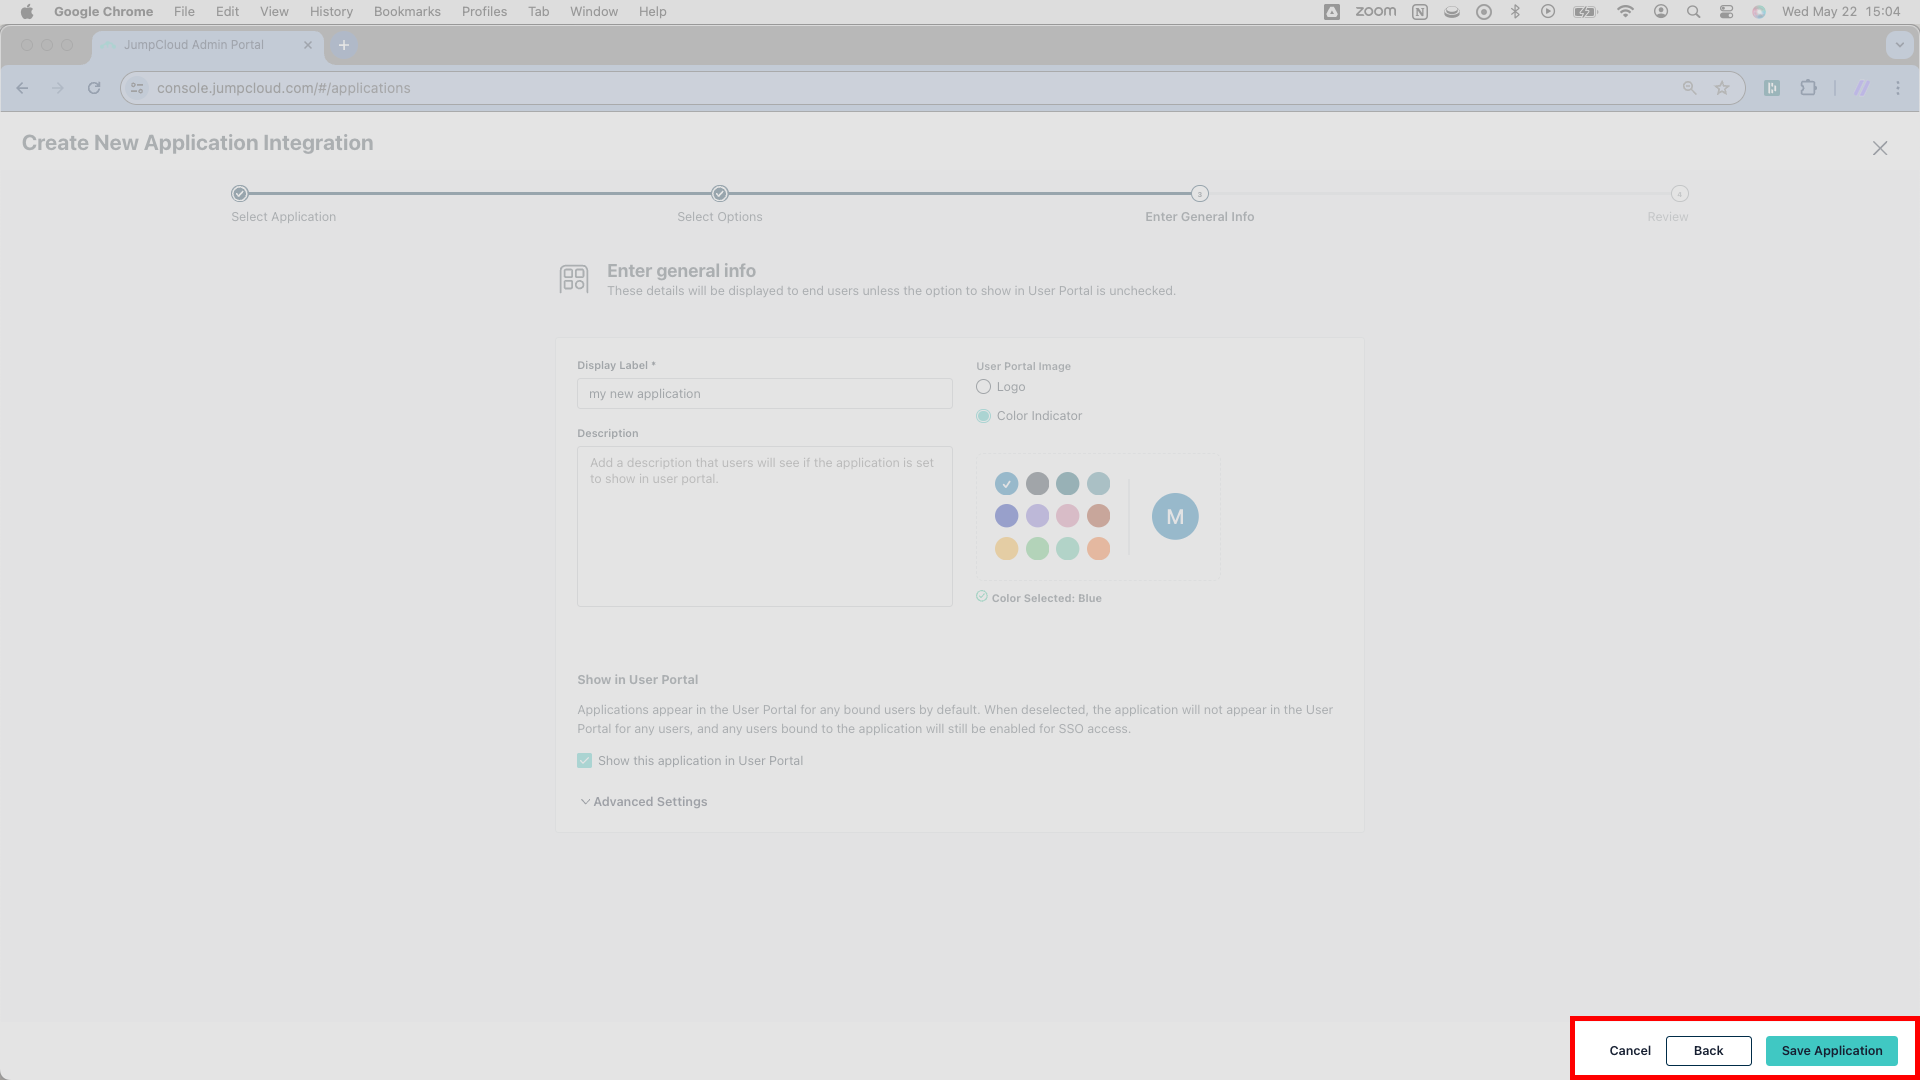
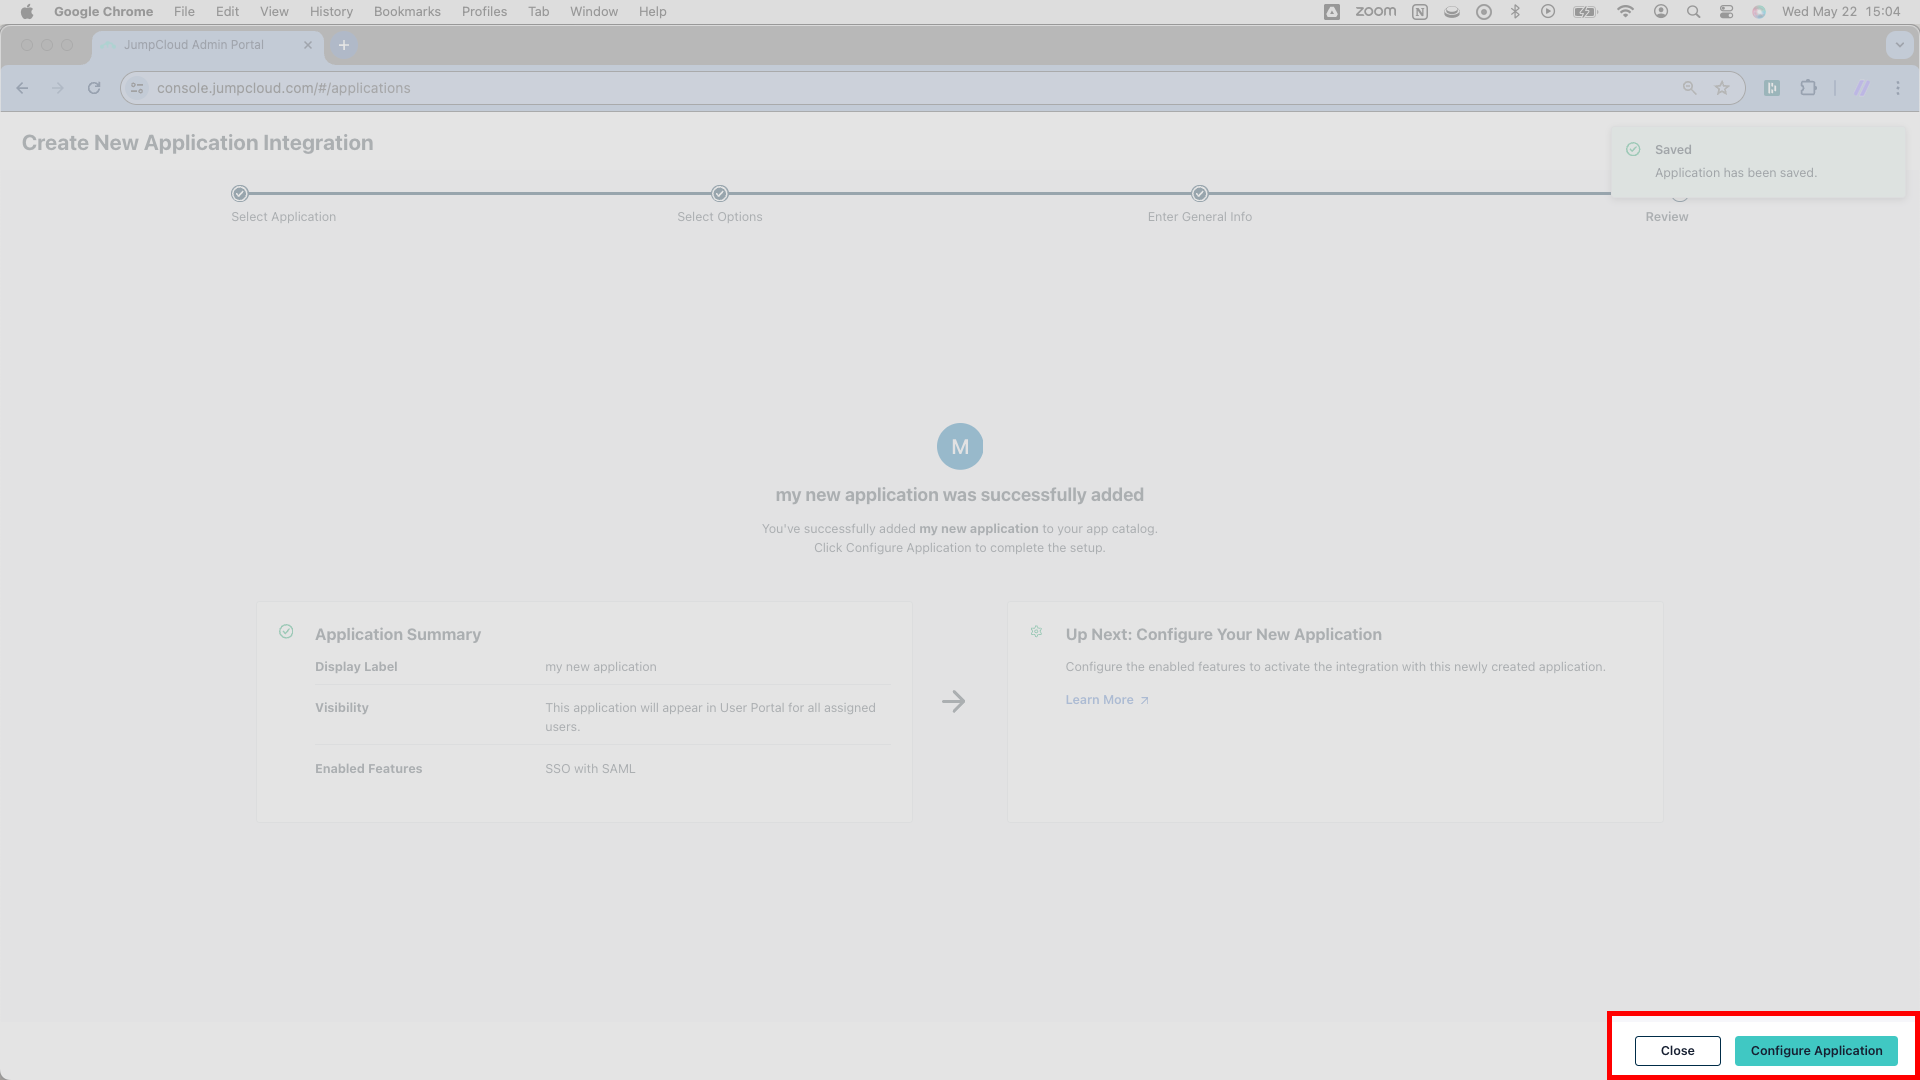
Having entered a Display Label, click Save Application in the lower right corner. This will send you to a new page.
On this page, press Configure Application.
You’ve now completed the first step of JumpCloud configuration and can move to the next step, entering details about SSOReady into JumpCloud.
Configure SAML Connection | Enter SSOReady details in JumpCloud
JumpCloud needs two important pieces of information from SSOReady.
Start with the first of these, a field JumpCloud calls the SP Entity ID. As it turns out, SSOReady assigns this data the same name. In the SSOReady web application, navigate to the detail page for the relevant SAML connection. From this page, copy the URL labeled SP Entity ID and paste it into JumpCloud’s SP Entity ID field.
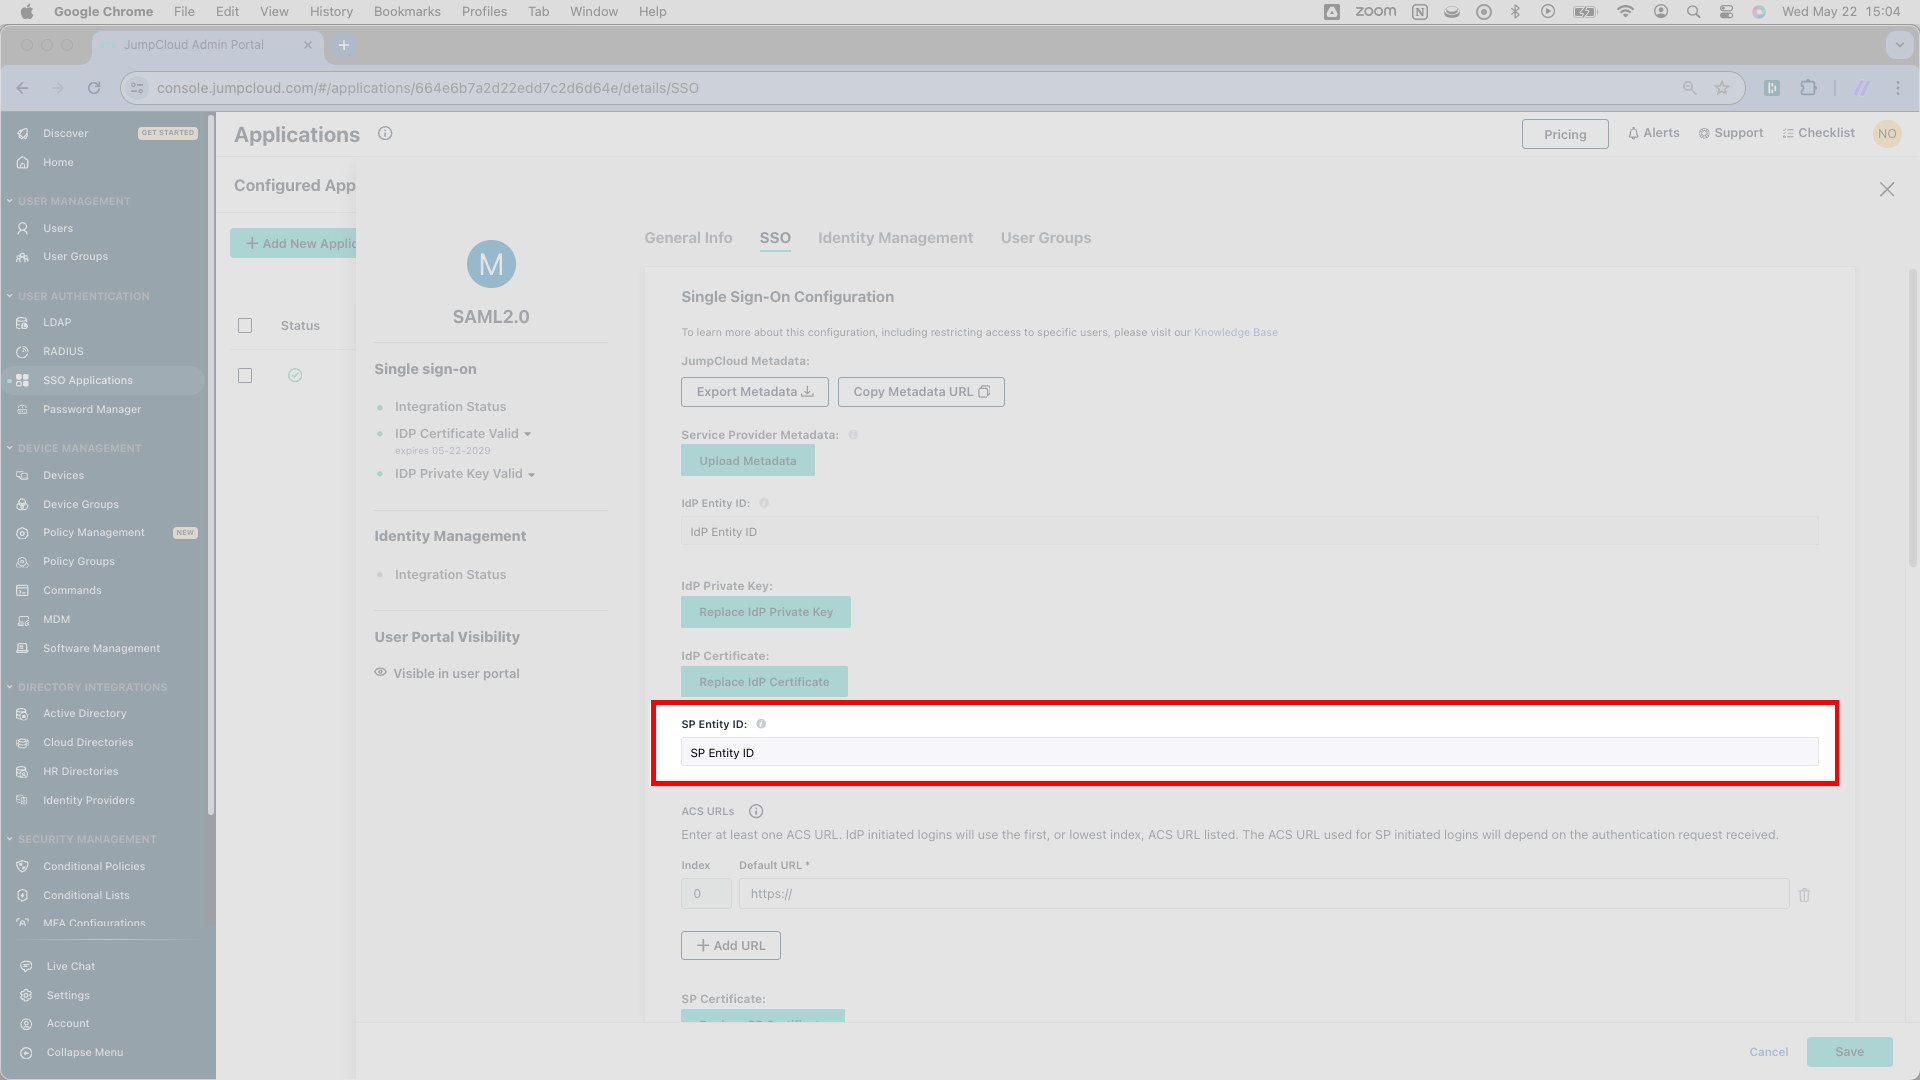
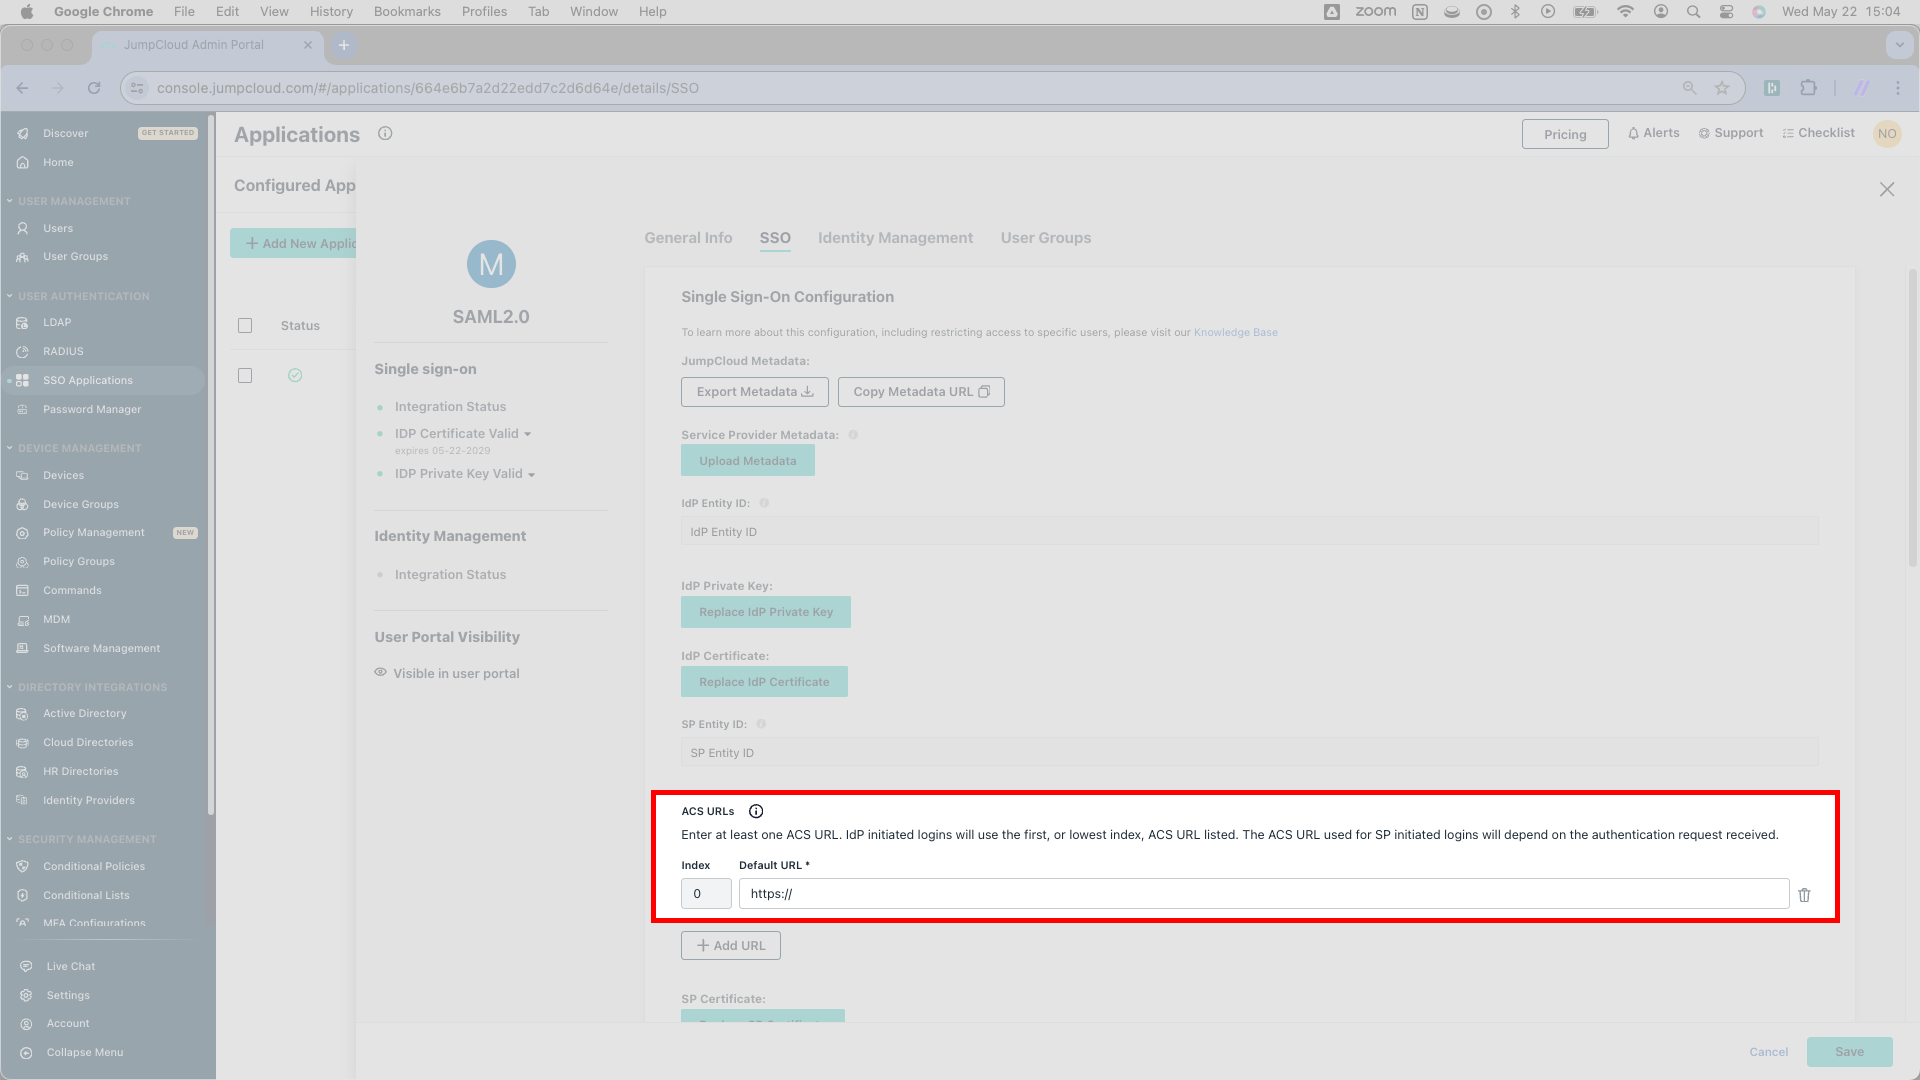
JumpCloud asks for ACS URLs. SSOReady provides exactly one for you.
Navigating back to the SSOReady web application, you’ll find a URL marked Assertion Consumer Service (ACS) URL associated with your SAML Connection. As it turns out, this your URL looks nearly identital to the SP Entity ID from the previous step. Moreover, it looks nearly identical to the SP Entity ID, only affixed with /acs at the end of the URL.
WCopy the Assertion Consumer Service (ACS) URL from SSOReady and paste it into JumpCloud as an ACS URL.
JumpCloud now has all the information it needs about SSOReady.
Configure SAML Connection | Enter JumpCloud details in SSOReady
Our next step requires copying a few details from JumpCloud into SSOReady.
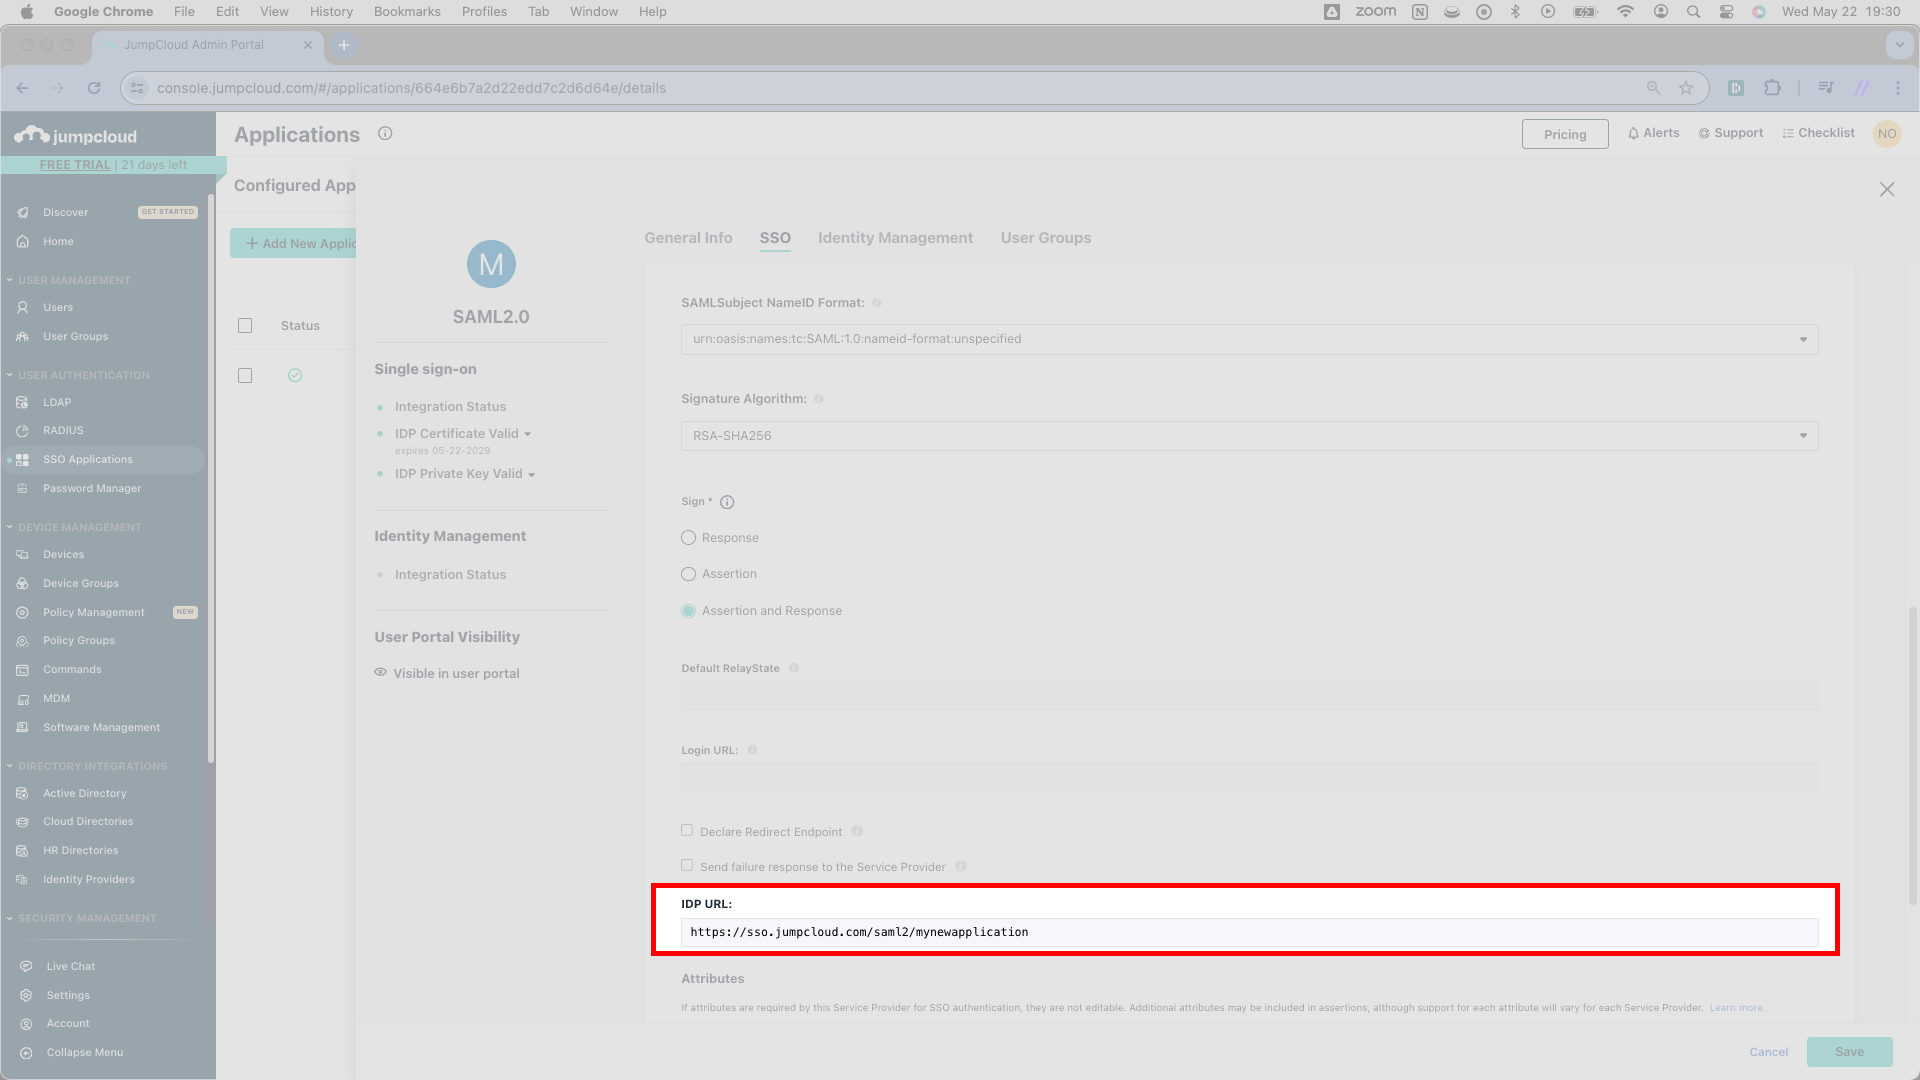
First, scroll down to a URL that JumpCloud calls the IDP URL. SSOReady calls this the Redirect URL. Copy JumpCloud’s IDP URL and paste it into SSOReady as the Redirect URL.
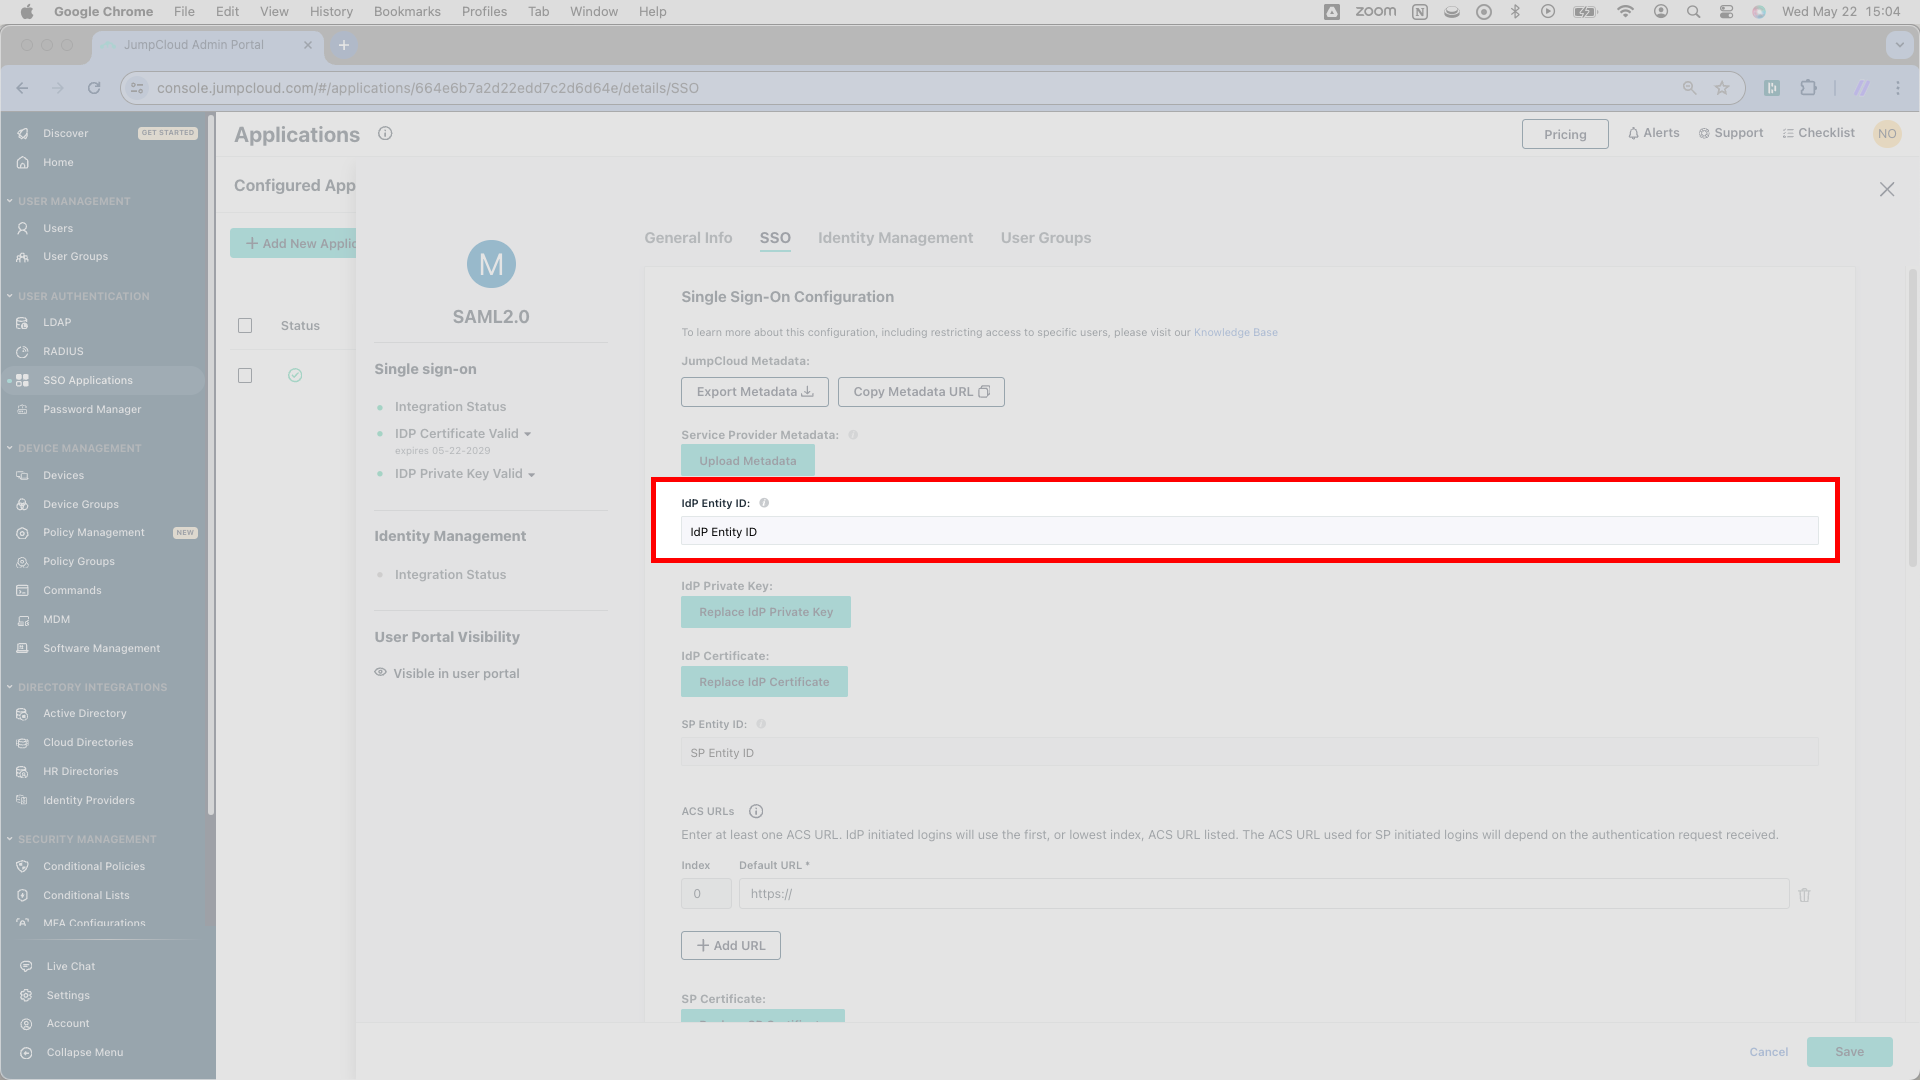
SSOReady also needs an IDP Entity ID. It turns out that JumpCloud doesn’t provide one, but it’s fine just to enter two matching strings in both JumpCloud and SSOReady.
Write “JumpCloud” in SSOReady as the IDP Entity ID. You just need JumpCloud to match, so write “JumpCloud” in the field that JumpCloud calls IDP Entity ID.
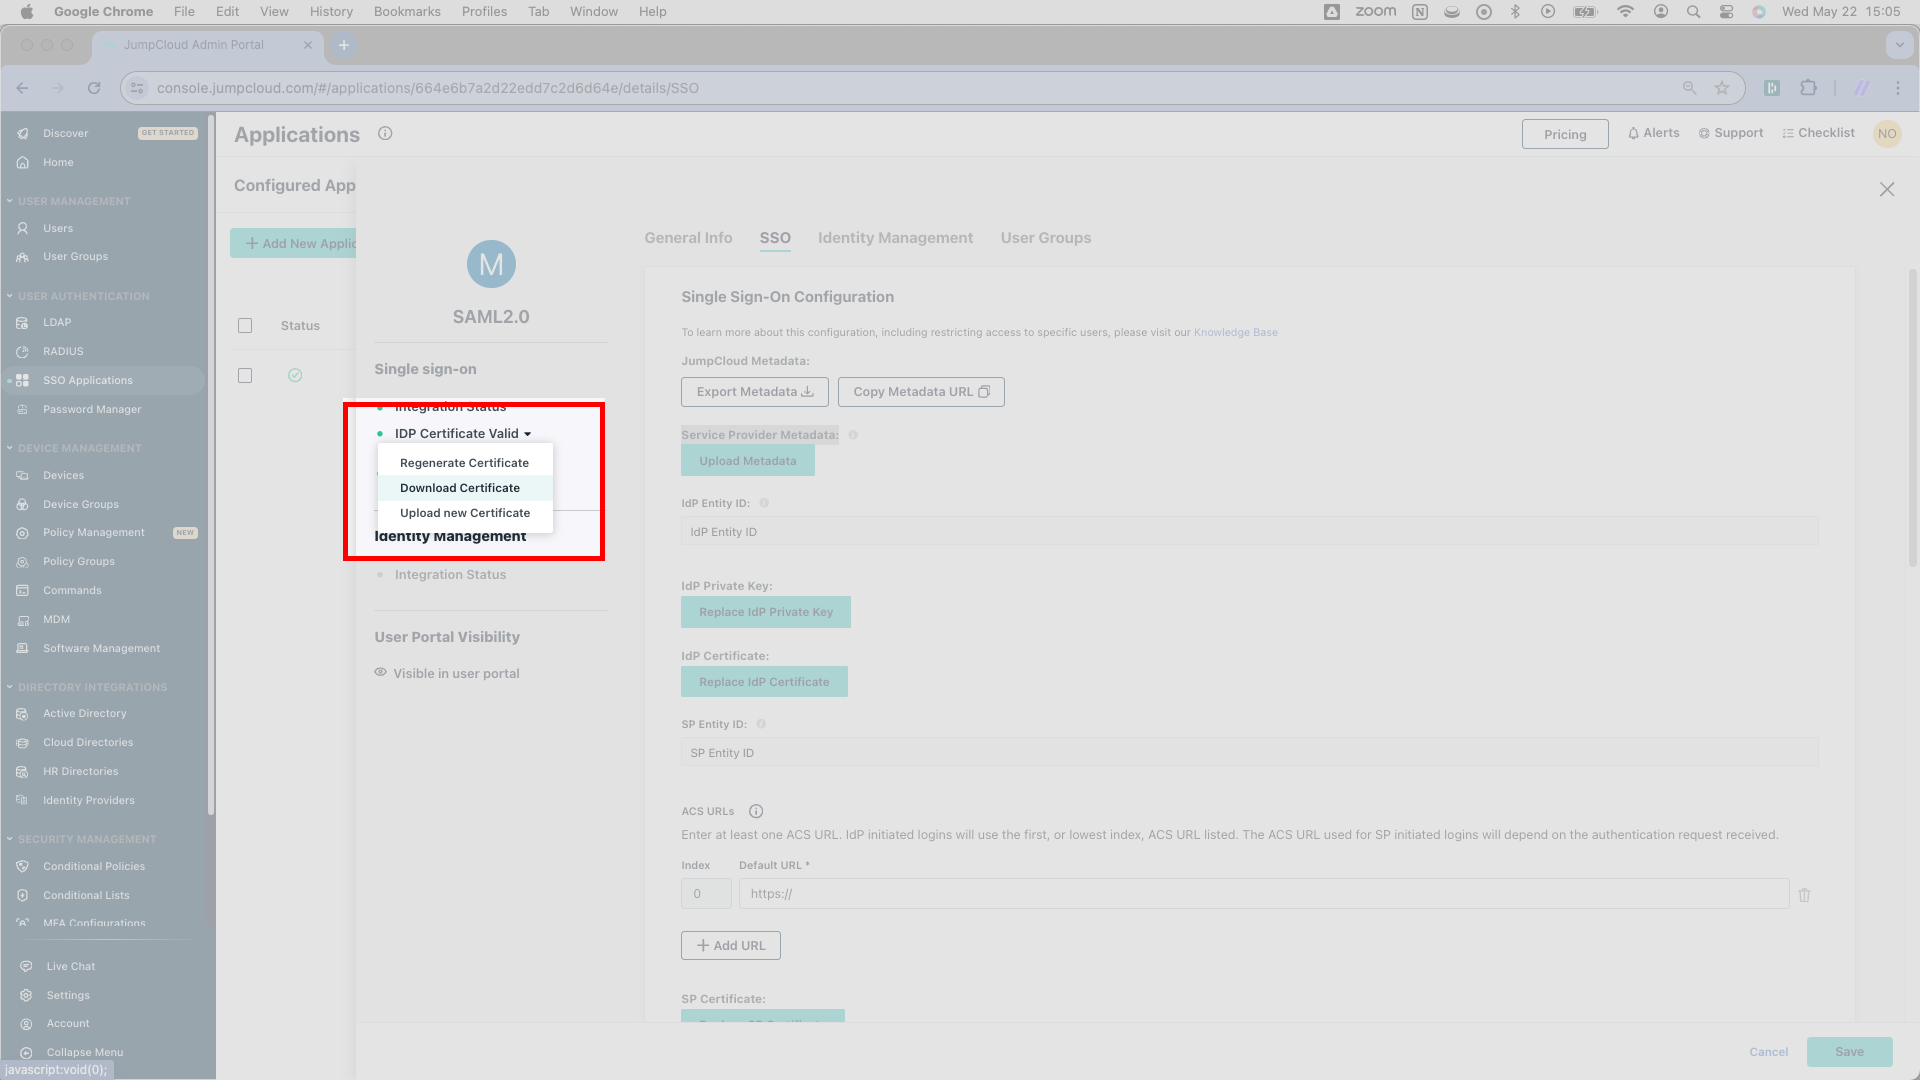
Next, you’ll upload a Certificate in SSOReady. You’ll find the file on the left side of the overlay you’ve been working in. Press IDP Certificate Valid > Download Certificate. JumpCloud creates a file called certificate.pem. Upload this file to SSOReady as the IDP Certificate.
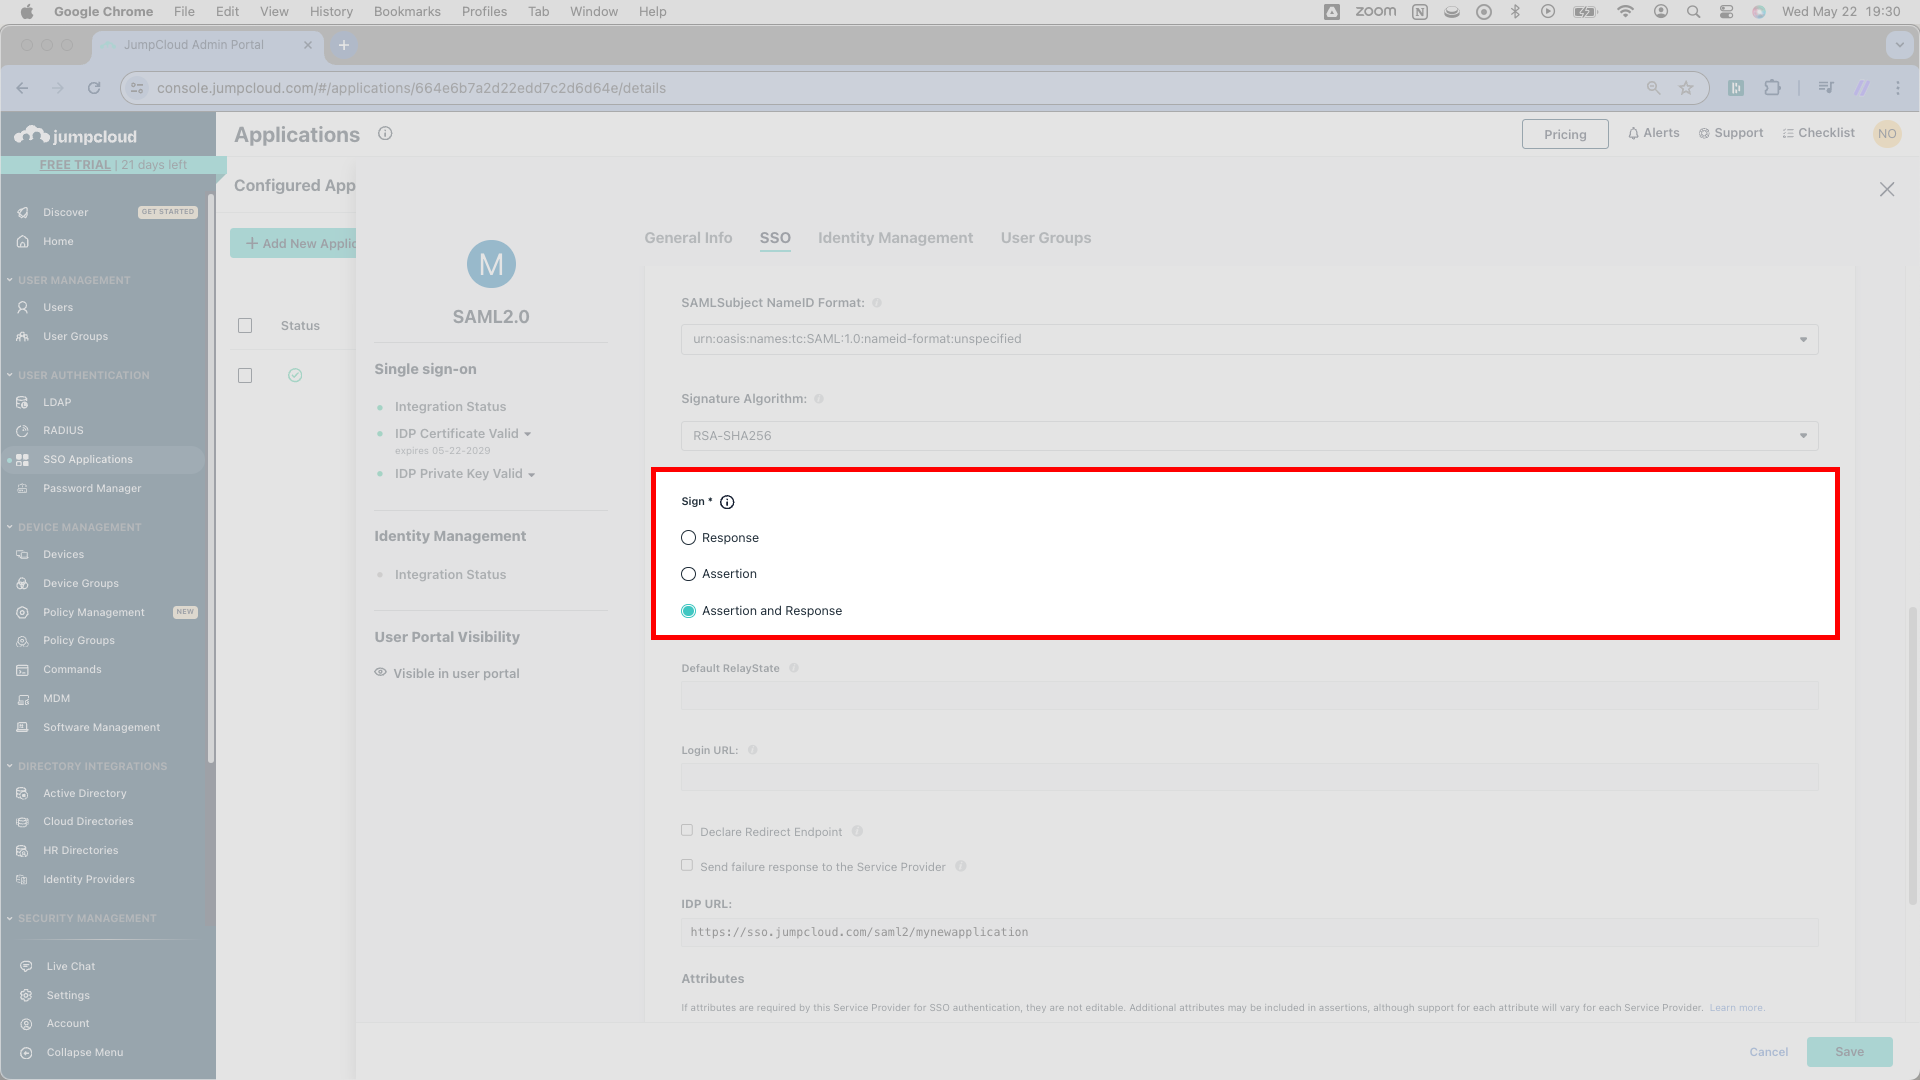
You’ll adjust one very important setting in JumpCloud before finishing up. Where JumpCloud writes Sign, change the radio button setting to Assertion and Response. JumpCloud’s default setting will not work properly with SSOReady.
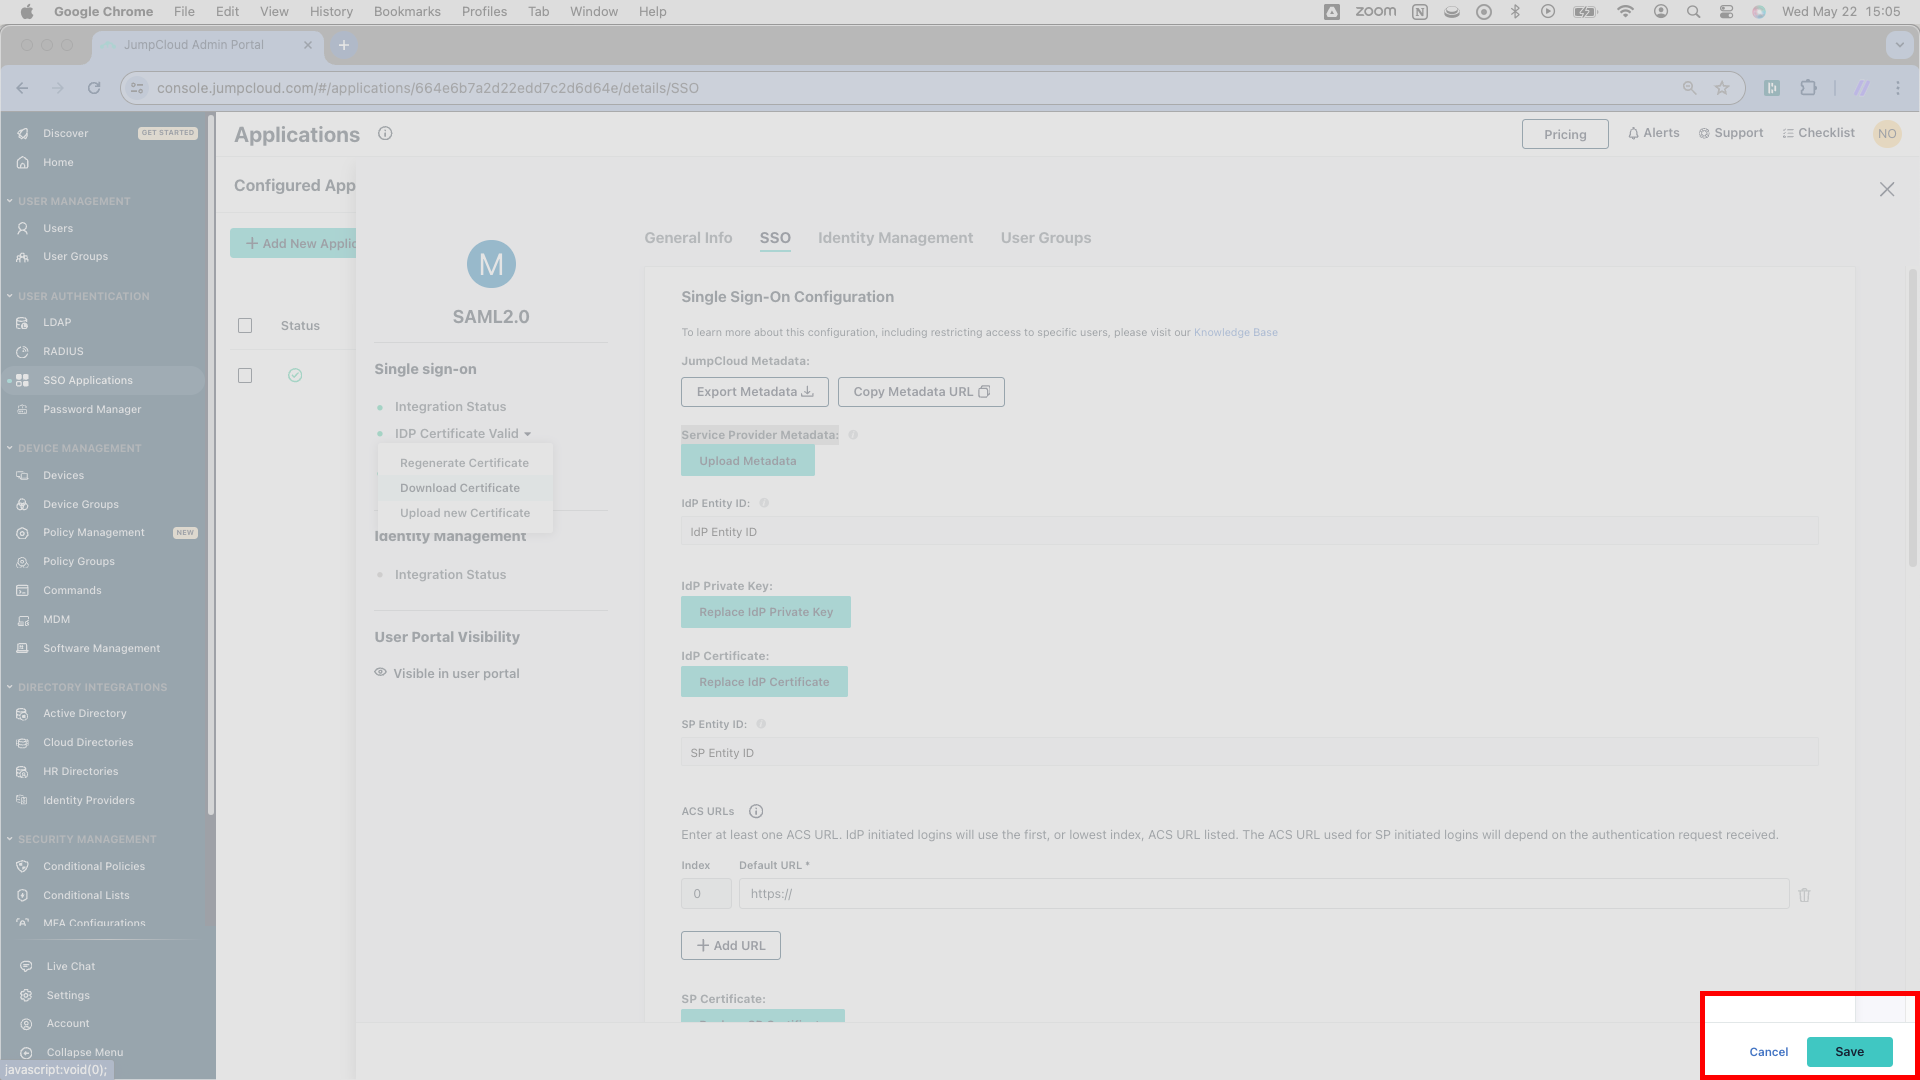
Hit Save in the bottom right corner.
You’ve finished connecting SSOReady to JumpCloud. Please note, however, that your customer’s JumpCloud admin will need to assign users to your application before they can successfully sign in.